Follow Me On Pinterest!


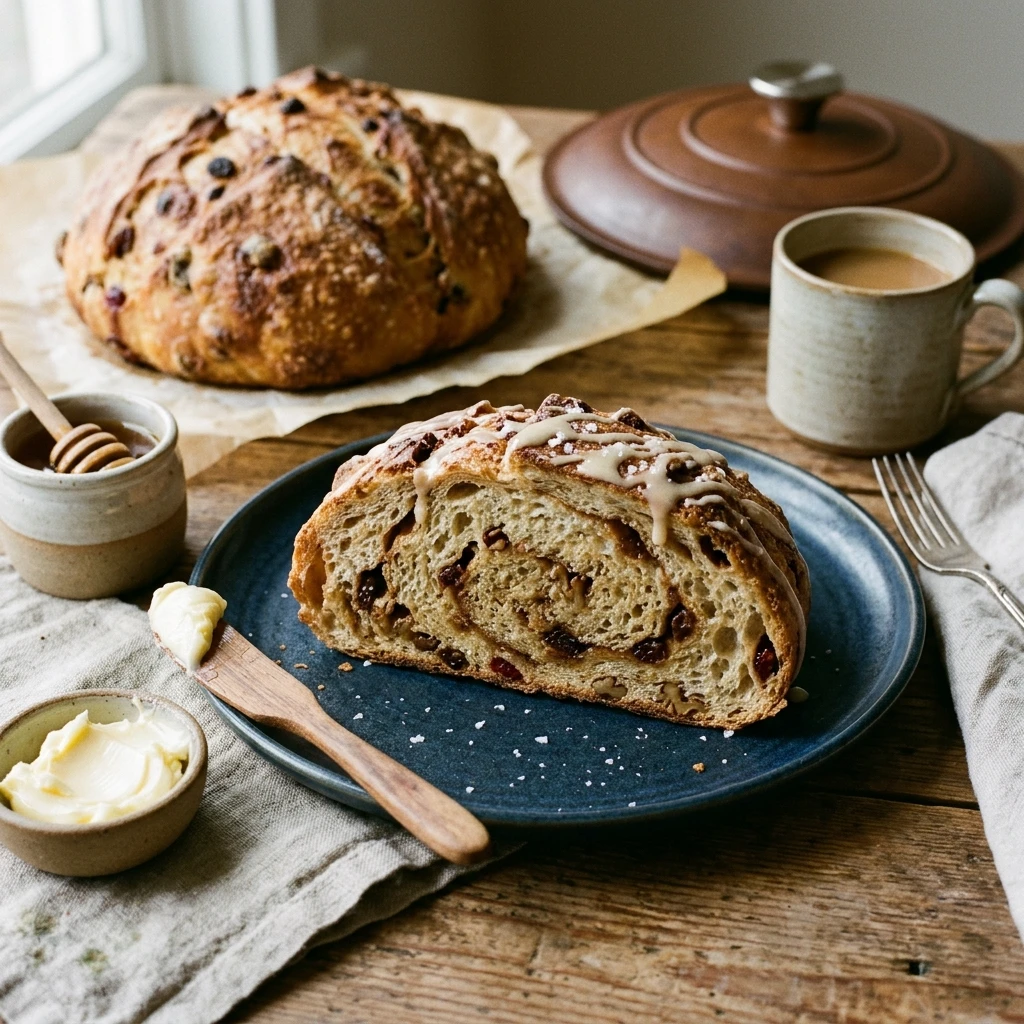
Imagine waking up to the intoxicating aroma of freshly baked bread without having to spend hours kneading dough or mastering complex culinary techniques. This No-Knead Dutch Oven Breakfast Bread is the ultimate game-changer for anyone who loves a sweet, crusty loaf but feels intimidated by traditional baking. By letting time do the heavy lifting, you achieve a professional, bakery-style crumb and a golden, crackly crust with almost zero effort. It is slightly sweet, infused with warmth, and perfect for slathering with butter or jam during your morning coffee break.
Recipe Information
- Prep Time: 15 minutes (plus 12-18 hours rising time)
- Cook Time: 45 minutes
- Total Time: 13 hours 15 minutes
- Servings: 10 slices
- Difficulty: Easy
Nutrition values
- Calories: 245 kcal
- Protein: 6g
- Carbs: 48g
Why Make This No-Knead Dutch Oven Breakfast Bread Easy Sweet Beginner
This recipe is designed specifically for beginners who want high-reward results with low-risk effort. Traditional bread making requires a specific kneading technique to develop gluten, but this method uses a long fermentation period to do that work for you. The Dutch oven acts as a mini steam oven, trapping moisture to create a thin, crispy crust while keeping the inside soft and airy. Because it features a hint of sweetness and cozy spices, it bridges the gap between a dinner loaf and a breakfast pastry, making it incredibly versatile for your morning routine.
Ingredients
- 3 cups all-purpose flour or bread flour
- 1 ½ cups warm water (about 100°F)
- 1 ½ teaspoons salt
- ½ teaspoon instant yeast
- 3 tablespoons honey or maple syrup
- 1 teaspoon ground cinnamon
- ½ cup raisins or dried cranberries (optional)
- 1 tablespoon granulated sugar (for the crust)
Directions
Step 1: Mixing the Dough
In a large mixing bowl, whisk together the flour, salt, instant yeast, and cinnamon. If you are using dried fruit, toss it in now to coat the pieces in flour. In a separate small bowl, stir the honey into the warm water until dissolved. Pour the liquid into the dry ingredients and stir with a wooden spoon or spatula until a shaggy, sticky ball forms. Ensure there are no dry flour pockets remaining.
Step 2: The Long Rise
Cover the bowl tightly with plastic wrap or a damp kitchen towel. Place it in a warm, draft-free spot in your kitchen. Let the dough rest for at least 12 hours, though 18 hours provides the best flavor and texture. During this time, the dough will double in size and become dotted with bubbles on the surface.
Step 3: Preheating the Dutch Oven
Place your empty Dutch oven (with the lid) into the oven. Preheat the oven to 450°F (230°C). Let the pot heat up for at least 30 minutes. This ensures the dough hits a screaming hot surface, which is the secret to a great rise and a crispy crust.
Step 4: Shaping and Final Proof
While the oven preheats, turn the dough out onto a well-floured surface. It will be very sticky, so use plenty of flour on your hands. Gently fold the edges toward the center to form a round loaf. Place the loaf onto a piece of parchment paper. Sprinkle the top with a little granulated sugar for a sweet crunch. Cover it loosely and let it rest for 30 minutes while the pot finishes heating.
Step 5: Baking
Carefully remove the hot Dutch oven from the oven. Lift the dough by the edges of the parchment paper and drop it (paper and all) into the pot. Put the lid back on and bake for 30 minutes. After 30 minutes, remove the lid and bake for another 10 to 15 minutes until the top is deep golden brown. Carefully remove the bread and let it cool on a wire rack for at least 30 minutes before slicing.
Expert Tips for Perfect No-Knead Dutch Oven Breakfast Bread Easy Sweet Beginner
To get the best results, always use fresh yeast; if your yeast is expired, the bread will not rise. Use a kitchen scale for the flour if possible, as scooping with a cup can often lead to using too much flour, resulting in a dense loaf. When shaping the dough, do not overwork it; you want to keep as many of those beautiful air bubbles inside as possible. If you find the bottom of your bread burns, try placing a baking sheet on the rack below the Dutch oven to deflect some of the direct heat.
Delicious Variations
- Chocolate Chip Morning Bread: Replace the dried fruit with ½ cup of dark chocolate chips for a decadent treat.
- Orange and Walnut: Add the zest of one orange and ½ cup of chopped walnuts to the dough for an earthy, citrusy twist.
- Apple Pie Bread: Fold in finely diced dried apples and a pinch of nutmeg along with the cinnamon.
- Vanilla Bean Sweet Bread: Scrape the seeds of one vanilla bean into the warm water before mixing for an aromatic breakfast experience.
Frequently Asked Questions
Can I use active dry yeast instead of instant yeast?
Yes, you can. However, you must “bloom” the active dry yeast first. Stir it into the warm water with the honey and let it sit for about 5 to 10 minutes until it becomes foamy before adding it to the dry ingredients.
What if I don’t have a Dutch oven?
You can use any heavy, oven-safe pot with a tight-fitting lid, such as a ceramic casserole dish. If you don’t have a lid, you can cover a heavy pot tightly with aluminum foil, though the crust may not be quite as crispy.
How do I store this bread?
Store the bread at room temperature in a paper bag for up to 2 days to maintain the crust. For longer storage, slice the bread and freeze it in a zip-top bag for up to 3 months. Toast the frozen slices directly for a quick breakfast.
Why is my dough so sticky?
This dough is meant to be very hydrated and sticky! High moisture content is what creates the steam necessary for those big airy holes in the bread. Use well-floured hands and a bench scraper to handle it easily.
Can I make this bread in a shorter amount of time?
While the long rise is best for flavor, you can increase the yeast to 2 teaspoons and let it rise in a very warm spot for 2 to 3 hours. The texture will be slightly denser, but it will still be delicious.
Conclusion
Making artisan-quality bread at home doesn’t have to be a stressful endeavor. This No-Knead Dutch Oven Breakfast Bread proves that with just a few ingredients and a little bit of patience, anyone can be a baker. Whether you enjoy it toasted with a thick layer of butter or use it to make the best French toast of your life, this recipe is sure to become a staple in your kitchen. Give it a try tonight, and let the oven do the work while you sleep!

No-Knead Dutch Oven Breakfast Bread Easy Sweet Beginner
- Total Time: 13 hours 15 minutes
- Diet: Vegetarian
Ingredients
Scale
- 3 cups all-purpose flour or bread flour
- 1 ½ cups warm water (about 100°F)
- 1 ½ teaspoons salt
- ½ teaspoon instant yeast
- 3 tablespoons honey or maple syrup
- 1 teaspoon ground cinnamon
- ½ cup raisins or dried cranberries (optional)
- 1 tablespoon granulated sugar (for the crust)
Instructions
- In a large mixing bowl, whisk together the flour, salt, instant yeast, and cinnamon. If you are using dried fruit, toss it in now to coat the pieces in flour. In a separate small bowl, stir the honey into the warm water until dissolved. Pour the liquid into the dry ingredients and stir with a wooden spoon or spatula until a shaggy, sticky ball forms. Ensure there are no dry flour pockets remaining.
- Cover the bowl tightly with plastic wrap or a damp kitchen towel. Place it in a warm, draft-free spot in your kitchen. Let the dough rest for at least 12 hours, though 18 hours provides the best flavor and texture. During this time, the dough will double in size and become dotted with bubbles on the surface.
- Place your empty Dutch oven (with the lid) into the oven. Preheat the oven to 450°F (230°C). Let the pot heat up for at least 30 minutes. This ensures the dough hits a screaming hot surface, which is the secret to a great rise and a crispy crust.
- While the oven preheats, turn the dough out onto a well-floured surface. It will be very sticky, so use plenty of flour on your hands. Gently fold the edges toward the center to form a round loaf. Place the loaf onto a piece of parchment paper. Sprinkle the top with a little granulated sugar for a sweet crunch. Cover it loosely and let it rest for 30 minutes while the pot finishes heating.
- Carefully remove the hot Dutch oven from the oven. Lift the dough by the edges of the parchment paper and drop it (paper and all) into the pot. Put the lid back on and bake for 30 minutes. After 30 minutes, remove the lid and bake for another 10 to 15 minutes until the top is deep golden brown. Carefully remove the bread and let it cool on a wire rack for at least 30 minutes before slicing.
- Cook Time: 13 hours 15 minutes