Follow Me On Pinterest!


Imagine waking up to the heavenly aroma of a professional bakery right in your own kitchen. This No-Knead Dutch Oven Toast Bread is the ultimate “set it and forget it” recipe that yields a golden, crispy crust and a pillowy-soft interior. Unlike traditional artisan breads that can be overly chewy or tough, this version is specifically designed to be soft enough for your morning toast while maintaining that rustic, high-quality feel. You don’t need a stand mixer, you don’t need strong arm muscles, and you definitely don’t need a culinary degree to master this loaf.
Recipe Information
- Prep Time: 15 minutes (plus 3 hours rising time)
- Cook Time: 45 minutes
- Total Time: 4 hours
- Servings: 10 slices
- Difficulty: Easy
Nutrition values
- Calories: 195 kcal per slice
- Protein: 6g
- Carbs: 38g
Why Make This No-Knead Dutch Oven Toast Bread Easy Soft Artisan
This recipe is a game-changer for anyone intimidated by yeast. By using a Dutch oven, you create a mini-steam chamber that does all the hard work for you, ensuring a perfect rise and a beautiful crust. Adding a touch of honey and oil to the dough transforms a standard lean artisan loaf into a soft, sandwich-friendly bread that stays fresh longer. It is the perfect hybrid bread: it looks like it came from a fancy boulangerie but eats like the softest sandwich loaf you’ve ever had.
Ingredients
- 3 cups (390g) Bread Flour (All-purpose works, but bread flour provides better chew)
- 1 ½ teaspoons Salt
- ½ teaspoon Instant Yeast
- 1 ½ cups Warm Water (about 100°F)
- 1 tablespoon Honey or Sugar
- 1 tablespoon Olive Oil or melted Butter
- Extra flour for dusting
Directions
Step 1: Mixing the Dough
In a large glass bowl, whisk together the bread flour, salt, and instant yeast. In a separate measuring cup, combine the warm water, honey, and olive oil. Pour the wet ingredients into the dry ingredients. Use a sturdy spatula or wooden spoon to stir the mixture until no dry flour streaks remain. The dough will look shaggy and sticky, which is exactly what you want.
Step 2: The First Rise
Cover the bowl tightly with plastic wrap or a damp kitchen towel. Place the bowl in a warm, draft-free spot. Let the dough rise for about 2 to 3 hours, or until it has doubled in size and looks bubbly on the surface. If you have extra time, you can even let it rise overnight in the refrigerator for a deeper flavor.
Step 3: Preheating the Dutch Oven
Place your empty Dutch oven (with the lid on) into the oven. Preheat the oven to 450°F (230°C). Let the pot heat up for at least 30 minutes. This high heat is crucial for achieving that signature artisan crust and “oven spring” rise.
Step 4: Shaping the Dough
Carefully turn the sticky dough out onto a well-floured surface. Using floured hands, gently fold the edges of the dough toward the center to form a round ball. Place the dough onto a piece of parchment paper. Use a sharp knife or a razor blade to score a shallow “X” or a long slit across the top of the loaf.
Step 5: Baking the Bread
Carefully remove the hot Dutch oven from the oven. Lift the parchment paper by the corners and lower the dough into the pot. Place the lid back on and bake for 30 minutes. The lid traps steam, which keeps the crust soft while the bread expands. After 30 minutes, remove the lid and bake for another 10 to 15 minutes until the crust is a deep golden brown.
Step 6: Cooling and Slicing
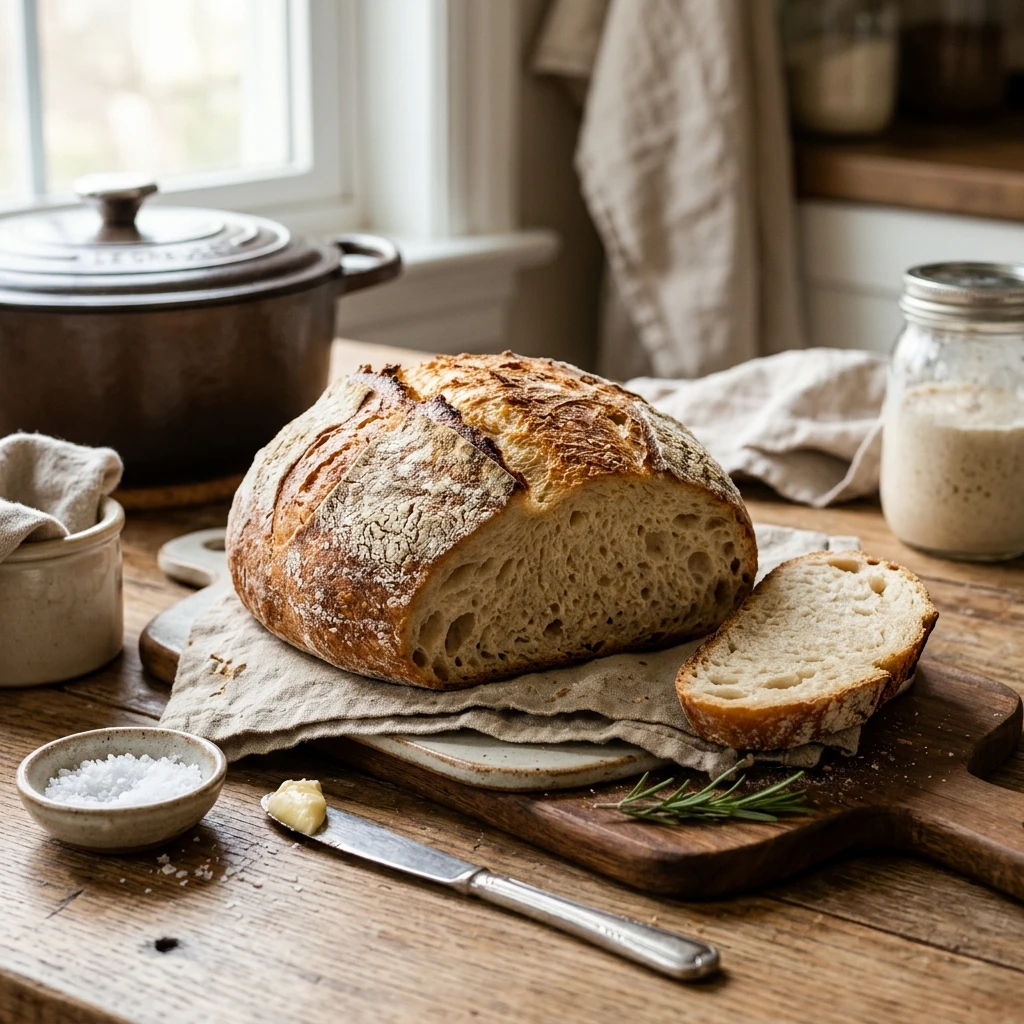
Lift the bread out of the Dutch oven using the parchment paper. Transfer it to a wire cooling rack immediately. Resist the urge to slice into it while hot! Letting the bread cool for at least 45 minutes allows the internal structure to set, ensuring your toast slices are soft and not gummy.
Expert Tips for Perfect No-Knead Dutch Oven Toast Bread Easy Soft Artisan
- Check your yeast: Ensure your yeast is fresh. If the dough doesn’t double in size during the first rise, your yeast may be expired.
- Don’t over-flour: The dough should be sticky. Adding too much flour during the shaping process will result in a heavy, dense loaf.
- The “Tap” Test: To check for doneness, tap the bottom of the loaf. It should sound hollow.
- Use Parchment Paper: This makes transferring the dough into a 450°F pot safe and easy, preventing any sticking issues.
- Steam is Key: Keep the lid on for the first 30 minutes. This is what creates that thin, crispy-yet-soft crust typical of artisan breads.
Delicious Variations
- Garlic and Herb: Fold in 1 tablespoon of dried rosemary and 2 cloves of minced garlic during the initial mixing phase.
- Cinnamon Raisin: Add 1/2 cup of raisins and 1 tablespoon of cinnamon for a sweet breakfast toast option.
- Everything Bagel: Sprinkle the top of the dough with everything bagel seasoning right before putting the lid on to bake.
- Cheesy Jalapeño: Fold in 1/2 cup of shredded sharp cheddar and 2 tablespoons of diced pickled jalapeños.
Frequently Asked Questions
Can I use All-Purpose flour instead of Bread Flour?
Yes, you can use all-purpose flour. The bread will still be delicious, though it may have slightly less volume and a softer, less chewy texture compared to using high-protein bread flour.
What size Dutch oven do I need?
A 4-quart to 6-quart Dutch oven is ideal for this recipe. If your pot is too large, the bread might spread out more and result in a flatter loaf.
How do I store this bread to keep it soft?
Once completely cool, store the bread in an airtight plastic bag at room temperature for up to 3 days. Do not refrigerate it, as this can cause the bread to go stale faster.
Can I freeze this bread?
Absolutely! Slice the loaf first, then freeze the slices in a freezer-safe bag. You can pop a frozen slice directly into the toaster whenever you need a quick snack.
Why is my crust too hard?
If the crust is too thick or hard, you may have baked it uncovered for too long. For a softer “toast-style” crust, stick to the 10-minute mark once the lid is removed, or brush the crust with melted butter immediately after it comes out of the oven.
Conclusion
Mastering homemade bread doesn’t have to be a stressful chore. With this No-Knead Dutch Oven Toast Bread recipe, you can enjoy the satisfaction of baking from scratch with minimal effort. It is the perfect solution for busy mornings or impressive brunch spreads. Give it a try this weekend, and you’ll likely never go back to store-bought bread again!

No-Knead Dutch Oven Toast Bread Easy Soft Artisan
- Total Time: 4 hours
- Diet: Vegetarian
Ingredients
Scale
- 3 cups (390g) Bread Flour (All-purpose works, but bread flour provides better chew)
- 1 ½ teaspoons Salt
- ½ teaspoon Instant Yeast
- 1 ½ cups Warm Water (about 100°F)
- 1 tablespoon Honey or Sugar
- 1 tablespoon Olive Oil or melted Butter
- Extra flour for dusting
Instructions
- In a large glass bowl, whisk together the bread flour, salt, and instant yeast. In a separate measuring cup, combine the warm water, honey, and olive oil. Pour the wet ingredients into the dry ingredients. Use a sturdy spatula or wooden spoon to stir the mixture until no dry flour streaks remain. The dough will look shaggy and sticky, which is exactly what you want.
- Cover the bowl tightly with plastic wrap or a damp kitchen towel. Place the bowl in a warm, draft-free spot. Let the dough rise for about 2 to 3 hours, or until it has doubled in size and looks bubbly on the surface. If you have extra time, you can even let it rise overnight in the refrigerator for a deeper flavor.
- Place your empty Dutch oven (with the lid on) into the oven. Preheat the oven to 450°F (230°C). Let the pot heat up for at least 30 minutes. This high heat is crucial for achieving that signature artisan crust and “oven spring” rise.
- Carefully turn the sticky dough out onto a well-floured surface. Using floured hands, gently fold the edges of the dough toward the center to form a round ball. Place the dough onto a piece of parchment paper. Use a sharp knife or a razor blade to score a shallow “X” or a long slit across the top of the loaf.
- Carefully remove the hot Dutch oven from the oven. Lift the parchment paper by the corners and lower the dough into the pot. Place the lid back on and bake for 30 minutes. The lid traps steam, which keeps the crust soft while the bread expands. After 30 minutes, remove the lid and bake for another 10 to 15 minutes until the crust is a deep golden brown.
- Lift the bread out of the Dutch oven using the parchment paper. Transfer it to a wire cooling rack immediately. Resist the urge to slice into it while hot! Letting the bread cool for at least 45 minutes allows the internal structure to set, ensuring your toast slices are soft and not gummy.
- Cook Time: 4 hours