Introduction
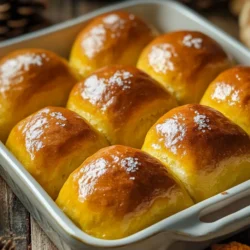
As the leaves turn golden and the air becomes crisp, the culinary world embraces the rich, warm flavors of fall, with pumpkin taking center stage. From lattes to pies, pumpkin-flavored treats have become synonymous with the season, infusing homes with comforting aromas and inviting flavors. Among these delights, Pumpkin Dinner Rolls stand out as a delightful addition to any meal. These rolls are not only visually appealing with their warm, golden hue, but they also boast a unique softness and subtle sweetness that pairs beautifully with a variety of dishes.
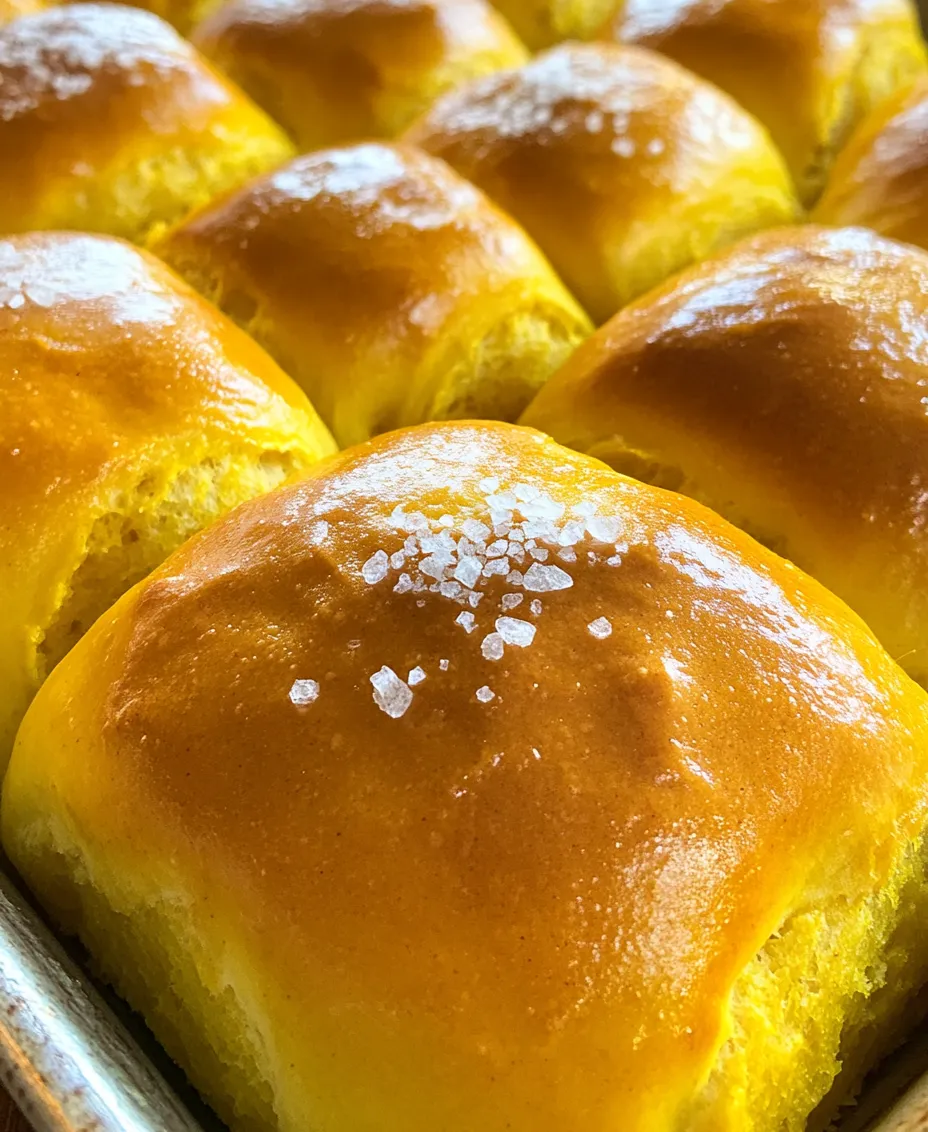
Imagine sinking your teeth into a warm, fluffy roll, the spices of cinnamon, nutmeg, and ginger gently whispering in your mouth, while the rich, earthy flavor of pumpkin envelops your taste buds. Pumpkin Dinner Rolls are versatile enough to complement Thanksgiving feasts, cozy family dinners, or even a simple weeknight meal. Moreover, they serve as a wonderful alternative to traditional bread, offering a hint of sweetness and a luxurious texture that elevates any dining experience.
Beyond their delightful taste, pumpkin is celebrated for its health benefits. Rich in vitamins A and C, fiber, and antioxidants, pumpkin puree not only adds flavor but also promotes overall well-being. Making these rolls from scratch is not just a culinary task; it’s a heartwarming experience that fills your kitchen with the essence of home-baked goodness. So, roll up your sleeves, and let’s dive into the world of Pumpkin Dinner Rolls, where comfort food meets healthful ingredients.
Understanding the Ingredients
To create the perfect Pumpkin Dinner Rolls, understanding each ingredient’s role is essential. This not only helps in achieving the desired texture and flavor but also allows you to appreciate the nuances of this delightful recipe.
Pumpkin Puree
At the heart of our Pumpkin Dinner Rolls is pumpkin puree. This ingredient is what gives the rolls their distinct flavor and vibrant color. Packed with nutrients, pumpkin puree is an excellent source of vitamins A and C, potassium, and fiber, making these rolls a wholesome choice.
When it comes to choosing pumpkin puree, you have two options: canned or homemade. Canned pumpkin puree is a convenient choice, often providing consistent texture and flavor. However, if you’re feeling adventurous, making your own puree can be incredibly rewarding. Simply roast a fresh pumpkin until tender, scoop out the flesh, and blend it until smooth. Homemade puree tends to have a richer flavor, but either option will yield delicious results.
Dairy Elements
The dairy elements in this recipe, specifically warmed milk and melted butter, play a crucial role in creating the tender, moist texture that makes these rolls so irresistible. Warmed milk helps to activate the yeast and provides a rich base for the dough, while melted butter adds flavor and contributes to the softness of the rolls.
Using whole milk is ideal due to its fat content, which enhances the flavor and creates a more tender crumb. If you’re looking for alternatives, consider using non-dairy milk options such as almond or oat milk, ensuring they are warmed before adding to the mixture. The melted butter not only enriches the dough but also contributes to a beautiful golden crust when baked.
Sweeteners
In our Pumpkin Dinner Rolls, brown sugar serves as the primary sweetener. Its unique flavor profile, characterized by molasses undertones, adds depth to the rolls. Beyond flavor, brown sugar retains moisture, ensuring that the rolls remain soft and fluffy even after baking.
While you can use granulated sugar if you’re in a pinch, brown sugar is recommended for its added richness and moisture retention. If you prefer a less sweet roll, you can always adjust the amount to suit your taste.
Yeast
Active dry yeast is the magic ingredient that brings these Pumpkin Dinner Rolls to life. Yeast is a living organism that ferments the sugars in the dough, producing carbon dioxide and causing the rolls to rise and become airy.
To ensure your yeast is active, it’s essential to activate it properly. This can be done by mixing it with warm water (around 110°F or 43°C) and a pinch of sugar, allowing it to sit until it becomes frothy, usually about 5–10 minutes. If your yeast doesn’t froth, it may be expired, and you’ll need to start with a fresh batch.
Flour and Seasonings
The base of our dough is all-purpose flour, which provides structure and stability to the rolls. When measuring flour, it’s important to use the spoon-and-level method or a kitchen scale to ensure accuracy, as too much flour can lead to dense rolls.
To enhance the flavor profile, we’ll incorporate warming spices such as cinnamon, nutmeg, and ginger. These spices complement the natural sweetness of the pumpkin and evoke the comforting essence of fall.
Cinnamon adds warmth and sweetness, nutmeg gives a nutty and slightly sweet flavor, while ginger adds a zesty kick. Together, they create a harmonious blend that elevates the rolls beyond the ordinary, making them a perfect fit for any autumn table.
Step-by-Step Recipe Guide
Now that we’ve explored the essential ingredients, it’s time to dive into the exciting process of making Pumpkin Dinner Rolls. Following this step-by-step guide will ensure that you achieve beautifully soft and flavorful rolls that are sure to impress.
Activating the Yeast
1. Prepare the Yeast Mixture: In a small bowl, combine 1 packet (2 ¼ teaspoons) of active dry yeast with ¼ cup of warm water (110°F or 43°C) and a pinch of sugar. Stir gently to incorporate the yeast and sugar.
2. Let It Sit: Allow the mixture to sit for about 5-10 minutes, or until it becomes frothy. This indicates that the yeast is alive and ready to work its magic.
3. Warm the Milk: While the yeast is activating, heat ¾ cup of milk in a saucepan or microwave until it is warm but not boiling. Aim for a temperature around 110°F (43°C) to avoid killing the yeast.
4. Combine Ingredients: In a large mixing bowl, combine the frothy yeast mixture with the warmed milk, ¼ cup of melted butter, and ½ cup of brown sugar. Stir well to combine, ensuring all ingredients are evenly mixed.
5. Add the Pumpkin: Next, add 1 cup of pumpkin puree to the mixture. Stir until the pumpkin is fully incorporated, creating a smooth and creamy base for your dough.
6. Incorporate Dry Ingredients: Gradually add 3 cups of all-purpose flour, 1 teaspoon of cinnamon, ½ teaspoon of nutmeg, and ½ teaspoon of ginger to the wet ingredients. Mix with a wooden spoon or spatula until the dough begins to come together.
7. Kneading the Dough: Once the mixture is well combined, turn it out onto a lightly floured surface. Knead the dough for about 5-7 minutes, adding additional flour as needed to prevent sticking. The dough should be smooth and elastic when ready.
8. First Rise: Shape the kneaded dough into a ball and place it in a lightly greased bowl. Cover with a clean kitchen towel or plastic wrap, and let it rise in a warm, draft-free area for about 1 to 1.5 hours, or until it has doubled in size.
As the dough rises, your kitchen will fill with the comforting scent of pumpkin and spices, setting the stage for the delicious rolls to come. The anticipation builds as you prepare for the next steps in crafting these delightful Pumpkin Dinner Rolls.