# Winter Coffee Brioche Buns: A Cozy Delight for Cold Days
As the chill of winter settles in, there’s a unique charm in the air that beckons us to indulge in comforting treats. One such delightful creation that captures the essence of winter is the Winter Coffee Brioche Buns. These soft, fluffy buns are not just a treat for the taste buds; they are a warm embrace on a cold day, infusing the rich aroma of freshly brewed coffee into the classic texture of brioche. The combination of coffee and brioche creates a culinary masterpiece that pairs perfectly with your favorite hot beverage, making it an ideal snack for cozy winter afternoons.
## The Allure of Brioche
Brioche is a classic pastry with a storied history that dates back to the French countryside. Known for its rich, buttery flavor and tender crumb, brioche stands out among other pastries due to its unique texture and taste. The dough is enriched with eggs and butter, giving it a luxurious mouthfeel that melts in your mouth. This indulgent treat originated in France and has evolved over centuries, becoming a staple in bakeries around the world.
The charm of brioche lies not just in its flavor, but also in its versatility. It can be shaped into various forms, from loaves to rolls, and can be enjoyed plain or filled with delightful ingredients. The cultural significance of brioche is palpable in France, where it is often enjoyed during festive occasions and family gatherings. From breakfast tables to dessert platters, brioche has earned its place as a beloved pastry that brings people together.
## The Perfect Winter Treat
As winter blankets the landscape, the craving for warm, aromatic comforts grows stronger. Coffee-flavored treats have a special relevance during this season, as they not only provide warmth but also uplift the spirit. The Winter Coffee Brioche Buns embody this comforting essence, serving as a perfect accompaniment to a steaming cup of coffee or cocoa. The experience of biting into a soft, warm bun filled with a rich coffee filling is simply unmatched.
Imagine the scene: a soft snow falls outside, and you’re nestled inside with a cozy blanket, a book in hand, and a plate of freshly baked Winter Coffee Brioche Buns by your side. The combination of the rich coffee aroma and the buttery brioche creates an inviting atmosphere, making these buns a quintessential winter treat. They elevate your coffee experience, transforming an ordinary afternoon into a delightful ritual.
## Ingredients Breakdown
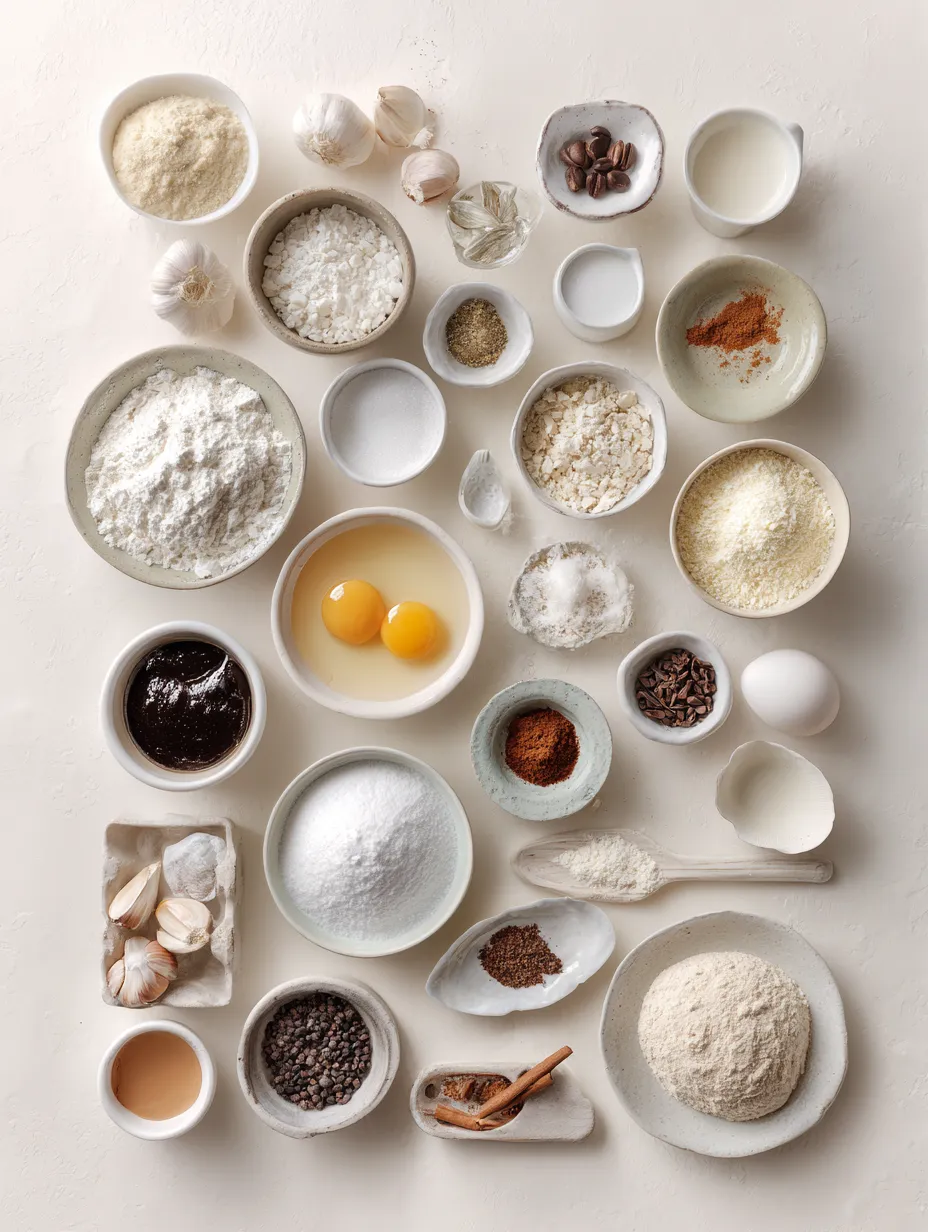
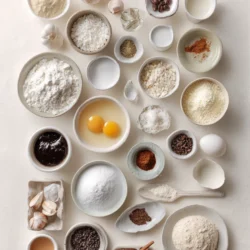
Creating the perfect Winter Coffee Brioche Buns begins with understanding the ingredients that contribute to their deliciousness. Each component plays a vital role in achieving the desired flavor and texture.
### Brioche Dough
The foundation of these buns starts with the brioche dough. This dough is made from a few essential ingredients, including:
– **All-Purpose Flour**: Provides structure and a soft crumb.
– **Sugar**: Adds sweetness and helps with browning.
– **Yeast**: Essential for leavening, making the buns rise beautifully.
– **Eggs**: Enrich the dough, contributing to its tender texture and golden color.
– **Butter**: Adds richness and flavor, resulting in a soft, tender crumb.
– **Milk**: Hydrates the dough and helps with yeast activation.
### Coffee Filling
The filling is where the magic happens. The coffee filling consists of:
– **Instant Coffee**: Provides a concentrated coffee flavor that infuses the buns.
– **Brown Sugar**: Adds depth and a hint of molasses flavor.
– **Cinnamon**: Offers warmth and spice, complementing the coffee.
### Topping
To finish off these buns, a simple topping can elevate their appearance and flavor. A light sprinkle of powdered sugar or a drizzle of coffee glaze can add a touch of sweetness and visual appeal.
Using high-quality ingredients ensures the best results, enhancing the overall flavor and texture of the Winter Coffee Brioche Buns. Freshly ground coffee, real butter, and organic eggs can make a noticeable difference in the final product.
## Crafting the Brioche Dough
Now that you’re familiar with the ingredients, let’s dive into the process of crafting the brioche dough. This step is crucial, as it lays the groundwork for the delightful buns that await you.
### Step 1: Activate the Yeast
The first step in making brioche dough is activating the yeast. Start by warming the milk until it’s comfortably warm to the touch, but not boiling. Once warmed, sprinkle the yeast into the milk and add a teaspoon of sugar. Allow this mixture to sit for about 5 to 10 minutes until it becomes frothy. This indicates that the yeast is active and ready to help your dough rise.
### Step 2: Combine Ingredients
In a large mixing bowl, combine the all-purpose flour, remaining sugar, and salt. Mix these dry ingredients well. Once the yeast mixture is frothy, add it to the bowl along with the eggs. Using a wooden spoon or a dough whisk, mix this together until it forms a shaggy dough.
### Step 3: Knead the Dough
This is where the magic happens. Turn the shaggy dough onto a lightly floured surface and begin to knead. Kneading is essential for developing gluten, which gives the dough its structure. Knead for about 10 minutes, until the dough becomes smooth and elastic. You can also use a stand mixer with a dough hook for this process, which can make kneading a bit easier and less labor-intensive.
### Step 4: Incorporate Butter
After the dough has been kneaded, it’s time to incorporate the butter. This step is crucial for achieving the rich, tender texture of brioche. Gradually add the softened butter to the dough, a few tablespoons at a time, kneading well after each addition. The dough will become sticky at this point, but don’t worry; continue kneading until the butter is fully incorporated and the dough is smooth again.
### Step 5: The First Rise
Once your dough is smooth and elastic, it’s time for the first rise. Shape the dough into a ball and place it in a lightly greased bowl, covering it with a clean kitchen towel or plastic wrap. Allow the dough to rise in a warm, draft-free area for about 1 to 2 hours, or until it has doubled in size. This rise is essential for developing flavor and texture, so be patient and let the yeast do its work.
## Creating the Coffee Filling
While the dough is rising, you can prepare the coffee filling. This step is quick and straightforward, allowing you to maximize flavor while minimizing effort.
### Ingredients for the Filling
To create the filling, you will need:
– **Instant Coffee**: This ingredient gives the filling its rich coffee flavor. It’s best to use a high-quality instant coffee for maximum taste.
– **Brown Sugar**: The moisture and depth of flavor in brown sugar complement the coffee beautifully, adding a slight caramel note.
– **Cinnamon**: This spice brings warmth and a comforting aroma to the filling, enhancing the overall flavor profile of the buns.
### Step-by-Step Preparation
1. In a small mixing bowl, combine the instant coffee and brown sugar. Mix well until the ingredients are fully blended.
2. Add in ground cinnamon to the coffee and sugar mixture, stirring until evenly combined. Set this filling aside for later use.
With the dough rising and the filling ready, you are well on your way to creating delicious Winter Coffee Brioche Buns that will warm your home and your heart during the chilly winter months. Stay tuned for the next part of this article, where we will shape the buns and bake them to perfection, ensuring that every bite is a delightful experience.
To create the perfect Winter Coffee Brioche Buns, you need to pay close attention to the mixing and preparing of the filling. The filling is what elevates these buns from basic to extraordinary, and achieving the right consistency is crucial for optimal flavor and texture.
**How to Properly Mix and Prepare the Filling**
Start by gathering your ingredients for the filling, which typically includes brown sugar, cinnamon, butter, and finely ground coffee. In a medium bowl, combine 1 cup of brown sugar with 2 tablespoons of cinnamon and 1 tablespoon of finely ground coffee. The combination of these ingredients will give the buns their rich flavor while the butter will ensure moisture.
Next, melt ½ cup of unsalted butter. Once melted, allow it to cool slightly before adding it to the dry ingredients. Mix everything together until you achieve a cohesive paste. It should be thick enough to spread but not so thick that it tears the dough. If you find it too crumbly, consider adding a tablespoon of milk to adjust the consistency. It’s important to taste the filling at this stage and adjust the sweetness or coffee flavor to your liking.
**Tips for Achieving the Right Consistency**
The key to a successful filling lies in striking the right balance between moisture and thickness. If your filling is too runny, it can seep out of the buns during baking, leading to a messy outcome. Conversely, if it’s too thick, it may not spread evenly. A good rule of thumb is to ensure the filling resembles a thick paste that can easily be spread with a spatula but holds its shape.
Also, using room-temperature ingredients can make mixing easier and provide a better texture. If the butter is too hot, it can melt the sugar, creating a more syrupy consistency that is not ideal.
**Shaping and Rolling the Brioche Buns**
Once your brioche dough has risen and is ready to be shaped, it’s time to turn your attention to the rolling and shaping process. This part is crucial for achieving those beautiful, uniform buns that everyone loves.
**Detailed Instructions for Shaping the Dough**
Begin by lightly flouring your work surface. Gently punch down the dough to release any excess air and transfer it to the floured surface. Using a rolling pin, roll out the dough into a rectangle that measures approximately 18 by 12 inches. The thickness should be around ¼ inch; this will ensure that the buns are fluffy yet have enough structure to hold the filling.
**Importance of Rolling Out to the Right Dimensions**
Rolling the dough out to the correct dimensions is essential for both the shaping and the final size of the buns. A rectangle that is too small will yield small buns, while an overly large rectangle can result in buns that are too thin and not fluffy enough. The dimensions provided create a perfect balance between size and texture.
**Techniques for Spreading the Filling Evenly**
Once you have your dough rolled out, it’s time to spread the filling. Use a spatula to evenly distribute the filling over the surface of the dough, leaving a small margin (about 1 inch) at the edges. This margin is key, as it will help seal the buns when you roll them up. Take your time with this step to ensure that the filling is evenly spread; this will prevent any dry spots in your buns.
**The Process of Rolling and Cutting into Uniform Pieces**
After the filling is spread, start rolling the dough tightly from one of the long edges, ensuring that you maintain even pressure. This tight rolling will help create those beautiful swirls of filling that will be visible once baked. Once rolled, use a sharp knife or a bench scraper to cut the log into 12 equal pieces. Each piece should be about 1.5 inches thick.
Place each piece cut side up in a greased baking dish or on a parchment-lined baking tray, leaving enough space for the buns to rise without touching each other.
**Explanation of the Second Rise and What to Look For**
After shaping, cover the buns with a clean kitchen towel and allow them to rise for an additional 30-45 minutes in a warm, draft-free area. You’ll know they are ready when they have puffed up significantly and have nearly doubled in size. This second rise is critical for achieving that light and airy texture that makes brioche so delightful.
**Baking the Brioche Buns**
With your buns shaped and risen, it’s time to bake. Pre-baking preparations are essential for ensuring that your buns come out perfectly golden and fluffy.
**Importance of Preheating the Oven**
Preheat your oven to 350°F (175°C) at least 20 minutes before you plan to bake. This ensures that the buns start baking at the right temperature, which is crucial for achieving a good rise and color. A properly preheated oven will help the buns to expand quickly and create a beautiful golden crust.
**Role of the Egg Wash for a Golden Finish**
For a shiny, golden finish, prepare an egg wash by whisking together one egg with a tablespoon of milk. Gently brush the mixture over the tops of the buns just before baking. This not only enhances the appearance but also adds a slight richness to the crust.
**Baking Time and Temperature Details**
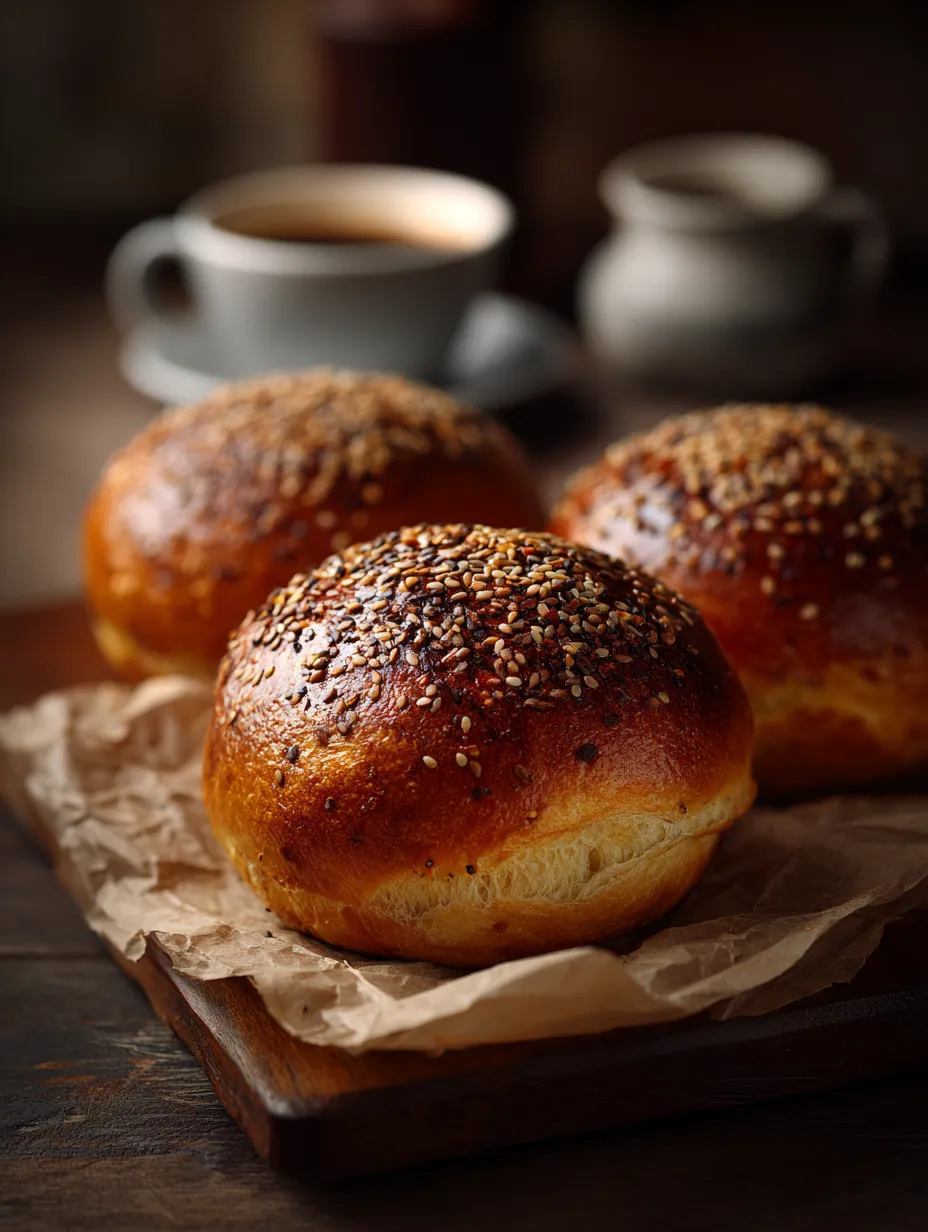
Bake the brioche buns in the preheated oven for approximately 25-30 minutes, or until they are golden brown and sound hollow when tapped on the bottom. The internal temperature of the buns should reach around 190°F (88°C) to ensure they are fully cooked.
**How to Tell When the Buns Are Perfectly Baked**
The visual cues for perfect brioche buns include a beautiful golden brown color and a slight spring back when you press on the top. If you notice they are browning too quickly, you can loosely cover them with aluminum foil about halfway through the baking time.
**Glazing and Serving Suggestions**
Once your buns are baked to perfection, it’s time to add a glaze that complements their rich flavors.
**Instructions for Preparing the Glaze**
For the glaze, combine 1 cup of powdered sugar with 2 tablespoons of brewed coffee and a splash of vanilla extract. Whisk until smooth, adjusting the consistency with a little more coffee or powdered sugar as necessary. The glaze should be pourable but thick enough to drizzle beautifully over the buns.
**How to Achieve the Right Consistency for Drizzling**
If your glaze is too thin, add more powdered sugar to thicken it; if it’s too thick, add a small amount of coffee until the desired consistency is reached. Remember that a perfect glaze should be able to hold its shape when drizzled but still flow easily.
**Ideas for Garnishing with Nuts for Added Texture**
For an added crunch, consider garnishing your glazed buns with chopped walnuts or pecans. The nutty flavor will enhance the coffee notes in the filling and provide a delightful contrast to the soft texture of the brioche.
**Best Ways to Serve Winter Coffee Brioche Buns**
Winter coffee brioche buns are best served warm, fresh out of the oven. You can slice them in half and serve them with a smear of butter or a dollop of cream cheese for a decadent breakfast or snack. Consider pairing them with a rich espresso or a flavored latte to complement their sweetness.
**Pairing Suggestions with Different Coffee Styles**
These buns can be enjoyed with a variety of coffee styles. A bold dark roast will beautifully contrast the sweet, rich flavors of the brioche, while a smooth medium roast can enhance the subtle coffee notes in the filling. For those who prefer milk-based drinks, a latte or cappuccino would provide a creamy balance to the buns.
**Storing and Reheating Leftovers**
If you find yourself with leftover brioche buns, proper storage is key to maintaining their freshness.
**Tips for Storing Leftover Brioche Buns**
Allow the buns to cool completely before storing them. You can place them in an airtight container at room temperature for up to two days. For longer storage, consider wrapping them tightly in plastic wrap and storing them in the freezer, where they can last for up to three months.
**Best Practices for Reheating to Maintain Freshness**
To reheat, simply place the buns in a preheated oven at 350°F (175°C) for about 10-15 minutes, until warmed through. If they were frozen, allow them to thaw in the refrigerator overnight before reheating. This method will help maintain their soft texture and delicious flavor.
**Discussing the Longevity of the Buns in Storage**
While these buns are best enjoyed fresh, following these storage tips will help preserve their quality. The buns may lose some softness over time, but reheating will help revive their delightful texture.
**Conclusion**
Winter coffee brioche buns are a true celebration of the season, bringing warmth and comfort to any breakfast or snack table. Their rich flavor, fluffy texture, and delightful coffee filling make them a perfect treat for chilly mornings or cozy gatherings. Embrace the art of baking this winter, and share the joy of these delectable buns with loved ones. Whether enjoyed with a cup of coffee or as a sweet indulgence on their own, these brioche buns are sure to become a cherished part of your winter traditions.