Follow Me On Pinterest!


Imagine pulling a bakery-style pizza out of your home oven with almost zero effort. This no-knead Dutch oven pizza dough changes the game for beginners and busy home cooks alike. You only need four basic pantry staples and a bit of patience to achieve a professional-grade crust. Forget messy flour-covered counters and tired arms from kneading; let the magic of slow fermentation do the heavy lifting for you. This method produces a crispy, airy, and flavorful crust that rivals your favorite local pizzeria.
Recipe Information
- Prep Time: 10 minutes (plus 12-18 hours rising time)
- Cook Time: 15 minutes
- Total Time: 18 hours 25 minutes
- Servings: 2 medium pizzas
- Difficulty: Easy
Nutrition values
- Calories: 285 kcal (per serving)
- Protein: 9g
- Carbs: 59g
Why Make This No-Knead Dutch Oven Pizza Dough Easy 4 Ingredient Beginner
This recipe is perfect for anyone intimidated by yeast or traditional bread making. By using a Dutch oven, you create a mini-steam chamber that mimics a professional brick oven, resulting in a shatteringly crisp bottom and a chewy interior. Because it requires no kneading, you cannot overwork the dough, ensuring a light and airy texture every single time. It is cost-effective, uses zero specialized equipment other than a heavy pot, and fits perfectly into a “set it and forget it” schedule.
Ingredients
- 3 cups (375g) All-purpose flour or Bread flour
- 1 ½ cups (355ml) Room temperature water
- 1 ½ teaspoons Salt
- ¼ teaspoon Active dry yeast
Directions
Step 1: Mix the Dough
In a large mixing bowl, whisk together the flour, salt, and active dry yeast until well combined. Pour the room temperature water into the dry ingredients. Use a sturdy spoon or your hands to stir the mixture until a shaggy, sticky ball forms and no dry flour remains. Do not worry about the texture looking rough; this is exactly how it should appear at this stage.
Step 2: The Long Rise
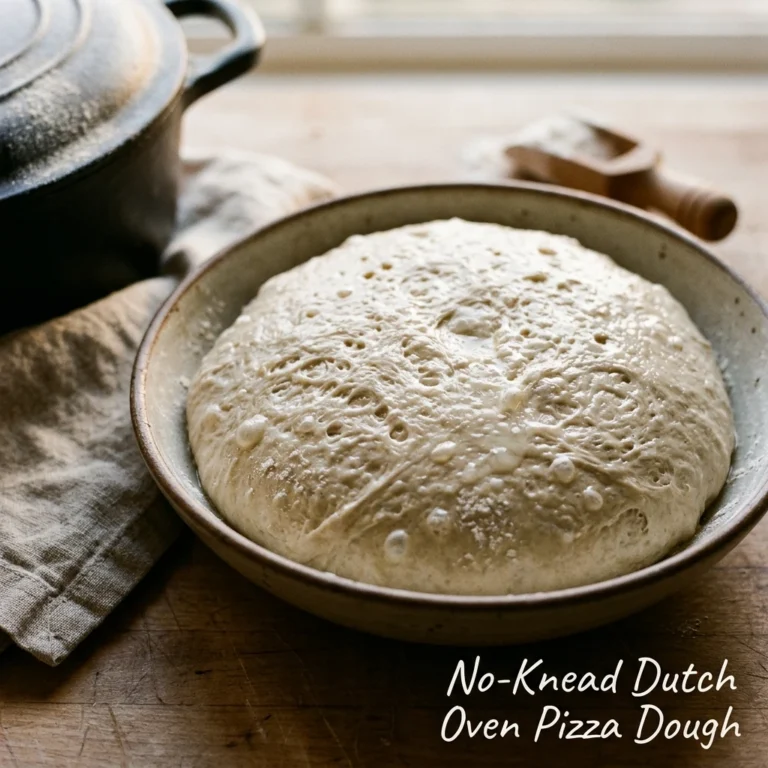
Cover the bowl tightly with plastic wrap or a damp kitchen towel. Place the bowl in a warm, draft-free spot on your counter. Let the dough rest for at least 12 hours, though 18 hours is ideal for maximum flavor development. During this time, the yeast will create bubbles and the gluten will align itself automatically, eliminating the need for kneading. The dough should double in size and look quite bubbly on the surface.
Step 3: Preheat and Shape
Place your empty Dutch oven (with the lid) into your oven and preheat it to 500°F (260°C). While the oven heats, gently scrape the dough onto a well-floured surface. Divide the dough into two equal portions. Dust your hands with flour and gently fold the edges of the dough toward the center to create a round shape. Place the dough onto a piece of parchment paper and let it rest for 20 minutes while the pot finishes heating.
Step 4: Baking the Pizza
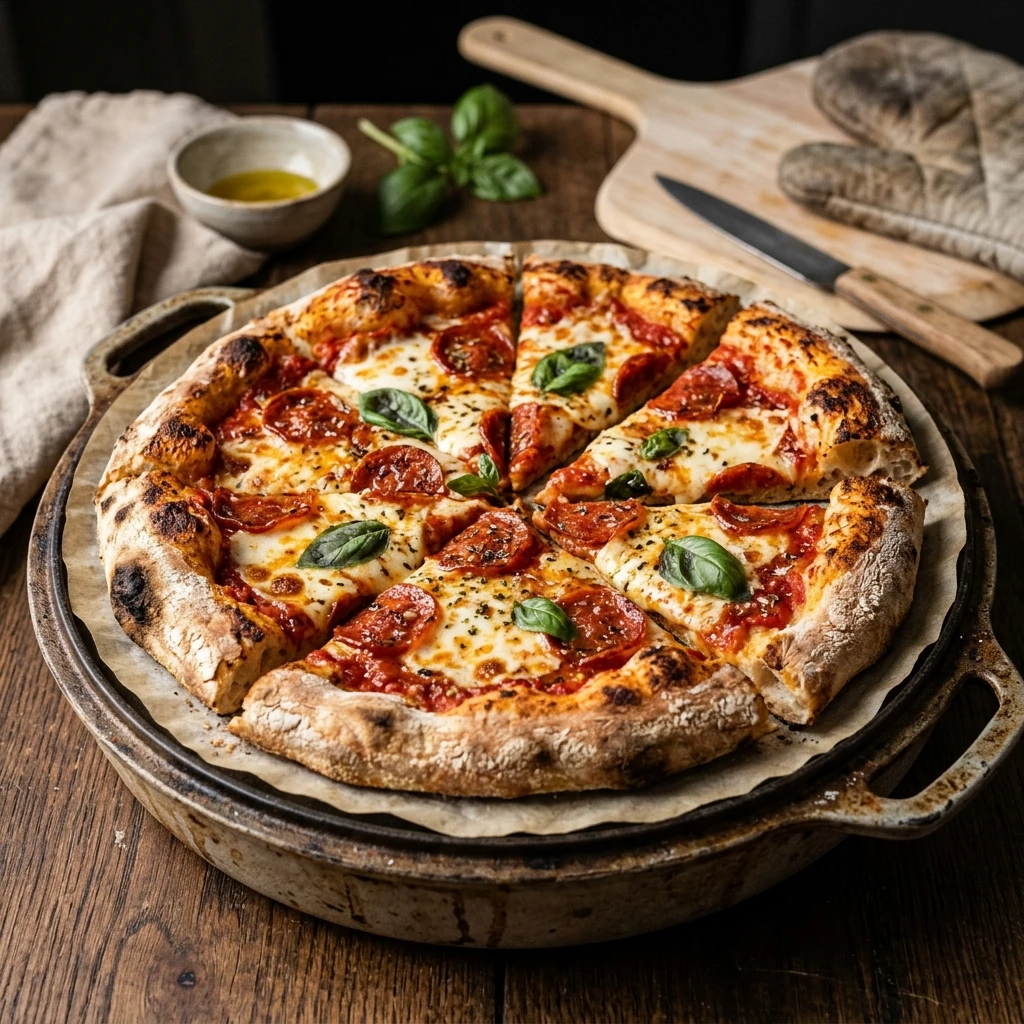
Carefully remove the hot Dutch oven from the oven. Carefully lift the parchment paper with the dough and drop it into the pot. Quickly spread your favorite sauce and toppings over the dough. Place the lid back on the pot and bake for 10 minutes. Remove the lid and bake for an additional 5 minutes, or until the cheese is bubbly and the crust is golden brown and charred in spots. Carefully lift the pizza out using the parchment paper and let it cool slightly before slicing.
Expert Tips for Perfect No-Knead Dutch Oven Pizza Dough Easy 4 Ingredient Beginner
- Use a Scale: For the most consistent results, weigh your flour in grams rather than using measuring cups.
- Don’t Rush the Rise: The long fermentation time is where the flavor comes from. If you are in a hurry, use warm water to speed it up, but the texture will be less airy.
- High Heat is Key: Ensure your oven and Dutch oven are fully preheated. The thermal mass of the pot is what gives you that signature crust.
- Sticky is Good: Do not add too much extra flour when shaping. A high-hydration dough results in those beautiful large air bubbles in the crust.
Delicious Variations
- Garlic Herb Crust: Add 1 teaspoon of garlic powder and 1 tablespoon of dried Italian herbs to the dry ingredients.
- Whole Wheat Blend: Replace 1 cup of white flour with whole wheat flour for a nuttier flavor and extra fiber.
- Everything Bagel Style: Brush the edges of the crust with water and sprinkle everything bagel seasoning before baking.
- Spicy Honey: Drizzle the finished pizza with Mike’s Hot Honey immediately after taking it out of the Dutch oven.
Frequently Asked Questions
Q: Can I use All-Purpose flour instead of Bread flour?
A: Yes, you can use All-Purpose flour. Bread flour has more protein and will result in a slightly chewier crust, but All-Purpose works very well for a lighter bite.
Q: My dough is very sticky, did I do something wrong?
A: No, this dough is meant to be very wet and sticky. This high hydration is what allows the steam to puff up the crust inside the Dutch oven.
Q: Can I make this dough ahead of time and freeze it?
A: Absolutely. After the long rise, you can wrap the dough tightly and freeze it for up to three months. Thaw it in the refrigerator overnight before using.
Q: Why do I need to bake with the lid on first?
A: The lid traps the moisture escaping from the dough, creating steam. This keeps the crust soft initially so it can expand fully before the outside hardens and crisps up.
Q: What if I don’t have a Dutch oven?
A: You can use a heavy oven-safe skillet or a pizza stone, but the Dutch oven is recommended because it creates the best steam environment for beginners.
Conclusion
Mastering homemade pizza doesn’t require years of training or expensive equipment. This no-knead Dutch oven pizza dough proves that simplicity often leads to the best results. With just four ingredients and a little bit of time, you can create a restaurant-quality meal in your own kitchen. Whether you are hosting a movie night or just want a cozy dinner, this easy recipe is sure to become a staple in your household. Happy baking!
No-Knead Dutch Oven Pizza Dough Easy 4 Ingredient Beginner
- Total Time: 18 hours 25 minutes
- Diet: Vegetarian
Ingredients
Scale
- 3 cups (375g) All-purpose flour or Bread flour
- 1 ½ cups (355ml) Room temperature water
- 1 ½ teaspoons Salt
- ¼ teaspoon Active dry yeast
Instructions
- Step 1: Mix the Dough. In a large mixing bowl, whisk together the flour, salt, and active dry yeast until well combined. Pour the room temperature water into the dry ingredients. Use a sturdy spoon or your hands to stir the mixture until a shaggy, sticky ball forms and no dry flour remains. Do not worry about the texture looking rough; this is exactly how it should appear at this stage.
- Step 2: The Long Rise. Cover the bowl tightly with plastic wrap or a damp kitchen towel. Place the bowl in a warm, draft-free spot on your counter. Let the dough rest for at least 12 hours, though 18 hours is ideal for maximum flavor development. During this time, the yeast will create bubbles and the gluten will align itself automatically, eliminating the need for kneading. The dough should double in size and look quite bubbly on the surface.
- Step 3: Preheat and Shape. Place your empty Dutch oven (with the lid) into your oven and preheat it to 500°F (260°C). While the oven heats, gently scrape the dough onto a well-floured surface. Divide the dough into two equal portions. Dust your hands with flour and gently fold the edges of the dough toward the center to create a round shape. Place the dough onto a piece of parchment paper and let it rest for 20 minutes while the pot finishes heating.
- Step 4: Baking the Pizza. Carefully remove the hot Dutch oven from the oven. Carefully lift the parchment paper with the dough and drop it into the pot. Quickly spread your favorite sauce and toppings over the dough. Place the lid back on the pot and bake for 10 minutes. Remove the lid and bake for an additional 5 minutes, or until the cheese is bubbly and the crust is golden brown and charred in spots. Carefully lift the pizza out using the parchment paper and let it cool slightly before slicing.
- Cook Time: 18 hours 25 minutes