Follow Me On Pinterest!


Finding the perfect snack that satisfies your sweet tooth while actually fueling your body can feel like a challenge. Most store-bought bars are packed with hidden sugars and preservatives that leave you crashing an hour later. That is where these High Protein Energy Balls come in. They are the ultimate meal-prep solution for busy professionals, athletes, and parents alike. With a chewy texture, rich peanut butter flavor, and a punch of protein, these no-bake treats taste like cookie dough but work like fuel. You can whip up a batch in minutes without ever touching your oven, making them a go-to staple for your weekly routine.
Recipe Information
- Prep Time: 15 minutes
- Cook Time: 0 minutes
- Total Time: 15 minutes
- Servings: 12 balls
- Difficulty: Easy
Nutrition values
Per serving (1 ball):
- Calories: 115 kcal
- Protein: 7g
- Carbs: 10g
Why Make This High Protein Energy Balls No Bake
These energy balls are a game-changer for anyone looking to maintain steady energy levels throughout the day. Unlike processed snacks, you control every ingredient that goes into the bowl. They are naturally sweetened, high in fiber from the oats, and loaded with healthy fats from the nut butter. Because they require no baking, they preserve the nutritional integrity of the ingredients and save you time. They are portable, kid-friendly, and stay fresh in the fridge for a full week, ensuring you always have a healthy option within reach when hunger strikes.
Ingredients
- 1 ½ cups rolled oats (use gluten-free if needed)
- ½ cup vanilla or chocolate protein powder
- ½ cup creamy natural peanut butter
- 1/3 cup honey or pure maple syrup
- 1 tablespoon chia seeds
- 1 teaspoon vanilla extract
- ¼ cup mini dark chocolate chips
- 1-2 tablespoons water or almond milk (if mixture is too dry)
Directions
Step 1: Combine Dry Ingredients
In a large mixing bowl, whisk together the rolled oats, protein powder, and chia seeds. Ensure the protein powder is evenly distributed through the oats to prevent clumps. If your protein powder is particularly lumpy, sift it before adding it to the bowl.
Step 2: Incorporate Wet Ingredients
Add the creamy peanut butter, honey (or maple syrup), and vanilla extract to the dry mixture. Use a sturdy spatula or a wooden spoon to stir everything together. The mixture should be thick and slightly sticky. If the dough feels too crumbly and won’t hold together when pressed, add water or almond milk one tablespoon at a time until it reaches a dough-like consistency.
Step 3: Add the Mix-ins
Gently fold in the mini dark chocolate chips. Stirring them in at the end ensures they are evenly distributed without being crushed by the heavier mixing process. You want every bite to have a little bit of chocolatey goodness.
Step 4: Roll the Energy Balls
Scoop about one tablespoon of the mixture at a time. Roll the dough between your palms to form a smooth, round ball about one inch in diameter. If the mixture sticks to your hands, lightly dampen your palms with water or a tiny bit of coconut oil to make the rolling process easier. Place each ball on a parchment-lined tray or directly into a storage container.
Step 5: Chill and Store
Place the energy balls in the refrigerator for at least 30 minutes before serving. This chilling period allows the oats to hydrate and the fats to firm up, resulting in a much better texture. Once firm, store them in an airtight container in the fridge for up to 7 days or in the freezer for up to 3 months.
Expert Tips for Perfect High Protein Energy Balls No Bake
To get the best results, always use a “drippy” or natural style of nut butter. Conventional thick nut butters can make the balls too dry and difficult to roll. If your protein powder absorbs a lot of moisture, don’t be afraid to add a splash of liquid to help the dough bind. Also, consider pulsing your oats in a blender for just a few seconds if you prefer a smoother, less chunky texture. This makes the balls feel more like traditional truffles or cookie dough.
Delicious Variations
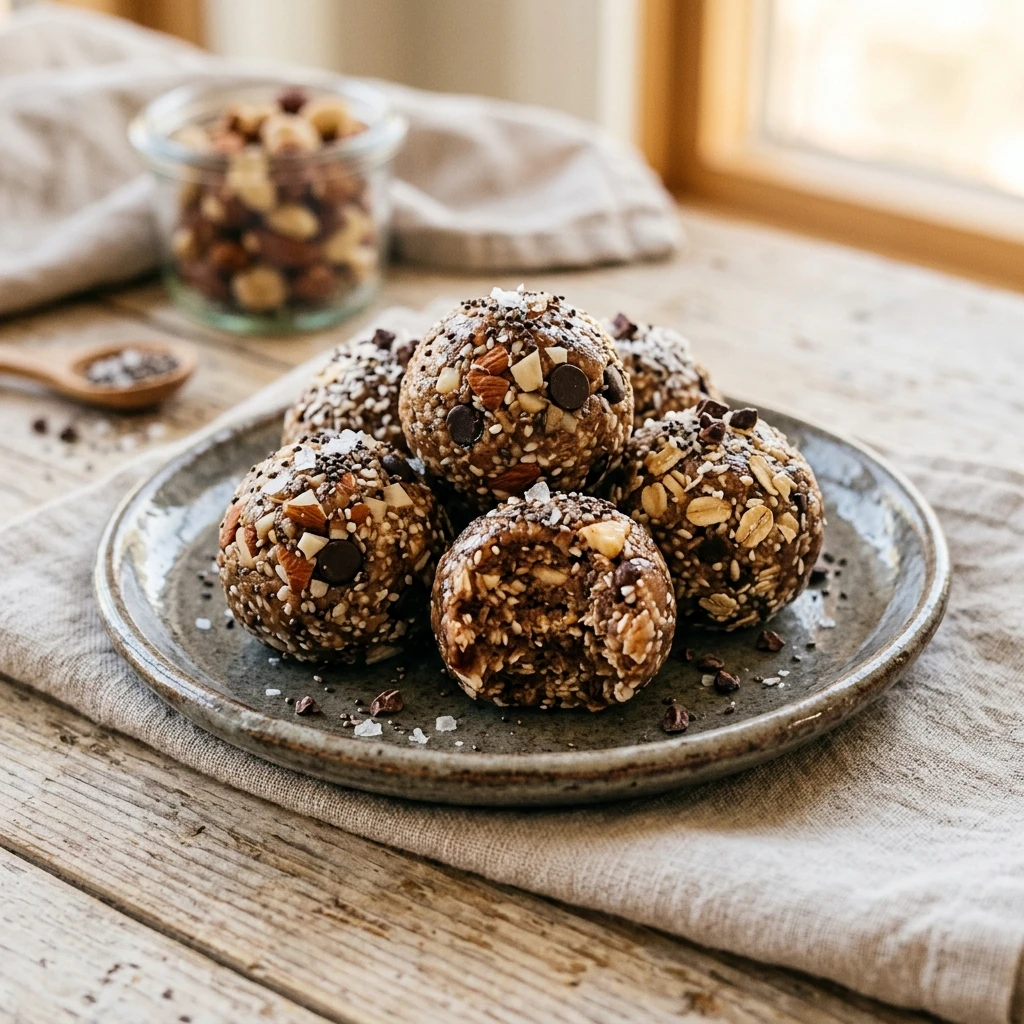
The beauty of this recipe is its versatility. Swap peanut butter for almond butter or sunflower seed butter for a nut-free version. If you want more crunch, add chopped walnuts or shredded coconut. For a seasonal twist, add pumpkin pie spice and a dash of cinnamon. You can also change the flavor of your protein powder; using strawberry or cookies-and-cream flavor can completely transform the snack without changing the base instructions.
Frequently Asked Questions
How long do these energy balls stay fresh?
When stored in an airtight container in the refrigerator, these balls stay fresh and delicious for up to 7 days. If you make a double batch, you can freeze them for up to 3 months.
Can I make these vegan?
Yes! To make this recipe vegan, simply use maple syrup instead of honey and ensure your protein powder and chocolate chips are plant-based.
What if my dough is too sticky to roll?
If the mixture is too sticky, add an extra tablespoon or two of oats or protein powder. You can also pop the bowl in the fridge for 10 minutes to let it firm up before you start rolling.
Can I use steel-cut oats instead of rolled oats?
No, steel-cut oats are too hard and crunchy for no-bake recipes. Stick to rolled oats (old-fashioned oats) or quick oats for the best chewy texture.
Do I have to use protein powder?
While protein powder provides the “high protein” element, you can substitute it with more oats or almond flour. However, you may need to adjust the amount of honey or nut butter to keep the consistency correct.
Conclusion
These High Protein Energy Balls are the perfect marriage of convenience and nutrition. They prove that healthy eating doesn’t have to be complicated or time-consuming. Whether you need a quick pre-workout boost or a healthy treat to pack in a lunchbox, these bites deliver every time. Keep a batch in your fridge, and you will never be tempted by processed vending machine snacks again. Enjoy the process of customizing them to your liking and feel the difference that real-food energy makes in your day.

High Protein Energy Balls No Bake
- Total Time: 15 minutes
- Diet: High-Protein, Gluten-Free Option, Vegan Option
Ingredients
Scale
- 1 ½ cups rolled oats (use gluten-free if needed)
- ½ cup vanilla or chocolate protein powder
- ½ cup creamy natural peanut butter
- 1/3 cup honey or pure maple syrup
- 1 tablespoon chia seeds
- 1 teaspoon vanilla extract
- ¼ cup mini dark chocolate chips
- 1–2 tablespoons water or almond milk (if mixture is too dry)
Instructions
- Step 1: Combine Dry Ingredients In a large mixing bowl, whisk together the rolled oats, protein powder, and chia seeds. Ensure the protein powder is evenly distributed through the oats to prevent clumps. If your protein powder is particularly lumpy, sift it before adding it to the bowl.
- Step 2: Incorporate Wet Ingredients Add the creamy peanut butter, honey (or maple syrup), and vanilla extract to the dry mixture. Use a sturdy spatula or a wooden spoon to stir everything together. The mixture should be thick and slightly sticky. If the dough feels too crumbly and won’t hold together when pressed, add water or almond milk one tablespoon at a time until it reaches a dough-like consistency.
- Step 3: Add the Mix-ins Gently fold in the mini dark chocolate chips. Stirring them in at the end ensures they are evenly distributed without being crushed by the heavier mixing process. You want every bite to have a little bit of chocolatey goodness.
- Step 4: Roll the Energy Balls Scoop about one tablespoon of the mixture at a time. Roll the dough between your palms to form a smooth, round ball about one inch in diameter. If the mixture sticks to your hands, lightly dampen your palms with water or a tiny bit of coconut oil to make the rolling process easier. Place each ball on a parchment-lined tray or directly into a storage container.
- Step 5: Chill and Store Place the energy balls in the refrigerator for at least 30 minutes before serving. This chilling period allows the oats to hydrate and the fats to firm up, resulting in a much better texture. Once firm, store them in an airtight container in the fridge for up to 7 days or in the freezer for up to 3 months.
- Cook Time: 15 minutes