

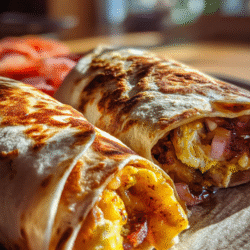
Satisfy Your Cravings with a Low-Carb Twist on a Classic Favorite
—
Introduction
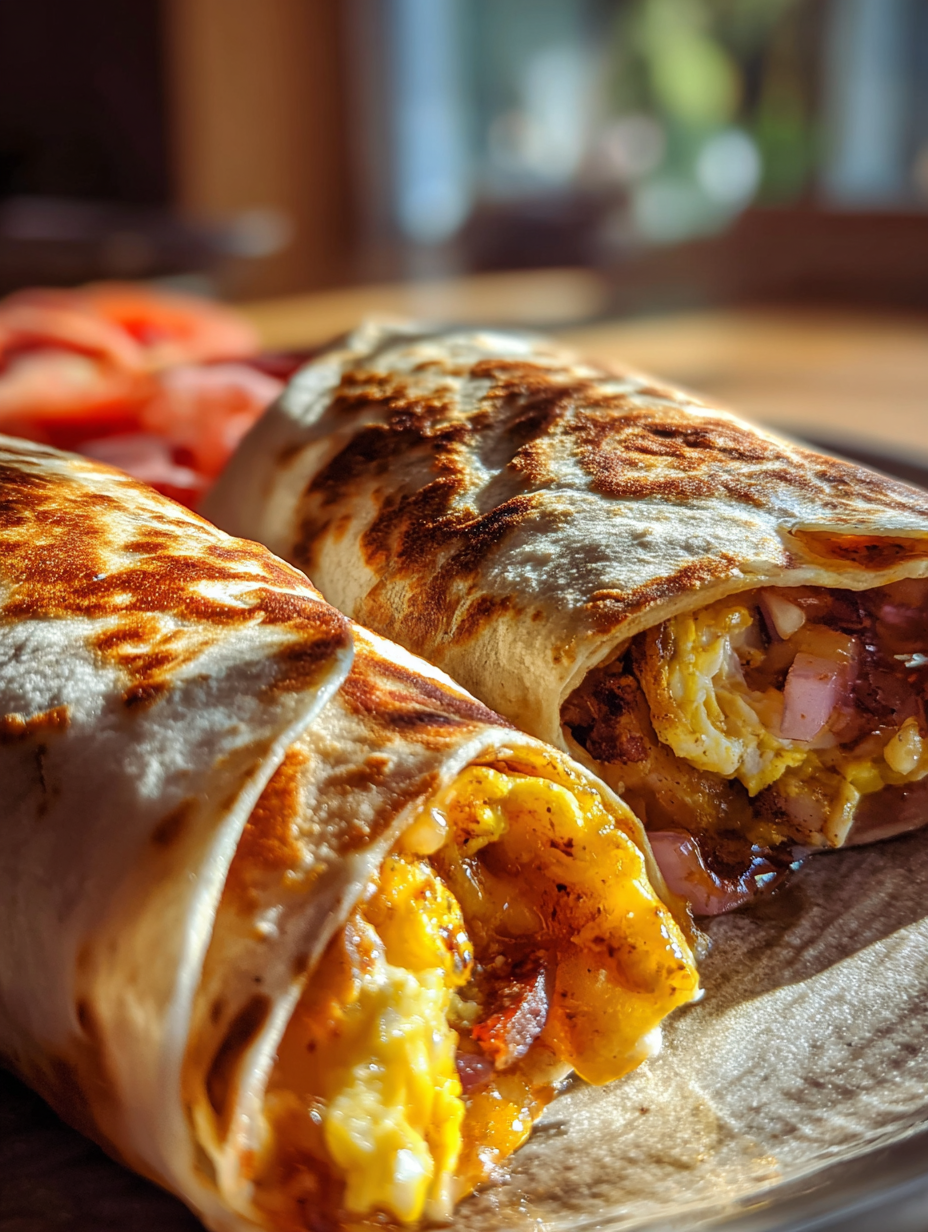
Gather around, and let me take you back to a cozy evening spent with friends, laughter bubbling in the air as the savory scent of spices wafted through the kitchen. I remember the first time I crafted my Keto Crunchwraps—it was one of those spontaneous cooking adventures that turned into a cherished memory. The golden brown, crispy exterior crackled under my fingers, and I couldn’t help but smile at the vibrant colors peeking through the folds of the wrap. The creamy slices of avocado contrasted beautifully with the bright red of diced tomatoes, while the rich shredded cheddar cheese melted into a gooey embrace of goodness.
As I took my first bite, the crunch was music to my ears, followed by a delightful harmony of flavors dancing on my palate. The spices embraced the shredded rotisserie chicken, providing an aromatic warmth that made me feel right at home. This dish quickly became a go-to favorite—not just for its deliciousness, but for the joy it brought to gatherings, effortlessly delighting everyone around the table.
In a world filled with fast-food options that can derail your healthy eating goals, these Keto Crunchwraps provide an ideal solution. They offer the satisfying indulgence of a classic wrap while keeping things low-carb and high in protein. Whether you’re following a keto diet or just looking for a flavorful meal that won’t weigh you down, this recipe promises to deliver a crunchy, savory delight that you can feel good about. So, let’s dive into making these delicious wraps that will become a staple in your kitchen!
—
Why This Recipe Works
The magic of these Keto Crunchwraps lies in the perfect balance of flavors and textures that come together in each bite. At the heart of this recipe is the almond flour tortilla, which serves as a sturdy yet tender base, holding everything together without the carbs found in traditional tortillas. Its nutty flavor enhances the overall experience, while also ensuring that you stay on track with your dietary goals.
The choice of shredded rotisserie chicken not only adds a hefty dose of protein but also introduces a depth of flavor that’s hard to beat. The convenience of using pre-cooked chicken means you can whip these up in a flash, making it an ideal option for busy weeknights. Paired with spices like cumin and smoked paprika, the chicken becomes a flavor-packed filling that truly sings.
Texture is another critical aspect achieved through careful layering. The shredded cheddar cheese melts beautifully inside the wrap, creating a creamy texture that complements the crunchy exterior. The slices of avocado add a buttery richness that rounds out the bite, while the refreshing diced tomatoes provide a burst of freshness that cuts through the richness of the cheese and chicken.
What sets these Keto Crunchwraps apart from generic versions is their wholesome ingredient list. Unlike fast-food options that often contain preservatives and unhealthy fats, this recipe uses fresh, high-quality ingredients that you can feel good about. Each bite is a testament to the flavors you’ve curated, making it a meal that’s not only delicious but also nourishing.
—
What Makes It Special
There are countless reasons to love these Keto Crunchwraps, but let’s highlight a few unique qualities that truly elevate this dish:
– Homemade Freshness: Unlike restaurant or store-bought versions, you control the ingredients here. This means no additives, preservatives, or mystery ingredients. Just pure, wholesome goodness that you can customize to your liking.
– Cost-Effective: Making your own wraps can save you money in the long run. Rotisserie chicken is often a budget-friendly protein option, and the rest of the ingredients are easy to source without breaking the bank.
– Customization Potential: This recipe serves as a fantastic base that you can modify according to your taste preferences. Want heat? Toss in some jalapeños or hot sauce. Prefer a different protein? Substitute chicken for ground beef or turkey—it’s all up to you!
– Surprising Elements: The addition of smoked paprika and cumin may seem simple, but these spices bring a depth of flavor that transforms your average wrap into something extraordinary. It’s these little touches that turn a quick meal into a gourmet experience.
—
Ingredient Breakdown
Let’s take a closer look at each ingredient that plays a vital role in crafting your Keto Crunchwraps:
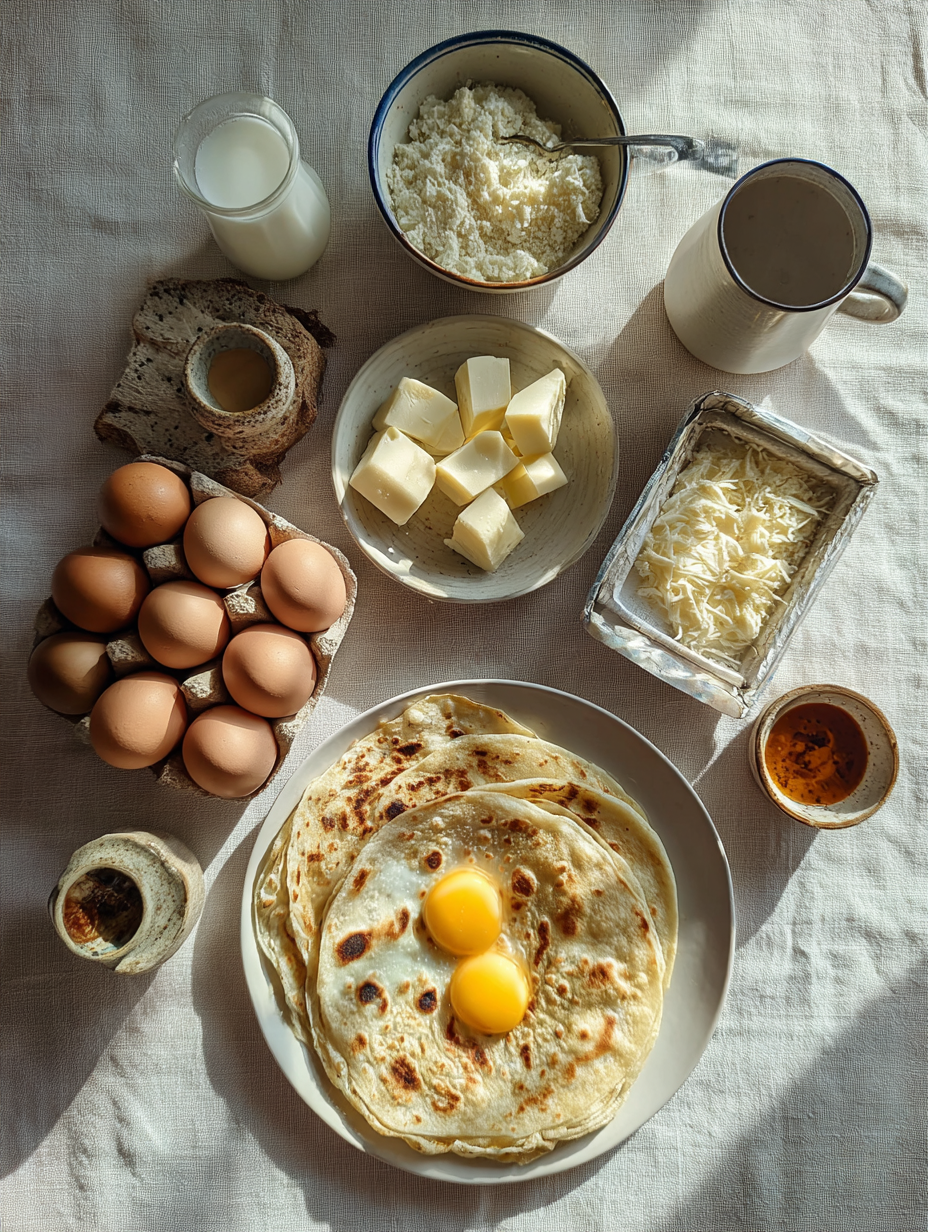
– Almond Flour Tortillas (1 cup): These serve as the foundation for your wraps. Their nutty flavor and low-carb content make them an ideal substitute for traditional tortillas. You can often find them in health food stores or the gluten-free aisle of your grocery store. If you can’t find them, you could also make your own using almond flour and egg.
– Shredded Rotisserie Chicken (1 cup): This is the protein powerhouse of your wrap. Using rotisserie chicken not only saves time but also ensures you have tender, juicy meat ready to go. If you prefer, you can substitute it with shredded turkey or even cooked lentils for a plant-based option.
– Shredded Cheddar Cheese (1/2 cup): The melty goodness of cheddar adds both flavor and creamy texture to your wraps. Feel free to swap it with mozzarella or pepper jack for a different twist. Look for high-quality cheese to elevate the overall taste.
– Avocado (1 medium, sliced): For that luscious creaminess, avocado is essential. It provides healthy fats and a silky mouthfeel. If you want a dairy-free option, consider using a vegan cream cheese or cashew spread in its place.
– Diced Tomatoes (1/2 cup): Freshness is key, and tomatoes add a brightness that balances the richness of the other ingredients. You can use cherry tomatoes, diced canned tomatoes, or even salsa for added flavor.
– Sour Cream (1 tablespoon): This ingredient brings a tangy creaminess that enhances the overall flavor. For a dairy-free alternative, try using coconut yogurt or a cashew-based sour cream.
– Olive Oil (1 tablespoon): Used for cooking the wraps, olive oil not only adds flavor but also helps achieve that perfect crispy texture. Feel free to substitute with avocado oil or another neutral oil if preferred.
– Cumin (1 teaspoon): This spice adds warmth and earthiness to your chicken filling, making it more flavorful. If you’re out of cumin, coriander can be a suitable substitute.
– Smoked Paprika (1/2 teaspoon): The smokiness of this spice rounds out the flavors beautifully. If you don’t have smoked paprika, regular paprika can be used, though it will lack the same depth.
– Salt and Pepper (to taste): These simple seasonings are crucial for enhancing all the flavors in your wrap. Adjust according to your preference.
With this ingredient breakdown, you’re well-equipped to make these Keto Crunchwraps absolutely delicious while accommodating different dietary needs. Enjoy the process of creating, and don’t hesitate to make it your own!
—
Equipment Needed
To whip up your Keto Crunchwraps, you’ll need a few essential tools that will ensure your cooking experience is seamless and enjoyable:
– Non-Stick Skillet: This is perhaps the most crucial tool for cooking your wraps. A non-stick surface prevents sticking and ensures an even, golden-brown finish. If you don’t have one, a cast-iron skillet works well too, though you may need to adjust the heat to prevent sticking.
– Spatula: A sturdy spatula will help you flip your wraps with ease, ensuring they stay intact. A silicone spatula is ideal as it won’t scratch your non-stick surface.
– Mixing Bowl: You’ll need a medium mixing bowl to combine your chicken filling and spices. A glass or stainless steel bowl is perfect as it’s easy to clean and won’t retain any odors.
– Knife: A sharp knife is essential for slicing your avocado and tomatoes with precision. If you have a small paring knife, it’s great for this task.
– Cutting Board: Use a cutting board to protect your countertops while you slice. A wooden or plastic board works well for this purpose.
Each of these tools plays a significant role in creating your Keto Crunchwraps, and while some are essential, others can be substituted based on what you have available in your kitchen. Enjoy the cooking journey, and let the aromas guide you!
Step-by-Step Instructions

1. Prepare the Chicken Filling: Begin by shredding your rotisserie chicken into bite-sized pieces. In a medium bowl, combine the shredded chicken with diced tomatoes, cumin, smoked paprika, salt, and pepper. Use a spatula to gently stir until the chicken is well-coated with the spices. You should smell the warm, earthy aroma of cumin and paprika as you mix. This step takes about 5 minutes.
2. Heat the Skillet: Place a non-stick skillet on the stove over medium heat and add olive oil. Allow the oil to warm for about 1-2 minutes until it shimmers but isn’t smoking. This is crucial because properly heated oil will help achieve that golden-brown color and crispy texture on your crunchwraps.
3. Assemble the Wrap: Place one almond flour tortilla in the skillet. Spoon half of the chicken mixture onto one side of the tortilla and top it with a generous sprinkle of shredded cheddar cheese and a few slices of avocado. Remember to leave a little space around the edges for easier folding. As you layer the ingredients, you should hear a slight sizzling sound, indicating the tortilla is starting to warm.
4. Fold the Tortilla: Carefully fold the tortilla in half over the filling, pressing down gently to seal it. It’s important to ensure that the filling is contained within the fold, so press lightly on the edges to secure them. If you feel any resistance, take your time to adjust the structure before proceeding. This should take about 30 seconds.
5. Cook the Crunchwrap: Cook the folded crunchwrap for approximately 3-4 minutes on one side. You want to look for a golden-brown color and a hint of crispiness. Carefully flip it using a spatula, and let it cook for another 3-4 minutes on the other side. Listen for a satisfying crunch as you flip; that’s your cue that things are cooking perfectly.
6. Cool and Serve: Once both sides are golden brown, carefully remove the crunchwrap from the skillet and place it on a cutting board. Let it cool for a minute so the cheese can firm up slightly, making it easier to slice. When you cut it in half, the melty cheese should ooze just a bit, mixed with the chicken and fresh avocado. Serve with a dollop of sour cream on the side, and enjoy the delightful contrast of textures and flavors.
Pro Tips for the Best Results
1. Use Fresh Ingredients: Always opt for fresh tomatoes and ripe avocados. They not only enhance the flavor but also add a vibrant color and texture to your crunchwraps. Fresh ingredients can elevate your dish from good to outstanding!
2. Mind the Temperature: Keep your skillet at medium heat. If it’s too hot, the tortilla may brown too quickly without warming the filling. On the flip side, if it’s too cool, you won’t achieve that crispy texture. A well-heated skillet is key to that perfect crunchwrap.
3. Don’t Overstuff: While it’s tempting to pile on the filling, resist the urge to overstuff your crunchwrap. A hefty amount of filling can cause it to burst open while cooking. Aim for a balanced layer that allows for easy folding and cooking.
4. Experiment with Cheese: Try different types of cheese for added flavor. Swap cheddar for pepper jack for a spicy kick, or use mozzarella for a gooey melt. Each cheese will bring a unique taste and texture to your crunchwrap.
5. Seal the Edges: Make sure to press down the edges of the tortilla firmly after folding. This helps ensure that your filling stays intact while cooking. A good seal will make a big difference when it comes time to flip or cut the crunchwrap.
6. Use a Spatula Wisely: When flipping the crunchwrap, use a wide spatula to support the entire surface. This prevents breakage and ensures an even cook on both sides. A careful lift and flip will keep your crunchwrap intact.
7. Prepping Ahead: You can prepare the chicken mixture in advance and store it in the refrigerator for up to 3 days. This makes meal prep a breeze and allows for quick assembly on busy weeknights.
Common Mistakes to Avoid
1. Skipping the Seasoning: Neglecting to season the chicken mixture can lead to bland crunchwraps. Seasoning is essential to bring out the flavors of the filling. Always taste your mixture before assembling to ensure it’s robust.
2. Using Cold Tortillas: Cooking with cold tortillas can result in a chewy texture rather than a crispy one. Always warm your tortillas slightly before assembling to enhance their pliability and crispiness during cooking.
3. Not Preheating the Skillet: Jumping straight into cooking without preheating the skillet can lead to uneven cooking. Always preheat your skillet for a few minutes to ensure that your crunchwrap cooks evenly and achieves that perfect golden-brown color.
4. Overcooking or Undercooking: Timing is everything. Overcooking can make your crunchwrap dry, while undercooking can leave your fillings cold and the cheese un-melted. Stay attentive to timing and look for visual cues like color and texture.
5. Ignoring the Filling Ratio: Using too much or too little filling can affect the structural integrity of your crunchwrap. A good balance is crucial for a satisfying bite and easy handling. Stick to a moderate amount to keep the wrap sturdy.
6. Cutting Too Soon: Cutting your crunchwrap immediately after cooking can lead to a messy presentation. Allow it to cool for a minute to let the cheese set, making for a cleaner slice and a more enjoyable eating experience.
Creative Variations
1. Seasonal Variation: Fall Harvest Crunchwrap – Swap the diced tomatoes for roasted butternut squash and add fresh spinach. The sweetness of the squash paired with savory spices will create a cozy autumn flavor that’s perfect for chilly evenings.
2. Dietary-Friendly Version: Vegan Crunchwrap – Use a plant-based protein substitute like lentils or chickpeas, and replace the cheese with a vegan cheese or nutritional yeast. This adaptation keeps it filling and satisfying while catering to a vegan diet.
3. Gourmet Elevated Version: Truffle Chicken Crunchwrap – Mix truffle oil into the chicken filling, and top with fontina cheese and arugula. This luxurious twist brings a high-end restaurant flavor to your kitchen, perfect for a special occasion.
4. Quick 15-Minute Version: Speedy Tuna Crunchwrap – Substitute shredded rotisserie chicken with canned tuna mixed with mayo, diced onions, and pickles. This variation is quick to assemble and still delicious, ideal for busy weeknights.
5. Kid-Friendly Version: Cheesy Chicken Crunchwrap – Keep it simple by using only chicken, cheddar cheese, and a mild salsa. Kids will love the melty, cheesy center, and you can involve them in the assembly for a fun family activity.
6. International Twist: Mediterranean Chicken Crunchwrap – Add feta cheese, kalamata olives, and zucchini to the chicken filling. This Mediterranean-inspired wrap is bursting with flavors that will transport you to a sunny coastline.
By exploring these variations, you can customize your crunchwraps to suit any occasion, dietary preference, or even seasonal craving!
Serving Ideas
To elevate your Keto Crunchwraps into a stunning meal, consider these beautiful serving suggestions:
1. Garnish with Fresh Herbs: Sprinkle chopped cilantro or parsley over the top for a vibrant touch. The green hues pop against the golden-brown wraps and add a fresh aroma that enhances the overall experience.
2. Colorful Side Salad: Plate the crunchwraps alongside a mixed greens salad with cherry tomatoes, cucumber slices, and a light vinaigrette. The vibrant colors not only create visual appeal but also add a refreshing contrast to the savory wrap.
3. Crispy Tortilla Chips: Serve your crunchwraps with a side of baked keto tortilla chips. Arrange them in a playful stack with a small bowl of salsa verde or guacamole for dipping. This adds a delightful crunch and a variety of textures to your meal.
4. Layered Presentation: For an engaging presentation, slice the crunchwrap in half and stand it upright on a plate. Pair it with a dollop of sour cream and a sprinkle of smoked paprika on the side. This not only showcases the delicious fillings but also encourages diners to dive right in.
5. Miniature Version: Create a tasting plate with smaller, mini crunchwraps, each with different fillings like ground turkey or sautéed veggies. This allows for a fun variety that keeps the meal exciting and visually dynamic.
What to Serve With
Complement your Keto Crunchwraps with these delightful dishes:
1. Cauliflower Rice: A light and fluffy side, cauliflower rice adds a nice texture balance. Its mild flavor won’t compete with the crunchwrap, making it a perfect base for extra toppings.
2. Zucchini Fries: Baked zucchini fries offer a satisfying crunch that pairs well with the soft texture of the crunchwrap. Their natural sweetness complements the spices in the filling.
3. Berry Sparkling Water: A refreshing beverage like sparkling water infused with berries provides a bright contrast to the savory flavors, while the carbonation cleanses your palate between bites.
4. Guacamole: The creamy richness of guacamole enhances the overall experience. It adds a layer of healthy fats that aligns with the keto lifestyle while also providing a delicious dip for your crunchwrap.
5. Cheese Crisps: These crunchy bites, made from baked cheese, bring an extra cheesy element to the meal. Their crispiness mirrors the crunchwrap’s texture, creating a harmonious plate.
6. Dark Chocolate Avocado Mousse: For dessert, this creamy and decadent treat brings a sweet finish without the carbs. The chocolate pairs beautifully with the savory elements of the meal, making it a well-rounded dining experience.
Storage Guide
To keep your Keto Crunchwraps fresh, store leftovers properly:
– Containers: Use airtight glass containers to prevent moisture buildup and preserve the crunchwrap’s texture.
– Temperature: Store in the refrigerator at 40°F (4°C) or below to maintain freshness.
– Shelf Life: The wraps will keep for up to 3 days in the fridge.
– Signs of Spoilage: Check for any off smells, discoloration, or slimy textures, which indicate that the wraps have gone bad.
– Refreshing Before Serving: Instead of just reheating, consider adding a dash of olive oil to the skillet when warming them up. This helps restore some crunchiness and keeps them from drying out.
Freezing Tips
If you want to prepare your Keto Crunchwraps in advance, they freeze remarkably well:
– Portioning: Slice the crunchwraps in half before freezing for easy single servings.
– Wrapping: Wrap each half tightly in plastic wrap and then place it in a freezer-safe bag. This double protection prevents freezer burn.
– Labeling: Don’t forget to label with the date! They can last up to 3 months in the freezer.
– Quality Changes: Expect some texture loss upon thawing, but the flavors will remain intact.
– Thawing Method: For the best results, thaw in the refrigerator overnight before reheating.
Reheating Guide
To enjoy your Keto Crunchwraps just as deliciously as the first time, follow these reheating instructions:
– Microwave: Place the crunchwrap on a microwave-safe plate. Heat on medium power (50%) for about 1-2 minutes, checking halfway through. To prevent drying out, cover it with a damp paper towel.
– Oven: Preheat your oven to 350°F (175°C). Place the crunchwrap on a baking sheet and cover it with foil. Bake for about 10-12 minutes until heated through, removing the foil for the last 2 minutes for extra crispness.
– Stovetop: Heat a non-stick skillet over medium-low heat. Add a splash of water to create steam, then cover and cook for about 5-7 minutes, flipping halfway through. This method helps restore moisture and keeps the wrap crispy.
– Texture Restoration Tips: Consider adding fresh toppings like avocado or sour cream after reheating to bring back some of that vibrant flavor.
Nutrition Overview
Each serving of Keto Crunchwraps offers a satisfying nutritional profile that aligns with your dietary goals:
– Calories: Approximately 350 calories
– Protein: About 25 grams from the chicken and cheese
– Carbohydrates: Roughly 10 grams, making it low-carb friendly
– Fat: Around 22 grams, primarily from healthy fats like avocado
– Fiber: Approximately 7 grams, courtesy of the avocado and tortillas
– Sugar: Less than 2 grams, ensuring a low-sugar meal option
Key ingredients like almond flour tortillas provide healthy fats and protein while being low in carbs, making them a staple in the keto diet. Avocado adds heart-healthy fats, and rotisserie chicken delivers a quick source of high-quality protein, perfect for fueling your day.
Frequently Asked Questions
Q: Can I substitute the chicken in the crunchwrap?
A: Absolutely! You can easily swap out shredded rotisserie chicken for ground beef, turkey, or even sautéed vegetables for a vegetarian option. Just remember to adjust the cooking time accordingly to ensure everything is fully cooked.
Q: How can I make these crunchwraps dairy-free?
A: To adjust the recipe for a dairy-free diet, use dairy-free cheese alternatives and skip the sour cream. You can replace sour cream with a cashew cream or a dairy-free yogurt for a creamy texture.
Q: What type of tortilla should I use for the crunchwraps?
A: Almond flour tortillas are perfect for a keto diet, but you could also use coconut flour tortillas or even lettuce wraps if you’re looking for an ultra-low-carb option.
Q: Can I make these crunchwraps in advance?
A: Yes! You can prepare the filling a day ahead and assemble the crunchwraps just before cooking. Alternatively, you can fully cook them and store them in the fridge for up to three days.
Q: What’s the best way to store leftovers?
A: Store your leftovers in airtight glass containers in the refrigerator at 40°F (4°C). They’ll stay fresh for up to three days.
Q: How long does it take to cook the crunchwraps?
A: The total cooking time for these crunchwraps is about 25 minutes, with approximately 15 minutes of prep and 10 minutes for cooking.
Q: Can I freeze the crunchwraps?
A: Yes, these crunchwraps freeze well! Wrap them tightly in plastic wrap and place them in a freezer-safe bag. They can last up to three months in the freezer.
Q: What is the best way to reheat the crunchwraps?
A: For the best results, reheat them in the oven at 350°F (175°C) for about 10-12 minutes. This keeps them crispy. Alternatively, the microwave is a quicker option if you cover them with a damp paper towel.
Final Thoughts
As you dive into making these Keto Crunchwraps, remember that the key is in the freshness and quality of your ingredients. Don’t hesitate to experiment with different fillings and flavors to make this recipe your own! I genuinely believe you’ll love the satisfaction of creating a crisp, savory wrap that aligns perfectly with your low-carb lifestyle.
I can’t wait for you to try this delightful recipe and share your own twists on it. So grab those ingredients, unleash your creativity, and savor every bite of your delicious crunchwrap!
Keto Crunchwraps | Low-Carb & High Protein Delight 🥙🥑
Ingredients
- 1 cup almond flour tortillas for the wrap base
- 1 cup shredded rotisserie chicken for protein filling
- 1/2 cup shredded cheddar cheese for melty texture
- 1 medium avocado sliced
- 1/2 cup diced tomatoes for freshness
- 1 tablespoon sour cream for creaminess
- 1 tablespoon olive oil for cooking the wraps
- 1 teaspoon cumin for flavor
- 1/2 teaspoon smoked paprika for smokiness
- salt and pepper to taste
Instructions
- In a medium bowl, combine shredded rotisserie chicken, diced tomatoes, cumin, smoked paprika, salt, and pepper. Mix well to ensure the chicken is evenly coated with the spices.
- Heat olive oil in a non-stick skillet over medium heat. Place one almond flour tortilla in the skillet and spoon the chicken mixture onto one half of the tortilla, followed by shredded cheddar cheese and sliced avocado.
- Fold the tortilla in half to cover the filling, pressing down gently to seal. Cook for about 3-4 minutes on each side or until golden brown and the cheese has melted.
- Once cooked, remove the crunchwrap from the skillet and let it cool slightly before slicing it in half. Serve with a dollop of sour cream on the side.
Notes
Tip 2: These wraps can be made in advance and stored in the refrigerator for up to 3 days.
Variation: Substitute the chicken for ground beef or turkey for a different protein option.