Introduction
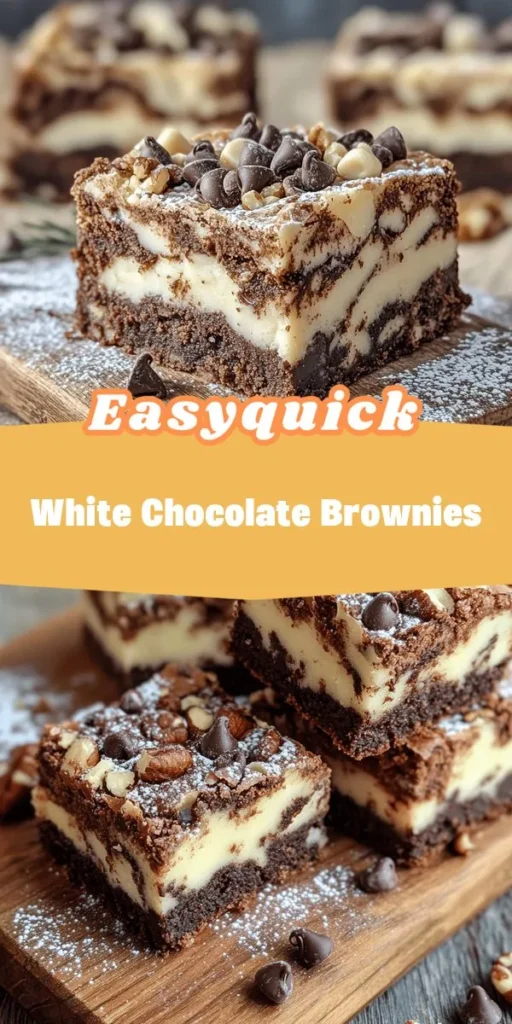
Brownies are undeniably one of the most cherished desserts in the world of baking. Their rich, fudgy texture and deep chocolate flavor have made them a staple in homes and bakeries alike. Whether enjoyed as a simple treat or dressed up for a special occasion, brownies offer an irresistible combination of sweetness and satisfaction that few desserts can match. But what if we could elevate this beloved classic to new heights? Enter the White Chocolate Bliss Brownies—a delightful twist on the traditional brownie that introduces the creamy decadence of white chocolate.
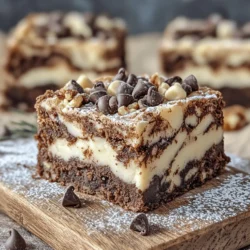
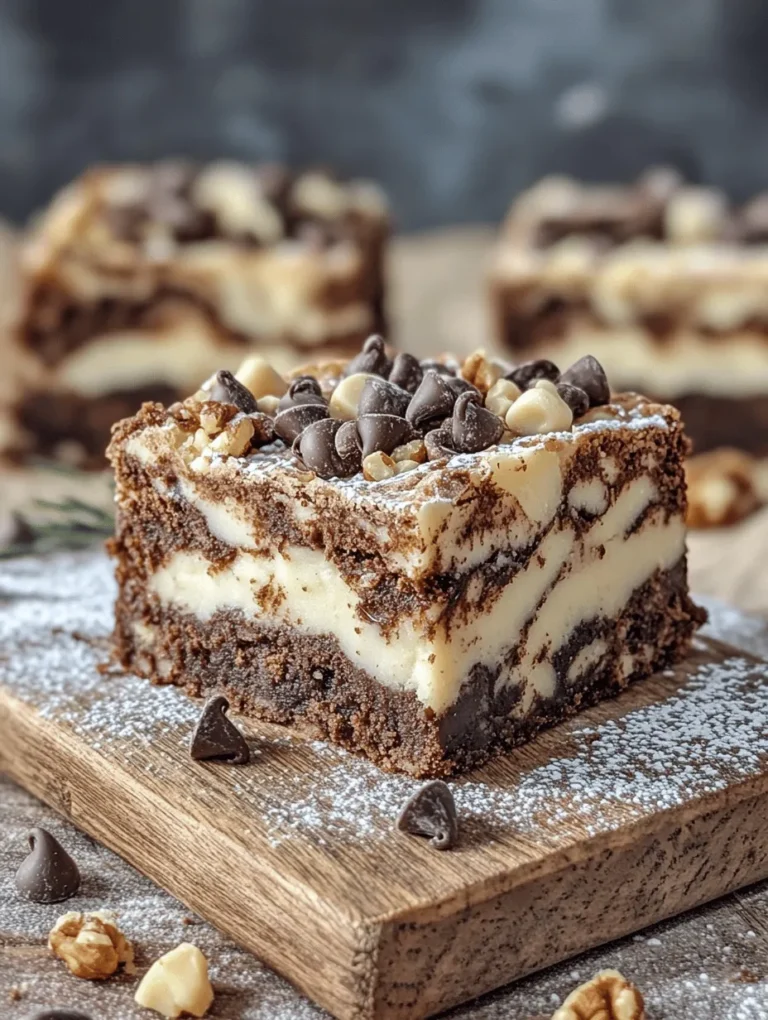
In this recipe, we’ll explore how the smooth and rich flavor of white chocolate transforms the familiar brownie into a luxurious treat. The combination of flavors and textures in these brownies is nothing short of sublime. Picture a dense, chewy base studded with luscious white chocolate chips that melt in your mouth, creating a delightful contrast with the slight crunch of chopped nuts. Whether you’re a lifelong brownie lover or a newcomer to this dessert, the White Chocolate Bliss Brownies promise to be a crowd-pleaser, appealing to both chocolate enthusiasts and those who prefer a sweeter, creamier version of this classic treat.
As we embark on this culinary adventure, expect to find a recipe that not only satisfies your sweet tooth but also allows for personal touches such as the addition of your favorite nuts. This recipe is perfect for sharing with friends and family or indulging in a quiet moment of bliss all on your own. Let’s dive into the ingredients and preparation steps that will lead us to the ultimate white chocolate brownie experience.
Understanding the Ingredients
To create these White Chocolate Bliss Brownies, we need to gather a selection of key ingredients, each playing a vital role in the final product. Understanding the purpose of each component will help you appreciate how they work together to produce a decadent dessert.
Unsalted Butter
At the heart of any great brownie recipe is butter, and for our White Chocolate Bliss Brownies, we use unsalted butter. The reason for choosing unsalted over salted butter is simple: it allows for greater control over the salt content in the recipe. Unsalted butter contributes to the rich flavor and fudgy texture we aim for, melting seamlessly into the batter to create a luscious mouthfeel. Additionally, using butter adds moisture, which is essential for achieving that melt-in-your-mouth quality.
Granulated and Brown Sugar
Next, we have our sweeteners: granulated sugar and brown sugar. Granulated sugar provides sweetness and helps create a crisp top layer on the brownies, while brown sugar enhances moisture and adds a hint of caramel flavor. The combination of these two types of sugar results in brownies that are both sweet and rich, with a delightful depth of flavor. The brown sugar, due to its molasses content, contributes to a chewy texture that perfectly complements the creamy white chocolate.
Eggs
Eggs are integral to the structure of the brownies, acting as a binding agent that holds everything together. They also add richness to the recipe, enhancing the overall flavor and texture. The proteins in the eggs help create a sturdy yet tender crumb, which is essential for achieving that perfect brownie consistency. Moreover, we will be incorporating the eggs gradually into the mixture to ensure a smooth, homogenous batter.
All-Purpose Flour, Salt, and Baking Powder
All-purpose flour is another fundamental ingredient in our brownie recipe. It provides the necessary structure for the brownies, allowing them to rise slightly without becoming cakey. The flour works in tandem with a pinch of salt, which not only balances the sweetness but also enhances the overall flavor profile. Baking powder, while not always used in brownie recipes, can be included in small amounts to promote a slight lift, resulting in a lighter texture that still maintains the signature chewiness we crave.
White Chocolate Chips
Of course, the star of the show is the white chocolate chips. White chocolate, made from cocoa butter, sugar, and milk solids, offers a creamy and sweet flavor that beautifully contrasts with the richness of the brownie base. When selecting white chocolate chips, opt for high-quality brands that contain real cocoa butter for the best results. The quality of the chocolate can significantly impact the overall flavor of your brownies, so it pays to choose wisely.
Optional Ingredients: Walnuts or Pecans
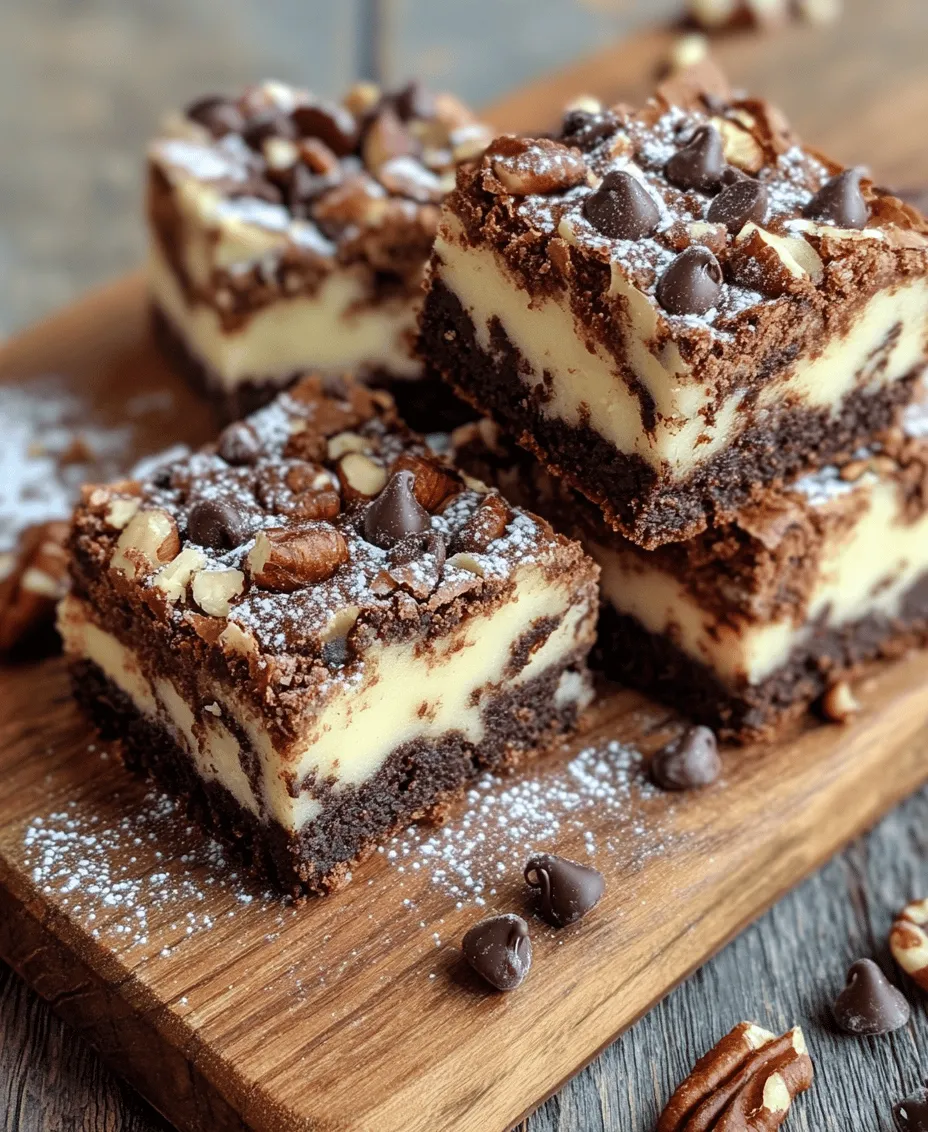
For those looking to add an extra layer of texture and flavor, consider incorporating chopped nuts such as walnuts or pecans. These nuts not only bring a delightful crunch to each bite but also complement the sweetness of the white chocolate. The earthy notes from the nuts add complexity to the flavor profile, making every mouthful a harmonious blend of textures and tastes. Feel free to adjust the amount of nuts based on your personal preference—whether you want a little crunch or a lot, the choice is yours.
Step-by-Step Instructions
Now that we have a clear understanding of our ingredients, let’s delve into the step-by-step process for creating these indulgent White Chocolate Bliss Brownies. Each step is designed to ensure that your brownies come out perfectly every time.
Preheat the Oven and Prepare the Baking Pan
Before we begin mixing our ingredients, it’s crucial to preheat the oven to 350°F (175°C). This ensures that the brownies bake evenly and develop that coveted fudgy texture. While the oven is heating, prepare your baking pan. Line an 8×8-inch square baking pan with parchment paper, allowing the edges to hang over the sides. This will make it easier to lift the brownies out of the pan once they’re baked. Alternatively, you can grease the pan with cooking spray or butter, but lining it with parchment paper is recommended for easy removal.
Melting the Butter
The next step involves melting the unsalted butter. You can do this either on the stovetop or in the microwave. If using the stovetop, place the butter in a small saucepan over low heat, stirring continuously until fully melted. If you prefer the microwave, place the butter in a microwave-safe bowl and heat it in short bursts of 20-30 seconds, stirring in between, until melted. It’s important to let the melted butter cool slightly before moving on to the next step, as adding hot butter to the sugar mixture can result in a grainy texture.
Mixing the Sugars
In a large mixing bowl, combine the granulated sugar and brown sugar. Pour in the slightly cooled melted butter and whisk until the mixture is smooth and creamy. This step is vital for achieving the right consistency in your brownie batter. The goal is to create a homogeneous mixture that blends the sugars and butter seamlessly. Take your time with this step, ensuring that there are no lumps and that the sugars are well incorporated.
Incorporating Eggs and Vanilla
Once your sugar mixture is smooth, it’s time to add the eggs. Crack in the eggs one at a time, mixing thoroughly after each addition. This gradual mixing allows the eggs to fully incorporate into the batter without creating air bubbles, which can affect the texture of the brownies. Add a splash of vanilla extract for extra flavor, whisking until everything is well combined. The batter should now be shiny and slightly thick, indicating that you’re on the right track.
Adding Dry Ingredients
In a separate bowl, whisk together the all-purpose flour, baking powder, and salt. This step ensures that the leavening agent is evenly distributed throughout the flour, which is crucial for achieving a consistent rise in your brownies. Slowly fold the dry ingredients into the wet mixture, using a spatula or wooden spoon. Be careful not to overmix; you want to combine the ingredients until just incorporated, leaving a few small streaks of flour in the batter. This will help maintain the brownies’ chewy texture.
Incorporating White Chocolate Chips
Finally, it’s time to add the white chocolate chips. Gently fold them into the brownie batter, making sure they are evenly distributed. If you’re adding nuts, this is the moment to fold in your chopped walnuts or pecans as well. The batter is now ready to be poured into the prepared baking pan.
By following these steps, you’ll be well on your way to creating delicious White Chocolate Bliss Brownies that are sure to impress. In the next part of this recipe, we will explore the baking process, tips for achieving the perfect texture, and ways to serve these delightful treats. Stay tuned for the continuation of this sweet journey!
Combining dry ingredients is a crucial step in making the perfect White Chocolate Bliss Brownies. It’s important to avoid over-mixing at this stage to ensure a tender and fudgy texture. Use a whisk to combine the dry ingredients thoroughly, including flour, cocoa powder, baking powder, and salt, before adding them to the wet ingredients. This ensures even distribution of the leavening agents, which is key to achieving the right rise and texture in your brownies.
When you are ready to combine the dry ingredients with the wet mixture, gently fold them together using a spatula or a wooden spoon. Instead of stirring vigorously, which can develop gluten and create a tough texture, use a folding technique. This involves bringing the spatula down through the center of the batter, then lifting it up and over to incorporate the dry ingredients gradually. Repeat this motion until the dry ingredients are just combined; it’s okay to see a few streaks of flour. This gentle approach preserves the delicate balance of the ingredients and leads to a tender brownie.
After mixing the batter, it’s time to incorporate the chocolate and nuts. If you have chosen to add chopped nuts—such as walnuts or pecans—now is the time to fold them in. Ensure that both the chocolate and nuts are distributed evenly throughout the batter by continuing to use the folding technique. This will help achieve that delicious contrast of textures in every bite.
Next, pour the batter into a prepared baking pan. Use a spatula to spread it evenly to the edges. This is crucial for even baking. An uneven batter can lead to uneven baking, where some sections may be undercooked while others are overbaked. For the best results, tap the pan gently on the counter a few times after spreading the batter. This helps eliminate any air bubbles that may have been trapped in the batter.
Baking time is another critical factor in achieving perfect brownies. Preheat your oven to the recommended temperature and place the pan in the center of the oven for even heat distribution. Start checking for doneness a few minutes before the recommended baking time. Insert a toothpick into the center of the brownies; if it comes out with a few moist crumbs, they are done. Remember, brownies will continue to cook slightly after being removed from the oven due to residual heat, so it’s better to underbake slightly than to overbake.
Once baked, allow the brownies to cool in the pan for at least 15-20 minutes before transferring them to a wire rack. Cooling is essential as it allows the structure to set and the flavors to develop. If you cut into them too soon, they may fall apart, resulting in a gooey mess rather than the perfect fudgy brownie you desire.
For an extra touch, consider drizzling melted white chocolate over the cooled brownies. This not only enhances the presentation but also amplifies the sweetness and creaminess of the white chocolate flavor. To do this, melt some white chocolate in a microwave-safe bowl, microwaving in 15-second intervals and stirring until smooth. Use a fork or a piping bag to drizzle the melted chocolate over the brownies before slicing.
Flavor Profile and Texture
The flavor profile of White Chocolate Bliss Brownies is a delightful balance of sweet and rich. The white chocolate, which is sweeter than its dark counterpart, brings a creamy and indulgent sweetness to the brownies. This sweetness is beautifully complemented by the richness of the butter and sugars used in the recipe. The result is a decadent treat that feels luxurious with every bite.
The texture of these brownies is equally important. You can expect a fudgy interior that melts in your mouth contrasted with slightly crisp edges. This combination of textures enhances the overall experience, making each bite an adventure. If you choose to add nuts, they provide an additional crunch that contrasts with the smooth interior, creating an exciting sensory experience. The nuts not only add texture but also bring a subtle earthiness that balances the sweetness of the chocolate.
Serving Suggestions
When it comes to serving your White Chocolate Bliss Brownies, the possibilities are endless. For a simple yet elegant approach, serve them plain, allowing the rich flavors to shine through. If you want to elevate the dessert experience, consider pairing the brownies with a scoop of vanilla ice cream, which adds a wonderful creaminess that pairs perfectly with the fudgy texture. Fresh berries, such as raspberries or strawberries, can also complement the sweetness of the brownies while adding a refreshing contrast.
For drinks, consider serving your brownies with a robust cup of coffee or a soothing cup of tea. The bitterness of coffee can balance the sweetness of the brownies, while a herbal or fruity tea can enhance the overall dessert experience. If you prefer a more indulgent pairing, a dessert wine like a late-harvest Riesling or a rich port can elevate the flavor profile and make for a truly luxurious experience.
Storage and Shelf Life
Proper storage is key to maintaining the freshness of your brownies. To keep them at their best, store the cooled brownies in an airtight container at room temperature for up to three days. If you want to extend their shelf life, you can refrigerate them, where they will stay fresh for about a week.
If you want to save them for later, freezing is an excellent option. To freeze your brownies, first ensure they are completely cooled. Cut them into squares and wrap each piece tightly in plastic wrap, then place them in a freezer-safe bag or container. They can be frozen for up to three months. When you’re ready to enjoy them, simply thaw them at room temperature for a few hours or warm them gently in the microwave for a few seconds.
Conclusion
Making White Chocolate Bliss Brownies is not just about baking; it’s about creating an indulgent experience that you and your loved ones can enjoy. From the delightful aroma filling your kitchen to the first bite of a fudgy, rich brownie, the entire process is a joy. We encourage you to try this recipe and explore variations, whether it’s adding different mix-ins or experimenting with other flavoring options.
Baking is a wonderful way to share love and happiness with those around you. Each batch of brownies can foster connections, spark joy, and create lasting memories. So gather your ingredients, don your apron, and enjoy the delightful process of making and sharing these White Chocolate Bliss Brownies. Happy baking!