

Bite-Sized Bliss: The Perfect Crunch and Juicy Flavor in Every Nugget
—
Introduction
The first time I made Crunchy Panko Chicken Nuggets, I found myself standing in the kitchen with a flurry of memories swirling around me. It was a chilly autumn afternoon, the air tinged with the warm scent of frying chicken, wrapping around me like a cozy blanket. As I prepared my ingredients, I could hear the soft crackle of the oil heating up and the rhythmic thud of my knife as I cut the chicken into bite-sized pieces. The vibrant colors of the panko breadcrumbs and the spices made it feel like I was preparing a small celebration in my kitchen.
Growing up, chicken nuggets were a staple in our household, but they mostly came from a box. I remember the convenience they offered, but the joy of making them from scratch was a revelation. The moment I pressed each nugget into the panko, feeling the delicate crunch beneath my fingertips, I knew this was going to be special. The anticipation built as I placed the nuggets in the hot oil, the sound of sizzling filling the room and mingling with the mouthwatering aroma.
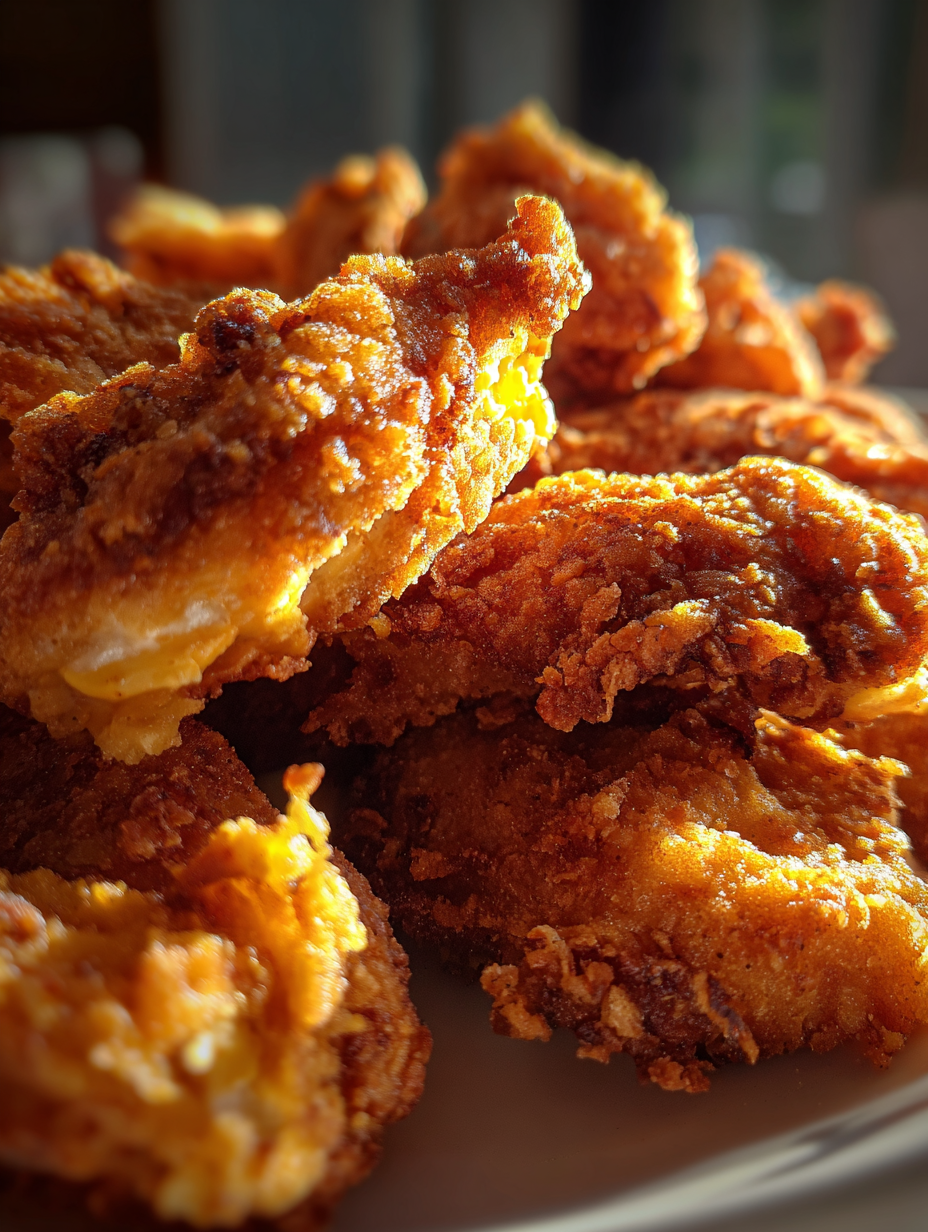
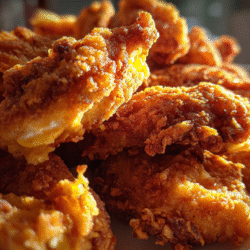
As the golden-brown nuggets emerged from the skillet, I couldn’t help but sneak a taste. The contrast of the crispy exterior and the juicy chicken inside was a revelation. Dipped in my favorite honey mustard sauce, it felt like a warm hug at the end of a long day. From that moment, these crunchy panko chicken nuggets became a beloved recipe in my family, perfect for dinner or a gathering with friends. Now, I can’t wait for you to experience the delight and satisfaction of making these nuggets from scratch in your own kitchen.
—
Why This Recipe Works
The magic of Crunchy Panko Chicken Nuggets lies in the harmonious blend of flavors and textures that come together in each bite. At the heart of this recipe is the panko breadcrumbs, which are coarser and flakier than traditional breadcrumbs, creating that irresistible crunch you crave. This light texture allows the nuggets to crisp up beautifully in the oil, giving you that satisfying crunch with every bite.
When you season the flour with garlic powder, onion powder, and paprika, you infuse the chicken with a depth of flavor that keeps it from being bland. The salt and black pepper enhance every other ingredient, ensuring that each nugget is seasoned to perfection. Meanwhile, the eggs act as a glue—a binder that helps the breadcrumbs adhere to the chicken, creating an even coating that locks in moisture during frying.
One of the standout features of this recipe is the straightforward yet effective breading technique. Dredging the chicken in flour first helps to absorb excess moisture, allowing the egg wash to cling better. This results in a thicker, crunchier crust that doesn’t fall off during cooking, an issue often seen with generic frozen nuggets.
What sets this recipe apart from store-bought versions is the freshness and quality of ingredients. You have full control over what goes into your nuggets, allowing you to customize the seasonings to suit your taste. Plus, there’s something incredibly satisfying about creating a dish from scratch, transforming simple chicken and breadcrumbs into a culinary masterpiece.
—
What Makes It Special
These Crunchy Panko Chicken Nuggets offer several unique qualities that elevate them above the average nugget. First and foremost, the panko breadcrumbs provide a texture that is both light and crunchy, a feature that is often missing in pre-packaged options. Unlike the heavy, soggy breading found in many fast-food nuggets, these nuggets deliver a delightful crunch that perfectly complements the juicy chicken inside.
Making these nuggets at home also grants you the benefit of freshness. You can customize the seasoning and make them as spicy or mild as you like. This is a far cry from the often generic flavors found in store-bought versions. Plus, you can experiment with different dipping sauces, whether it’s a tangy BBQ sauce, a creamy ranch dressing, or even a sweet-and-spicy honey mustard.
One surprising element that elevates this recipe is the option to marinate your chicken in buttermilk before breading. This not only tenderizes the meat but also adds an extra layer of flavor that you won’t find in store-bought nuggets. It’s these little touches that transform a simple recipe into something truly special, allowing you to savor not just the taste but the experience of cooking and sharing this dish with loved ones.
—
Ingredient Breakdown
When you gather the ingredients for your Crunchy Panko Chicken Nuggets, each plays a vital role in creating that perfect balance of flavor and texture. Here’s a breakdown of what you’ll need:
– Boneless Skinless Chicken Breasts (1 pound): The star of the show, chicken breasts provide a lean protein base that is juicy and tender when cooked properly. Cutting them into bite-sized pieces ensures even cooking and easy handling for dipping.
– All-Purpose Flour (1 cup): This acts as the first layer in the breading process. The flour not only helps the egg wash stick but also absorbs moisture from the chicken, allowing for a crispier finish.
– Large Eggs (2, beaten): Serving as a binding agent, the beaten eggs help the panko adhere to the chicken. This is crucial for achieving that golden-brown crust you desire.
– Panko Breadcrumbs (1 cup): These Japanese-style breadcrumbs are key to achieving a superior crunch. They are coarser than regular breadcrumbs, allowing for better air circulation during frying, which results in a wonderfully crispy exterior.
– Garlic Powder (1/2 teaspoon): This adds a depth of flavor, enriching the chicken with a savory undertone that pairs beautifully with the other seasonings.
– Onion Powder (1/2 teaspoon): Like garlic powder, onion powder enhances the overall taste profile, providing a subtle sweetness that balances the seasonings.
– Paprika (1 teaspoon): This spice adds not only flavor but also a pop of color to the nuggets. It contributes a slight smokiness that elevates the dish.
– Salt (1 teaspoon): Essential for enhancing the flavors of the chicken and ensuring that the nuggets are well-seasoned. Adjust to taste based on your preferences.
– Black Pepper (1/2 teaspoon): A classic seasoning that adds warmth and a bit of spice to the nuggets.
– Vegetable Oil (1/4 cup): Used for frying, this oil should have a high smoke point, making it ideal for achieving that crispy texture without burning.
For those with dietary restrictions, here are some substitution options:
– Dairy-Free: Use a plant-based milk in place of buttermilk for marinating and consider using a dairy-free egg substitute for breading.
– Gluten-Free: Substitute all-purpose flour with a gluten-free flour blend and use gluten-free panko breadcrumbs.
– Vegan: Use tofu or tempeh in place of chicken and substitute eggs with a flax or chia seed mixture for binding.
If you’re looking for panko breadcrumbs or specialty spices, many grocery stores carry them in the international aisle or you can find them in Asian markets.
—
Equipment Needed
To bring your Crunchy Panko Chicken Nuggets to life, you’ll need a few essential tools that will make the process smooth and enjoyable:
– Sharp Knife: A good knife is essential for cutting the chicken breast into uniform pieces. This ensures even cooking and helps maintain that perfect bite-sized shape.
– Cutting Board: A sturdy cutting board provides a safe surface for preparing your chicken and other ingredients.
– Three Shallow Dishes: These are necessary for setting up your breading station. Shallow dishes make it easier to dredge and coat the chicken evenly.
– Large Skillet or Frying Pan: A heavy-bottomed skillet is perfect for frying, as it distributes heat evenly, helping you achieve that golden-brown crust.
– Slotted Spoon or Tongs: These tools are essential for safely flipping the nuggets in the hot oil and transferring them out once cooked.
– Paper Towels: Have these on hand to absorb excess oil after frying, ensuring your nuggets are crispy and not greasy.
Optional tools that can enhance your experience include a deep-fry thermometer to monitor oil temperature for precise frying, and a wire rack for cooling the nuggets, allowing air to circulate around them for extra crispiness.
While many of these tools can be found in most kitchens, don’t hesitate to get creative with alternatives. For example, if you don’t have a slotted spoon, a regular spoon can work just fine for removing the nuggets from the oil.
—
With these sections complete, you’re well on your way to mastering the art of Crunchy Panko Chicken Nuggets from Scratch! Your taste buds will thank you as you embark on this culinary adventure.
Step-by-Step Instructions
1. Prepare the Chicken
Start by taking your 1 pound of boneless, skinless chicken breasts. With a sharp knife, cut them into bite-sized pieces — about 1 to 1.5 inches. This size not only helps them cook evenly but also makes them perfect for dipping. As you cut, listen for that satisfying crunch of the knife slicing through the meat. You’ll want to ensure all pieces are uniform to achieve consistent cooking.
2. Set Up Your Breading Station
To create a smooth workflow, set up a breading station. In one shallow dish, combine 1 cup of all-purpose flour with 1 teaspoon salt, 1/2 teaspoon black pepper, 1/2 teaspoon garlic powder, 1/2 teaspoon onion powder, and 1 teaspoon paprika. Mix well using a fork. In a second dish, beat 2 large eggs until they are smooth and slightly frothy. In a third dish, pour 1 cup of panko breadcrumbs. The panko is key for that extra crunch, so make sure to choose the Japanese-style variety. Chef’s Note: Having everything ready will make the breading process quicker and less messy.
3. Dredge the Chicken Nuggets
Take one chicken piece and coast it in the flour mixture, shaking off any excess. Then, dip it into the beaten eggs, ensuring every surface is covered. Finally, roll it in the panko breadcrumbs, pressing gently to help them stick. Repeat this process for each nugget. You should hear a light crunch as the panko adheres, signaling that you’re on the right track. Chef’s Note: For a thicker coating, you can repeat the egg and panko steps.
4. Heat the Oil
In a large skillet, pour in 1/4 cup of vegetable oil and heat it over medium-high heat. To know when the oil is ready, sprinkle a few breadcrumbs into the pan; if they sizzle, it’s time to fry. You want the oil hot enough that the nuggets will crisp up but not so hot that they burn.
5. Fry the Nuggets
Carefully add the breaded chicken nuggets to the hot oil in batches, ensuring they don’t overcrowd the pan. This is crucial — too many nuggets at once will lower the oil temperature and lead to soggy nuggets. Fry for about 4-5 minutes on each side, or until they turn a gorgeous golden brown. You’ll know they’re ready when they float slightly and are beautifully crisp.
6. Drain and Serve
Using a slotted spoon, gently transfer the cooked nuggets to a plate lined with paper towels. This will absorb any excess oil, keeping them light and crispy. Allow them to rest for a few minutes — this lets the temperature even out, making them easier to eat. As the nuggets cool, the aroma of the spices will fill your kitchen, tempting everyone to gather around. Serve them warm with your favorite dipping sauces like honey mustard, ranch, or BBQ sauce.
Pro Tips for the Best Results
1. Use a Meat Thermometer
To ensure your chicken nuggets are safely cooked, use a meat thermometer. Chicken should reach an internal temperature of 165°F. This prevents undercooking and ensures juiciness and safety.
2. Opt for Fresh Breadcrumbs
For the best texture, consider making your own panko breadcrumbs from stale bread. Pulse it in a food processor until the crumbs are coarse and fluffy, giving your nuggets an even better crunch.
3. Double Fry for Extra Crunch
For an extra crispy exterior, consider double frying the nuggets. After the first fry, let them rest for a minute, then return them to the hot oil for an additional minute. This technique will take them to the next level of crispiness.
4. Control the Heat Carefully
If the oil starts to smoke, it’s too hot. Reduce the heat immediately to avoid burning the nuggets. Maintaining the right oil temperature is crucial for achieving that perfect crunchy exterior while keeping the chicken juicy inside.
5. Resting Period for Breading
After breading the nuggets, let them sit for about 10 minutes before frying. This allows the coating to adhere better during cooking, leading to a more uniform crunch.
6. Experiment with Seasonings
Don’t be afraid to get creative with your spices. Adding a pinch of cayenne pepper for heat or some Italian seasoning for an herbaceous twist can make these nuggets uniquely yours.
7. Use the Right Pan
A cast-iron skillet or a heavy-bottomed pan retains heat better than a lightweight pan, leading to more evenly cooked nuggets. If you have one, it’s worth using for frying.
Common Mistakes to Avoid
1. Overcrowding the Pan
Adding too many nuggets at once can lower the oil temperature drastically, resulting in soggy nuggets instead of crispy ones. Always fry in small batches to maintain consistent heat.
2. Skipping the Flour Step
Dipping the chicken directly into the egg without the flour coating will lead to the panko falling off during cooking. The flour acts as a glue for the egg and panko, ensuring a well-adhered crust.
3. Not Preheating the Oil
If you add the nuggets before the oil is hot enough, they’ll absorb too much oil, leading to greasy, unappetizing nuggets. Always check that the oil is hot enough by dropping in a breadcrumb first.
4. Using Wet Chicken
If your chicken is wet, the flour won’t stick properly, leading to uneven coating. Pat the chicken dry with paper towels before breading for the best results.
5. Not Seasoning the Flour
Failing to season your flour mixture will result in bland nuggets. Always season the flour liberally to infuse the chicken with flavor from the inside out.
6. Skipping the Letting Time
Immediately frying the breaded nuggets can cause the coating to slide off. Let them rest for a few minutes before frying to ensure the breading adheres properly.
7. Not Letting Nuggets Rest After Frying
Eating the nuggets right after frying might result in a burnt tongue and chewy texture. Let them rest so that the steam can escape and the crust stays crisp.
Creative Variations
1. Seasonal Variation
For a fresh twist, incorporate seasonal herbs like rosemary or thyme into your flour mixture. This will add a fragrant touch to your chicken nuggets, making them perfect for serving with a light salad in the spring or summer.
2. Dietary-Friendly Version
To create a gluten-free version, substitute the all-purpose flour with almond flour or a gluten-free flour blend. Use gluten-free panko breadcrumbs to keep that satisfying crunch while catering to dietary needs.
3. Gourmet Elevated Version
Upgrade your nuggets by adding finely grated Parmesan cheese to the panko breadcrumb mixture. This will lend a rich, savory flavor and an even more delightful crunch, giving your nuggets a touch of gourmet elegance.
4. Quick 15-Minute Version
For a super quick meal, use frozen, pre-breaded chicken nuggets instead of making them from scratch. Just bake or fry according to the package instructions. Pair with fresh-cut veggies and a vibrant dipping sauce for a speedy dinner.
5. Kid-Friendly Version
For picky eaters, skip the spices in the flour mixture and coat the nuggets simply with flour and panko. Serve with classic ketchup or honey as a dipping sauce, guaranteeing a hit with children.
6. International Twist
For an Asian-inspired take, mix sesame seeds into the panko breadcrumbs and serve the nuggets with a sweet chili dipping sauce. This adds a delightful crunch and a hint of nutty flavor that pairs beautifully with the chicken.
Serving Ideas
When it comes to presenting your Crunchy Panko Chicken Nuggets, think vibrant colors and inviting textures to make your dish truly shine. Here are a few creative plating ideas:
1. Colorful Dipping Station: Arrange your nuggets on a large, white platter with small bowls of dipping sauces like honey mustard, BBQ sauce, and ranch dressing. Garnish each bowl with a sprinkle of fresh herbs, like parsley or chives, for a pop of color.
2. Bento Box Style: For a fun twist, create a bento box by placing nuggets in one compartment and pairing them with sliced cucumbers, cherry tomatoes, and carrot sticks in another. This adds a healthy crunch and vibrant colors to your presentation.
3. Skewered Nuggets: Thread the chicken nuggets onto skewers for a playful presentation. Serve them upright in a mason jar filled with a bit of rice or beans, garnished with a sprig of fresh parsley for an appealing rustic touch.
4. Elegant Plating with Greens: Place your nuggets on a bed of mixed greens, such as arugula and spinach, and drizzle with a light vinaigrette. This adds freshness and showcases the golden nuggets beautifully.
5. Mini Slider Buns: For a fun twist, serve nuggets in small slider buns with a dollop of coleslaw and pickles. You can garnish with toothpicks adorned with colorful flags for a festive touch.
Each serving should consist of about 4-5 nuggets, ensuring each guest gets a satisfying portion while preserving the visual appeal. Your plating choices not only elevate the meal but also excite the palate before the first bite!
What to Serve With
Pairing your Crunchy Panko Chicken Nuggets with complementary dishes will enhance the overall dining experience. Here are several delightful suggestions:
1. Sweet Potato Fries: The sweetness of sweet potato fries contrasts beautifully with the savory nuggets, adding a nutritious twist. Their crispiness complements the crunch of the nuggets, making for a satisfying bite.
2. Coleslaw: A creamy coleslaw with a tangy dressing balances the richness of the fried nuggets. The cold, crunchy texture provides a refreshing contrast, making each bite feel lighter.
3. Apple Slices with Nut Butter: For a fun and healthy dessert option, serve apple slices drizzled with nut butter. The fruity sweetness paired with the nutty flavor provides a perfect end note to the meal.
4. Lemonade or Iced Tea: Quench your thirst with a refreshing glass of homemade lemonade or iced tea. The zesty citrus notes in the lemonade or the subtle sweetness of iced tea will elevate the overall flavor profile of your meal.
5. Vegetable Skewers: Grilled vegetable skewers with bell peppers, zucchini, and cherry tomatoes add a colorful and healthy touch to your dinner. Their charred flavor pairs wonderfully with the crispy chicken.
6. Chocolate Chip Cookies: For dessert, serve warm chocolate chip cookies. Their gooeyness and sweetness create a delightful contrast to the savory nuggets, rounding off the meal perfectly.
These pairings not only enhance flavor but also create a balanced meal that appeals to all ages, ensuring your crunchy nuggets are the highlight of the dining experience.
Storage Guide
To store leftover Crunchy Panko Chicken Nuggets properly, follow these steps to maintain their flavor and texture:
– Container: Use an airtight container made of glass or BPA-free plastic. This helps keep moisture out while preserving the crunchiness of the coating.
– Temperature: Store the nuggets in the refrigerator at a temperature of 40°F (4°C) or below. This ensures the chicken remains fresh without compromising safety.
– Shelf Life: The nuggets can be kept in the fridge for up to 2 days. After that, the quality may decline, and you might notice changes in texture and flavor.
– Signs of Spoilage: Check for any off smells, changes in color, or a slimy texture, which indicate that the nuggets have gone bad. When in doubt, it’s better to err on the side of caution.
– Refreshing Before Serving: To restore freshness, consider reheating them in the oven at 375°F (190°C) for about 10-15 minutes. This will help re-crisp the coating while warming the chicken through. A light spray of oil before reheating can also help regain that crunchy texture.
Following these guidelines will ensure your homemade nuggets stay delicious, making them a great option for meal prep or quick snacks!
Freezing Tips
Yes, your Crunchy Panko Chicken Nuggets freeze remarkably well! Here’s how to do it without sacrificing quality:
– Portioning: Allow the cooked nuggets to cool completely. Once cooled, arrange them in a single layer on a baking sheet and freeze until solid. This prevents them from sticking together.
– Wrapping Method: After freezing, transfer the nuggets to a freezer-safe container or a resealable plastic bag. Make sure to remove as much air as possible before sealing. Alternatively, wrap each nugget in plastic wrap before placing them in the bag for extra protection.
– Labeling: Don’t forget to label your container or bag with the date and contents. This helps you keep track of how long they’ve been stored.
– Shelf Life: When properly stored, the nuggets can be kept in the freezer for up to 3 months.
– Quality Changes: While they maintain flavor, you might notice a slight change in texture after thawing. However, they will still be delicious when reheated properly.
– Best Thawing Method: To thaw, place the nuggets in the refrigerator overnight before reheating. This gentle method helps preserve their texture and prevents them from becoming mushy.
By following these steps, you can enjoy your homemade nuggets even weeks later!
Reheating Guide
Here are some specific reheating methods to bring back the crispiness of your Crunchy Panko Chicken Nuggets:
– Microwave: Place the nuggets on a microwave-safe plate. Heat at medium power (50-70%) for about 1-2 minutes. To prevent them from drying out, cover the plate with a damp paper towel. This helps maintain moisture while heating.
– Oven: Preheat your oven to 375°F (190°C). Arrange the nuggets in a single layer on a baking sheet. Cover with aluminum foil to lock in moisture, and heat for about 10-15 minutes. Remove the foil for the last 5 minutes to allow the coating to crisp up.
– Stovetop: Heat a skillet over medium heat and add a splash of oil to coat the bottom. Add the nuggets and heat for about 5-7 minutes, turning occasionally. This will help restore crispness while warming them through. Consider adding a splash of water and covering the skillet for the first few minutes to ensure they heat evenly.
– Restoring Texture and Flavor: No matter which reheating method you choose, sprinkle a little salt or your favorite seasoning after reheating to enhance the flavor.
These reheating methods will keep your nuggets tasting freshly made and delicious!
Nutrition Overview
Each serving of Crunchy Panko Chicken Nuggets offers approximately:
– Calories: 300
– Protein: 25g
– Carbohydrates: 30g
– Fat: 12g
– Fiber: 1g
– Sugar: 1g
These nuggets are not only tasty but also pack a protein punch, making them a fulfilling option. Chicken breast is an excellent source of lean protein that supports muscle health and keeps you feeling full longer. Panko breadcrumbs, made from crustless bread, add a satisfying crunch while being lighter than traditional breadcrumbs. Finally, the spices like paprika and garlic powder not only enhance flavor but also provide antioxidant properties that benefit your overall health. Enjoy these nuggets guilt-free knowing they provide nourishing ingredients!
Frequently Asked Questions
Q: Can I use chicken thighs instead of chicken breasts?
A: Absolutely! Chicken thighs offer a bit more fat and flavor, resulting in extra juicy nuggets. Just ensure they are boneless and skinless for the best results.
Q: Can I make these nuggets gluten-free?
A: Yes, you can substitute the all-purpose flour with a gluten-free flour blend and use gluten-free panko breadcrumbs. This way, you can enjoy the same delicious crunch without gluten.
Q: How do I prevent the nuggets from becoming soggy after frying?
A: Make sure to fry in batches without overcrowding the pan, and allow them to drain on paper towels to absorb excess oil. This helps retain their crunch.
Q: Can I prepare the chicken nuggets ahead of time?
A: Yes, you can bread the chicken nuggets and store them in the refrigerator for a few hours before frying. This allows the coating to adhere better during cooking.
Q: What dipping sauces work best with these nuggets?
A: Classic options include honey mustard, BBQ sauce, ranch dressing, or even a spicy sriracha mayo for those who enjoy a kick! Feel free to get creative with your favorite sauces.
Q: How can I make these nuggets healthier?
A: You can bake the nuggets instead of frying them. Arrange them on a baking sheet, spray lightly with cooking oil, and bake at 400°F (200°C) for about 15-20 minutes, flipping halfway through for even cooking.
Q: How do I know when the chicken is cooked through?
A: The internal temperature of the chicken should reach 165°F (74°C). Use a meat thermometer for the most accurate reading.
Q: Can I use this recipe for meal prep?
A: Definitely! These nuggets are great for meal prep. Just store them in airtight containers in the fridge or freezer, and reheat as needed.
Final Thoughts
Making your own Crunchy Panko Chicken Nuggets from scratch is not just rewarding; it’s a delightful way to bring joy to your kitchen. Remember, the key to that satisfying crunch lies in the panko breadcrumbs and the careful frying technique. Your family and friends will appreciate the love and effort you’ve put into crafting these homemade nuggets.
I can’t wait for you to try this recipe and see how it brings smiles around your dinner table! Share your results and thoughts, and don’t forget to experiment with your favorite dips. Now, roll up your sleeves, gather your ingredients, and let’s make something delicious together!
Crunchy Panko Chicken Nuggets from Scratch 🍗🥢
Ingredients
- 1 pound boneless skinless chicken breasts cut into bite-sized pieces
- 1 cup all-purpose flour for dredging
- 2 large eggs beaten
- 1 cup panko breadcrumbs Japanese-style breadcrumbs for extra crunch
- 1/2 teaspoon garlic powder
- 1/2 teaspoon onion powder
- 1 teaspoon paprika
- 1 teaspoon salt adjust to taste
- 1/2 teaspoon black pepper adjust to taste
- 1/4 cup vegetable oil for frying
Instructions
- Begin by preparing the chicken pieces. Cut the boneless skinless chicken breasts into bite-sized nuggets, ensuring uniform size for even cooking.
- Set up your breading station: in one shallow dish, place the all-purpose flour seasoned with salt, black pepper, garlic powder, onion powder, and paprika. In a second dish, pour in the beaten eggs, and in a third dish, pour the panko breadcrumbs.
- Dredge each chicken nugget first in the flour mixture, shaking off any excess, then dip into the beaten eggs, and finally coat thoroughly with panko breadcrumbs, pressing gently to adhere.
- Heat the vegetable oil in a large skillet over medium-high heat. Once hot, carefully add the breaded chicken nuggets in batches, ensuring not to overcrowd the pan. Fry for about 4-5 minutes on each side or until golden brown and cooked through.
- Using a slotted spoon, transfer the cooked nuggets to a plate lined with paper towels to absorb excess oil. Allow them to rest for a few minutes before serving.
- Serve the crunchy panko chicken nuggets with your favorite dipping sauce, such as honey mustard, BBQ sauce, or ranch dressing for an extra burst of flavor.
Notes
Tip 2: Store leftovers in an airtight container in the refrigerator for up to 2 days.
Variation: Try adding grated Parmesan cheese to the panko for a cheesy twist.