Follow Me On Pinterest!


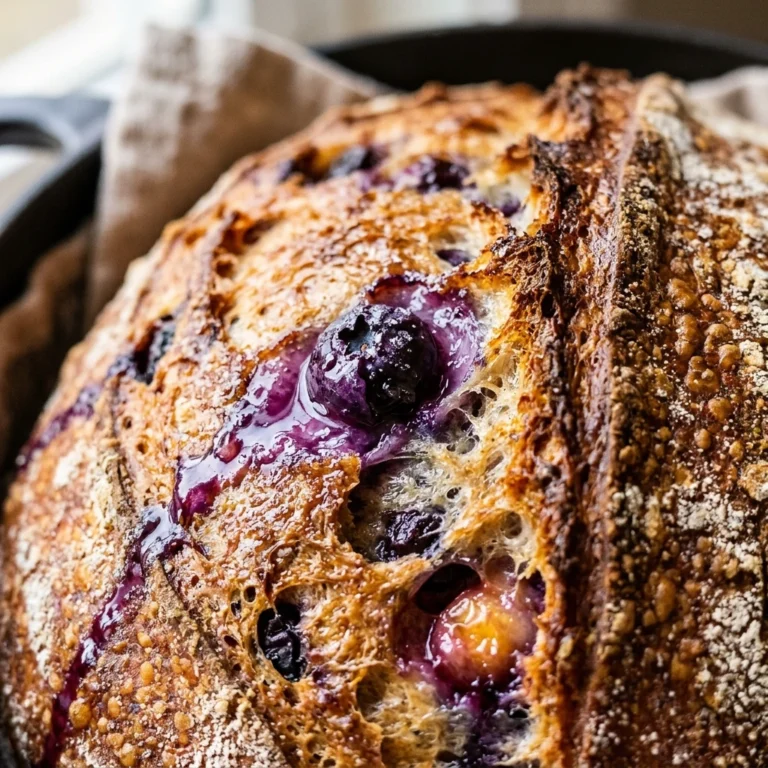
Imagine the aroma of freshly baked bread mingling with the sweet scent of bursting blueberries wafting through your kitchen. This No-Knead Dutch Oven Blueberry Bread is a game-changer for anyone who thinks baking artisan bread is too difficult. You don’t need a fancy stand mixer or incredible upper-body strength for kneading. With just a few basic ingredients and a little bit of patience, you can create a loaf with a crackly, golden crust and a soft, pillowy interior studded with juicy fruit. It is the perfect beginner-friendly recipe that delivers bakery-quality results every single time.
Recipe Information
- Prep Time: 15 minutes (plus 12–18 hours rising time)
- Cook Time: 45 minutes
- Total Time: 19 hours 0 minutes
- Servings: 10 servings
- Difficulty: Easy
Nutrition values
- Calories: 215 kcal
- Protein: 5g
- Carbs: 44g
Why Make This No-Knead Dutch Oven Blueberry Bread Easy Sweet Beginner
This recipe is the ultimate confidence booster for new bakers. Because it uses the “no-knead” method, the gluten develops naturally over time, saving you from the messy work of hand-kneading. The Dutch oven acts like a professional steam oven, trapping moisture to create that iconic crispy crust. It’s a versatile loaf that works just as well for a decadent breakfast toast as it does for a sweet afternoon snack. Plus, using simple pantry staples makes it an affordable way to impress your friends and family.
Ingredients
- 3 cups all-purpose flour (plus extra for dusting)
- 1 ½ cups warm water (about 100°F)
- 1 teaspoon active dry yeast
- 1 ½ teaspoons salt
- 2 tablespoons granulated sugar
- 1 cup fresh blueberries (frozen works too, do not thaw)
- 1 tablespoon cornstarch (to coat the berries)
- Optional: Zest of one lemon for a citrus kick
Directions
Step 1: Mix the Dough
In a large mixing bowl, whisk together the flour, yeast, salt, and sugar. Slowly pour in the warm water. Use a wooden spoon or a sturdy spatula to stir the mixture until a shaggy, sticky ball forms. Ensure there are no large pockets of dry flour left at the bottom of the bowl. The dough will look messy, but that is exactly what you want.
Step 2: The Long Rise
Cover the bowl tightly with plastic wrap or a damp kitchen towel. Place it in a warm, draft-free spot in your kitchen. Let the dough rest for at least 12 hours, though 18 hours is even better for flavor development. During this time, the dough will double in size and become dotted with little air bubbles.
Step 3: Incorporate the Blueberries
In a small bowl, toss your blueberries with the cornstarch; this prevents them from sinking or bleeding too much into the dough. Gently fold the blueberries (and lemon zest, if using) into the risen dough. Try not to overwork the dough or pop too many bubbles. Flour your hands and a work surface, then briefly shape the dough into a rough ball.
Step 4: Preheat the Dutch Oven
Place your empty Dutch oven (with the lid on) into the oven. Preheat the oven to 450°F (230°C). Let the pot heat up for at least 30 minutes. This high heat is the secret to getting a thick, crunchy crust.
Step 5: Baking the Bread
Carefully remove the hot Dutch oven from the oven. Place a piece of parchment paper on the counter, put your dough ball in the center, and lift the parchment paper to drop the dough into the hot pot. Cover with the lid and bake for 30 minutes. After 30 minutes, remove the lid and bake for another 15 minutes to brown the top.
Step 6: Cooling and Slicing
Carefully lift the bread out of the Dutch oven using the parchment paper. Place the loaf on a wire cooling rack. It is tempting to slice it immediately, but you must wait at least 30–60 minutes. The bread continues to “cook” on the inside as it cools, and slicing too early can result in a gummy texture.
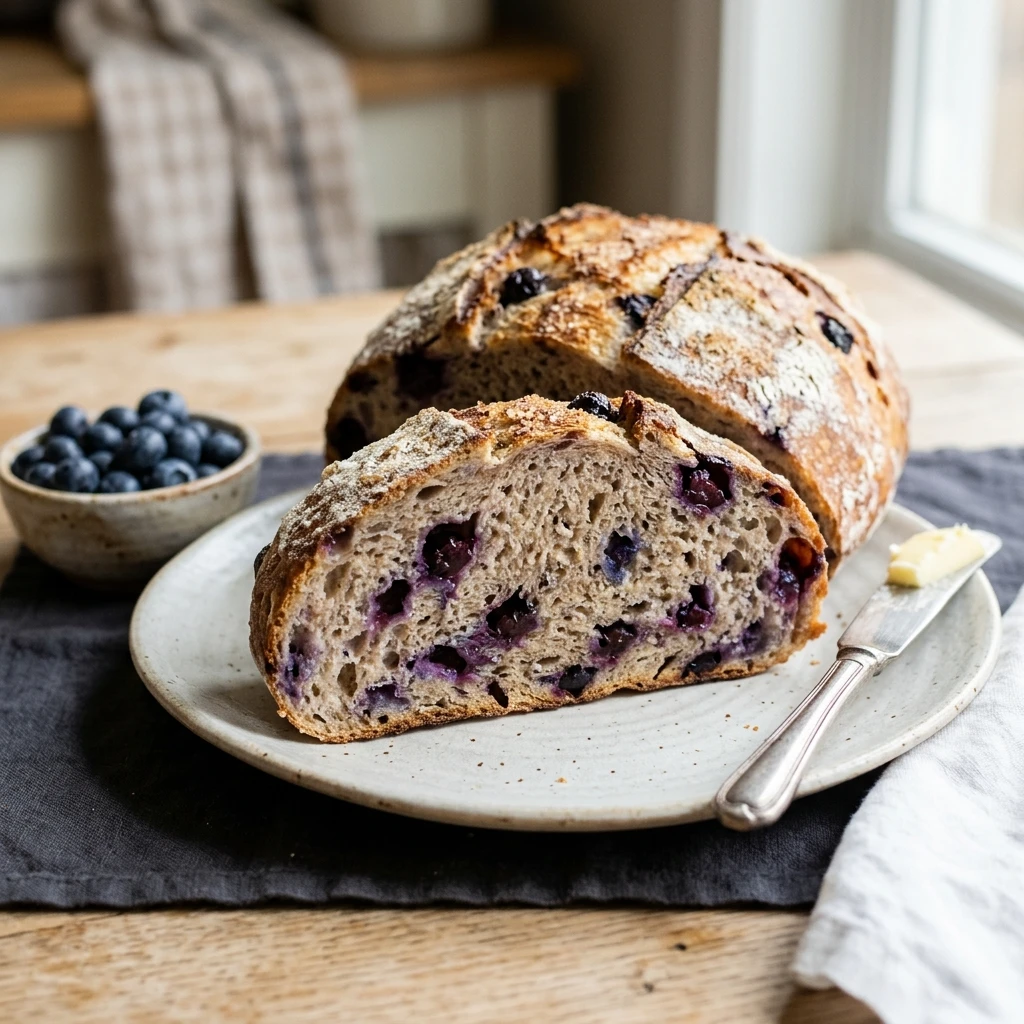
Expert Tips for Perfect No-Knead Dutch Oven Blueberry Bread Easy Sweet Beginner
- Check your yeast: Make sure your yeast is fresh. If the water doesn’t look slightly foamy after mixing, your yeast might be dead.
- Don’t skip the cornstarch: Tossing the berries in cornstarch or a little flour helps them stay suspended in the dough rather than settling at the bottom.
- Use parchment paper: It makes transferring the sticky dough into a screaming hot pot much safer and prevents sticking.
- Watch the water temperature: If the water is too hot, it will kill the yeast. If it’s too cold, it won’t activate. Think of “baby bath water” temperature.
Delicious Variations
- Lemon Blueberry: Add 1 tablespoon of fresh lemon zest and a teaspoon of lemon extract for a bright, summery flavor.
- Cinnamon Swirl: Mix 1 tablespoon of cinnamon into the dry ingredients for a warm, spiced aroma.
- Blueberry Walnut: Add ½ cup of chopped walnuts during Step 3 for an added earthy crunch.
- Honey Glazed: Brush the warm crust with a mixture of melted butter and honey as soon as it comes out of the oven.
Frequently Asked Questions
Can I use frozen blueberries instead of fresh?
Yes, frozen blueberries work perfectly! Do not thaw them before adding to the dough, as this will turn your entire loaf purple. Toss them in cornstarch while frozen and fold them in quickly.
What if I don’t have a Dutch oven?
You can use a heavy oven-safe pot with a tight-fitting lid, like a Pyrex casserole dish. The key is having a lid that traps steam. Results may vary slightly in texture, but it will still be delicious.
Can I make this bread faster?
While the long rise creates the best flavor, you can increase the yeast to 2 teaspoons and let it rise in a very warm spot for 2–3 hours. The texture will be slightly denser, but it still works in a pinch.
How do I store this bread?
Store the bread at room temperature in a paper bag or a loosely closed plastic bag for up to 2 days. For longer storage, slice the bread and freeze it in a freezer-safe bag. Toast slices directly from the freezer.
Why is my crust not crispy?
Usually, this happens if the Dutch oven wasn’t preheated long enough or if the lid wasn’t tight. Make sure your oven reaches the full 450°F before putting the dough in.
Conclusion
Baking your first loaf of artisan bread doesn’t have to be intimidating. This No-Knead Dutch Oven Blueberry Bread is the perfect entry point for any beginner. It requires minimal active work but rewards you with a beautiful, fragrant, and delicious loaf that looks like it came from a high-end bakery. Whether you slather a slice in butter or eat it plain, you’ll be amazed at what you can create with just a pot and a little time. Happy baking!
No-Knead Dutch Oven Blueberry Bread Easy Sweet Beginner
- Total Time: 19 hours
- Diet: Vegetarian
Ingredients
Scale
- 3 cups all-purpose flour (plus extra for dusting)
- 1 ½ cups warm water (about 100°F)
- 1 teaspoon active dry yeast
- 1 ½ teaspoons salt
- 2 tablespoons granulated sugar
- 1 cup fresh blueberries (frozen works too, do not thaw)
- 1 tablespoon cornstarch (to coat the berries)
- Optional: Zest of one lemon for a citrus kick
Instructions
- In a large mixing bowl, whisk together the flour, yeast, salt, and sugar. Slowly pour in the warm water. Use a wooden spoon or a sturdy spatula to stir the mixture until a shaggy, sticky ball forms. Ensure there are no large pockets of dry flour left at the bottom of the bowl. The dough will look messy, but that is exactly what you want.
- Cover the bowl tightly with plastic wrap or a damp kitchen towel. Place it in a warm, draft-free spot in your kitchen. Let the dough rest for at least 12 hours, though 18 hours is even better for flavor development. During this time, the dough will double in size and become dotted with little air bubbles.
- In a small bowl, toss your blueberries with the cornstarch; this prevents them from sinking or bleeding too much into the dough. Gently fold the blueberries (and lemon zest, if using) into the risen dough. Try not to overwork the dough or pop too many bubbles. Flour your hands and a work surface, then briefly shape the dough into a rough ball.
- Place your empty Dutch oven (with the lid on) into the oven. Preheat the oven to 450°F (230°C). Let the pot heat up for at least 30 minutes. This high heat is the secret to getting a thick, crunchy crust.
- Carefully remove the hot Dutch oven from the oven. Place a piece of parchment paper on the counter, put your dough ball in the center, and lift the parchment paper to drop the dough into the hot pot. Cover with the lid and bake for 30 minutes. After 30 minutes, remove the lid and bake for another 15 minutes to brown the top.
- Carefully lift the bread out of the Dutch oven using the parchment paper. Place the loaf on a wire cooling rack. It is tempting to slice it immediately, but you must wait at least 30–60 minutes. The bread continues to “cook” on the inside as it cools, and slicing too early can result in a gummy texture.
- Cook Time: 19 hours 0 minutes