Follow Me On Pinterest!



Vegan Banana Bread: A Slice of Nostalgia
Introduction
There’s something undeniably comforting about the aroma of freshly baked banana bread wafting through your kitchen. It reminds me of cozy mornings at my grandmother’s house, where the sun would peek through the curtains, casting warm golden rays on the wooden table. I can still hear the soft hum of her favorite radio station in the background, blending with the gentle sounds of birds chirping outside. My grandmother would often whip up her famous banana bread, a delightful treat that brought the family together around the breakfast table.
As a child, I would sit on a stool, my legs swinging back and forth, eagerly awaiting a slice, slathered with a generous pat of vegan butter. The moist texture and the rich, sweet banana flavor felt like a warm hug on a chilly morning. It was during these moments that I developed a deep love for this simple yet satisfying dish.
Fast forward to today, and I’m proud to say that I’ve created my own version of this cherished recipe, one that is entirely vegan and just as scrumptious. The secret lies in using ripe bananas and a few clever substitutions that maintain the classic flavors without any animal products. Whether you’re looking for a quick snack or a delicious breakfast, this Vegan Banana Bread is a perfect fit for any occasion.
The best part? It’s incredibly easy to prepare, allowing you to recreate those sweet childhood memories in your own home. So roll up your sleeves, grab those overripe bananas sitting on your counter, and let’s dive into this delightful recipe together!
Why This Recipe Works
This Vegan Banana Bread is not just a tasty treat; it’s a beautifully balanced recipe that harnesses the natural sweetness and moisture from its key ingredients. The foundation of this bread is, of course, the ripe bananas. As they ripen, they become sweeter and softer, making them perfect for baking. The natural sugars in the bananas provide a depth of flavor that’s hard to replicate with refined sugars alone.
Next, we introduce unsweetened applesauce as a substitute for eggs. This clever swap not only keeps our recipe vegan but also adds a delightful moisture content that results in a soft, tender crumb. The plant-based milk further enhances the bread’s moistness, allowing the flavors to meld beautifully.
The combination of all-purpose flour and baking soda ensures a perfect rise, while the pinch of salt balances out the sweetness, creating a harmonious flavor profile. What sets this recipe apart is the method: the wet and dry ingredients are combined gently, just enough to mix, which prevents the bread from becoming dense and chewy.
By using simple, wholesome ingredients, this Vegan Banana Bread remains reliable and forgiving, making it an ideal recipe for bakers of all levels. Whether it’s your first time in the kitchen or you’re a seasoned pro, you’ll find that this recipe delivers consistent results every time.
What Makes It Special
What distinguishes this Vegan Banana Bread from store-bought or restaurant versions is its homemade charm and wholesome ingredients. Here are a few unique qualities that elevate this recipe:
– No Animal Products: This bread is entirely free of dairy and eggs, making it suitable for vegans and those with lactose intolerance or egg allergies without sacrificing taste or texture.
– Natural Sweetness: The use of overripe bananas and applesauce means you can enjoy a naturally sweet treat without the need for excess sugar. This not only enhances the flavor but also lends a healthier profile to your snack.
– Moist and Flavorful: Thanks to the thoughtful combination of ingredients, this recipe yields a moist, tender crumb that rivals any traditional banana bread. Each bite is bursting with flavor and comfort.
– Customizable: This recipe serves as a fantastic base for creativity. You can easily add in nuts, chocolate chips, or even spices like cinnamon and nutmeg to give your banana bread a personal touch.
With each slice, you’re not just enjoying a delicious treat; you’re also indulging in a piece of nostalgia that connects you to the joys of baking and sharing with loved ones.
Ingredient Breakdown
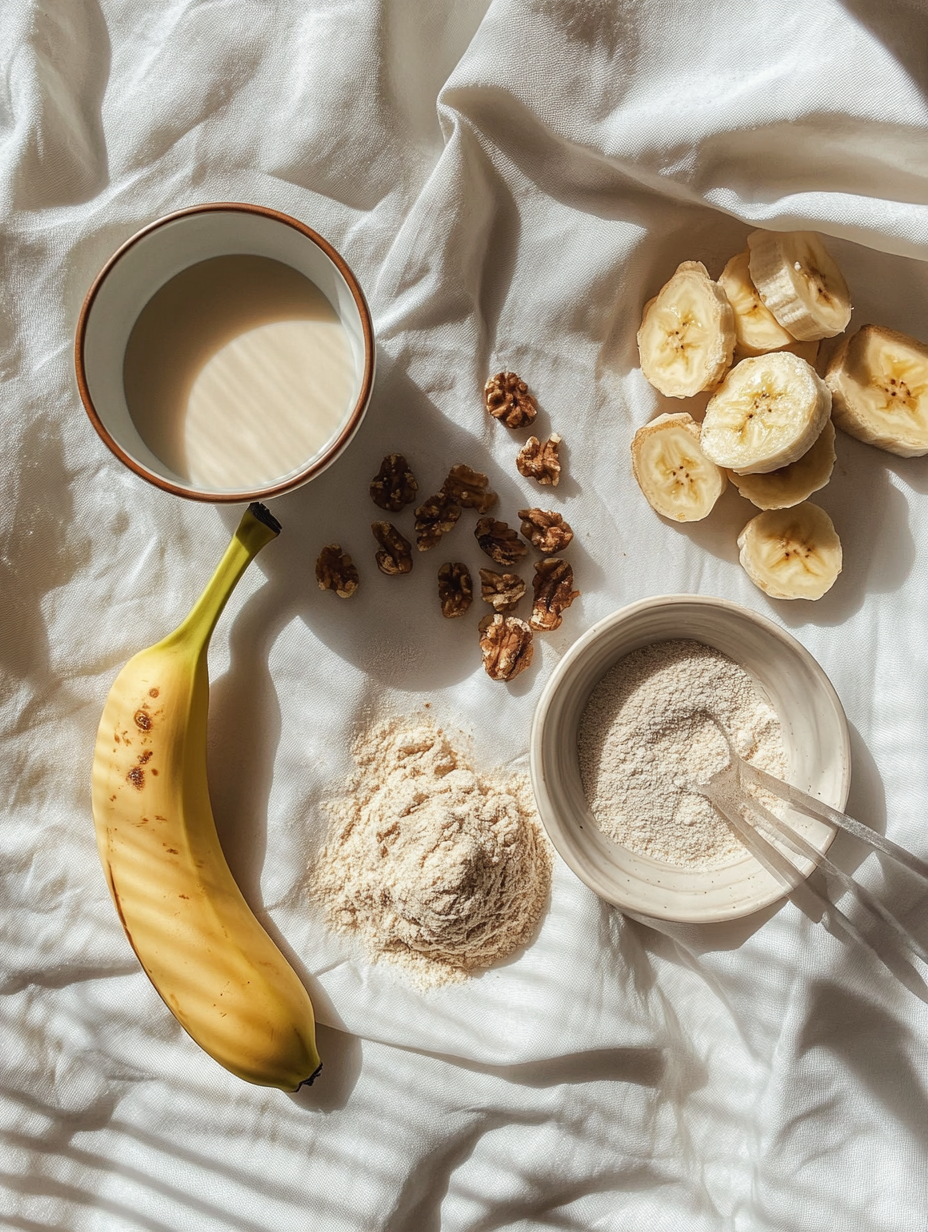
Creating the perfect Vegan Banana Bread starts with carefully selected ingredients, each playing a crucial role in the overall outcome of the recipe. Here’s a closer look at what makes each ingredient special, along with substitution suggestions for any dietary needs:
– Ripe Bananas: The star of the show! Ripe bananas not only provide sweetness but also moisture and flavor. Look for bananas that are heavily spotted or even brown; they’re at their peak for baking. If bananas aren’t available, you can try using mashed avocado for a similar texture, though the flavor will differ slightly.
– Granulated Sugar: This adds sweetness and helps with browning. If you’re looking for a lower glycemic index option, consider using coconut sugar or maple syrup; however, you may need to adjust the liquid ratios slightly when using liquids.
– All-Purpose Flour: This gives structure to the bread. For a gluten-free version, feel free to substitute with gluten-free all-purpose flour or almond flour, but keep in mind that the texture may change slightly.
– Unsweetened Applesauce: Acts as an egg replacement while adding moisture. If you’re avoiding apples, flaxseed meal mixed with water can serve as a binding agent. Mix 1 tablespoon of flaxseed meal with 2.5 tablespoons of water and let it sit until it thickens.
– Plant-Based Milk: This keeps the batter moist while enhancing the overall flavor. You can use almond milk, soy milk, oat milk, or any plant-based milk you prefer.
– Vanilla Extract: A touch of vanilla adds depth and a lovely aroma. You can substitute it with almond extract for a different flavor profile or simply omit it if you prefer a more straightforward taste.
– Baking Soda: The leavening agent that helps the bread rise. Ensure it’s fresh for the best results. If you’re out of baking soda, you can use baking powder—just remember to adjust the amount (use about three times the amount of baking powder).
– Salt: Enhances the overall flavor and balances the sweetness. If you’re watching your sodium intake, feel free to reduce the amount or use a salt substitute.
Understanding the role of each ingredient allows you to feel confident in your baking. With these alternatives and insights, you can create a Vegan Banana Bread that’s not only delicious but also tailored to your dietary needs.
Equipment Needed
To make your Vegan Banana Bread, you’ll need a few basic tools that are essential for a smooth baking experience:
– Loaf Pan: A standard 9×5 inch loaf pan is ideal for this recipe, ensuring even baking and a lovely shape. If you don’t have a loaf pan, you can use a square baking dish or even muffin tins for individual servings.
– Mixing Bowls: A large mixing bowl for combining your wet ingredients and a separate bowl for your dry ingredients are crucial. If you’re short on bowls, you can always mix everything in one bowl, just be careful not to overmix.
– Fork or Potato Masher: For mashing the bananas. A fork works perfectly for this task, but a potato masher can help speed up the process if you have one on hand.
– Spatula: To scrape down the sides of your bowl and to smooth the batter into the loaf pan. A silicone spatula is great for this, as it’s flexible and makes it easy to get every last bit of batter out.
– Oven Thermometer: Always a good idea for accurate baking! Ovens can often misread their temperature, which can lead to uneven baking. A simple oven thermometer ensures you’re baking at the right temperature.
– Cooling Rack: Once your banana bread is baked, letting it cool on a rack helps to prevent it from becoming soggy. If you don’t have one, you can set it on a plate or cutting board to cool.
With these tools in your kitchen arsenal, you’ll be well-prepared to whip up a delightful Vegan Banana Bread that echoes the warmth and comfort of your favorite childhood memories.
Step-by-Step Instructions
1. Preheat the Oven and Prepare the Pan
WHAT: Start by preheating your oven to 350°F (175°C) to ensure it’s at the right temperature for baking.
HOW: While the oven heats, grab your loaf pan and lightly grease it with oil or line it with parchment paper.
LOOK/SMELL/HEAR: You should hear a gentle whir from your oven as it warms up, and the smell of cooking oil or the buttery scent of parchment paper can fill the kitchen.
2. Mash the Bananas
WHAT: The bananas are the star of this bread, providing both moisture and natural sweetness.
HOW: Take your ripe bananas and place them in a large mixing bowl. Use a fork to mash them until they’re completely smooth—no lumps allowed!
LOOK/SMELL/HEAR: You should see a creamy mixture taking shape, and the sweet smell of ripe bananas will fill the air as you mash.
3. Combine Wet Ingredients
WHAT: Add the sugar and other wet ingredients to the mashed bananas to create a flavorful base for your bread.
HOW: Stir in the granulated sugar, unsweetened applesauce, plant-based milk, and vanilla extract. Mix until everything is well combined and smooth.
LOOK/SMELL/HEAR: The mixture should be glossy and cohesive; the sweet aroma of vanilla and bananas will be quite inviting.
4. Whisk Dry Ingredients
WHAT: It’s time to prepare the dry ingredients, which provide structure to your banana bread.
HOW: In a separate bowl, whisk together the all-purpose flour, baking soda, and salt until evenly mixed. This helps to distribute the leavening agent properly.
LOOK/SMELL/HEAR: You’ll notice a fine, fluffy texture in the flour mixture, and the salt’s slight crunch might be audible as you whisk.
5. Combine Wet and Dry Ingredients
WHAT: This step is crucial for achieving the perfect texture in your banana bread.
HOW: Gradually add the dry mixture to the wet ingredients, using a spatula or wooden spoon. Stir gently until just combined—don’t overmix!
LOOK/SMELL/HEAR: You should see streaks of flour disappearing as you mix; the batter will begin to thicken. Avoid overmixing to keep the bread light and fluffy.
6. Pour Batter into the Pan
WHAT: Now it’s time to get your batter ready for the oven.
HOW: Pour the batter into the prepared loaf pan, then use a spatula to smooth the top.
LOOK/SMELL/HEAR: The batter should look thick and glossy as you pour it in; the sound of it plopping into the pan is quite satisfying!
7. Bake the Bread
WHAT: Baking transforms your raw batter into a delicious loaf of banana bread.
HOW: Place the loaf pan in the center of your preheated oven. Bake for about 50 minutes. Check for doneness by inserting a toothpick in the center; it should come out clean.
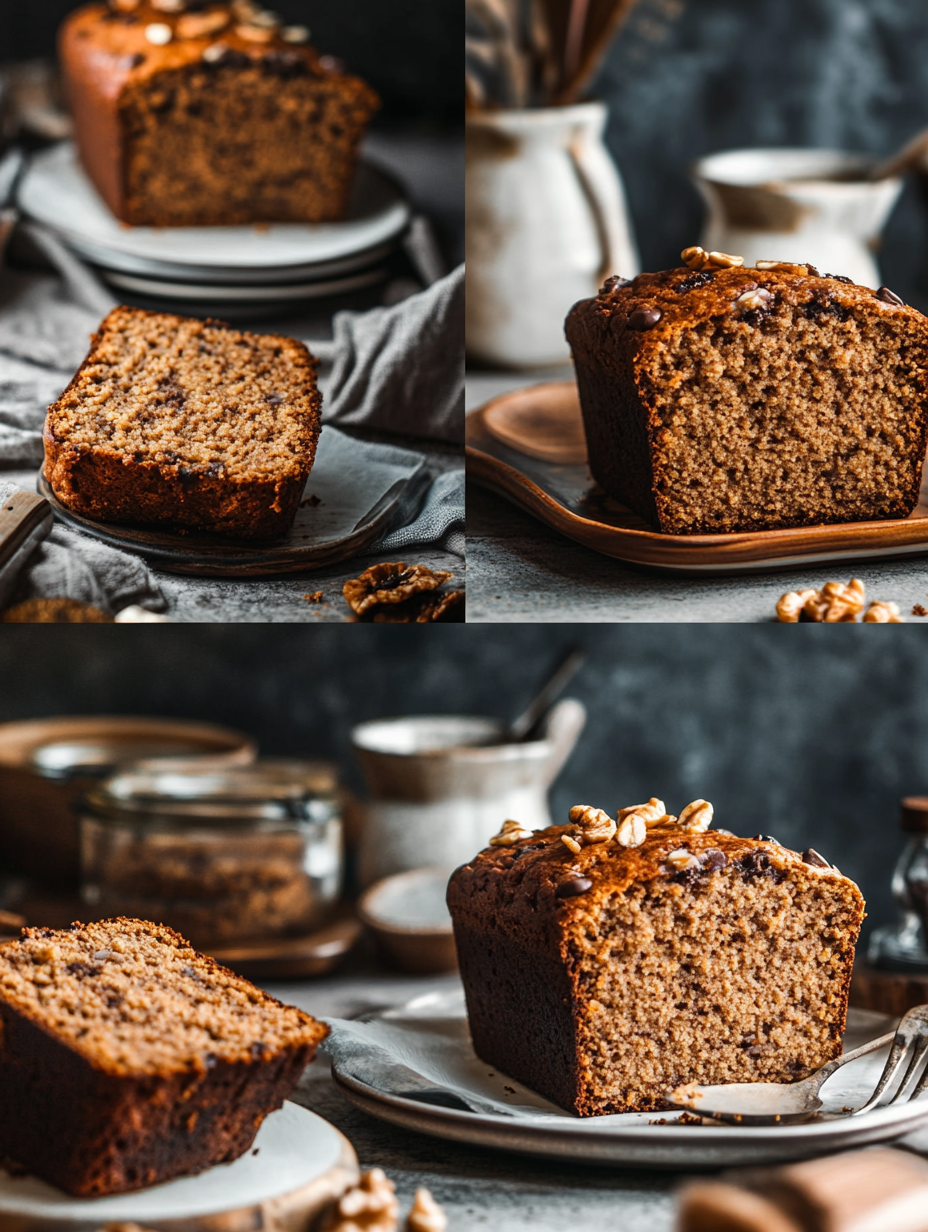
LOOK/SMELL/HEAR: You’ll see the bread rising beautifully and turning golden brown. The delightful aroma of baking bananas and sugar will fill your kitchen, making it hard to resist!
Chef’s Note: Remember to let your banana bread cool in the pan for about 10 minutes before transferring it to a wire rack. This helps prevent sogginess at the bottom.
Pro Tips for the Best Results
1. Use Overripe Bananas: The riper the bananas, the sweeter and more flavorful your bread will be. Look for bananas with brown spots, as they are packed with natural sweetness.
2. Don’t Skip the Salt: While it may seem small, salt enhances the flavors in your bread and balances the sweetness.
3. Mix Gently: Overmixing can lead to a dense loaf. Stir until just combined to keep your banana bread fluffy and light.
4. Test for Doneness: Every oven is different. Start checking your banana bread a few minutes before the suggested baking time to avoid overbaking.
5. Cool Properly: Allow the bread to cool in the pan for a few minutes before transferring it to a wire rack. This prevents it from becoming mushy on the bottom.
6. Add Extras: Feel free to fold in nuts, chocolate chips, or dried fruits into the batter for added texture and flavor. Just be sure to adjust the flour slightly if adding too many extras.
7. Store Correctly: To keep your banana bread moist, wrap it tightly in plastic wrap or store it in an airtight container. It can be refrigerated for a few days or frozen for longer storage.
Common Mistakes to Avoid
1. Using Green Bananas: If your bananas are not ripe enough, your banana bread will lack sweetness and moisture. Use fully ripe bananas with plenty of brown spots for the best results.
2. Overmixing the Batter: If you mix the batter too much, you’ll develop gluten and end up with a tough loaf instead of a tender one. Mix until just combined for a light texture.
3. Ignoring Oven Temperature: Not preheating your oven can lead to uneven baking. Always allow your oven to reach the right temperature before placing your loaf inside.
4. Skipping the Toothpick Test: Not testing for doneness can lead to undercooked or overcooked bread. Use a toothpick and check for crumbs—not wet batter—for perfect results.
5. Not Letting It Cool: Cutting into the bread while it’s still warm can cause it to crumble. Allow it to cool properly to set the structure.
6. Incorrect Measurement: Whether it’s flour or bananas, precise measurements are crucial. Use a kitchen scale for the most accurate results, especially with flour.
7. Using the Wrong Pan Size: Using a pan that’s too small or large can affect baking time and texture. Stick to the recommended size for best results.
Creative Variations
1. Seasonal Banana Bread: Use seasonal spices like pumpkin spice for fall, or add zest from oranges or lemons in the spring for a fresh twist. You can also incorporate seasonal fruits like apples or berries for added flavor.
2. Dietary-Friendly: For a gluten-free version, substitute the all-purpose flour with a 1:1 gluten-free flour blend. Additionally, ensure your plant-based milk is fortified for added nutrients.
3. Gourmet Elevated: Elevate your banana bread by adding gourmet ingredients like chopped dark chocolate, toasted walnuts, and a drizzle of maple syrup on top before baking. Consider adding a swirl of almond or peanut butter for an extra layer of flavor.
4. Quick 15-Minute Banana Bread: If you’re short on time, consider using a microwave-safe mug! Mix the ingredients directly in a microwave-safe mug and cook for about 1-2 minutes until set for a quick treat.
5. Kid-Friendly: Involve your kids in the baking process! Let them add chocolate chips, sprinkles, or their favorite nuts. You can also make mini muffins instead of a loaf—perfect portion sizes for little hands!
6. International Twist: Try adding spices like cinnamon and nutmeg for a chai-inspired version, or even incorporate matcha powder for a unique flavor. You can also experiment with tropical flavors by adding shredded coconut and pineapple for a Hawaiian twist.
7. Savory Banana Bread: For the adventurous, consider making a savory version by adding herbs like rosemary or thyme and incorporating sun-dried tomatoes or olives. This can make for an interesting addition to brunch or a snack!
Serving Ideas
When it comes to enjoying your delicious vegan banana bread, there are endless ways to serve it up! Here are a few plating ideas and garnishes that can elevate your experience:
1. Simple Slices: Serve thick slices of banana bread on a rustic wooden board. A light dusting of powdered sugar on top adds a lovely contrast and a hint of sweetness.
2. Toast It: Lightly toast slices and spread a thin layer of vegan butter or coconut oil. The warm, crispy edges will enhance the flavors and texture.
3. Nutty Topping: Top with a sprinkle of chopped walnuts or sliced almonds for a delightful crunch and added nutrition.
4. Fruit Garnish: Pair your banana bread with fresh fruit like berries or banana slices. This adds a refreshing element and beautiful color to your plate.
5. Chocolate Drizzle: For a decadent touch, drizzle a homemade vegan chocolate sauce over the top. It’s a perfect treat for special occasions or when you need a little indulgence.
Portion sizes can vary, but aim for about 1-inch thick slices for a perfect serving size that’s both satisfying and not overwhelming.
What to Serve With
Enjoying your vegan banana bread with complementary items can enhance the overall experience. Here are some pairings that work beautifully:
– Nut or Seed Butter: Spread almond or peanut butter on top for a protein boost. The creaminess pairs wonderfully with the moist texture of the bread.
– Plant-Based Yogurt: A dollop of coconut or almond yogurt on the side adds a tangy flavor that balances the sweetness of the banana bread.
– Herbal Tea: A warm cup of chamomile or mint tea complements the flavors and makes for a cozy snack or breakfast option.
– Freshly Squeezed Juice: Pairing with an orange or green juice will provide a refreshing contrast to the rich flavors of the bread.
– Oatmeal or Granola: Serve alongside a small bowl of oatmeal or granola for a wholesome breakfast combo. The added crunch and chewiness create a delightful texture contrast.
– Vegan Ice Cream: For a delightful dessert, serve warm banana bread with a scoop of your favorite vegan ice cream. The combination of warm and cold is simply irresistible!
Storage Guide
Storing your vegan banana bread correctly will ensure it stays fresh and delicious for days. Here’s how to do it:
– Container Type: Once cooled, wrap the banana bread tightly in plastic wrap or foil. Alternatively, place it in an airtight container to keep moisture locked in.
– Temperature: Store your banana bread at room temperature if you plan to eat it within a few days. For longer storage, consider refrigerating or freezing it.
– Days It Keeps: At room temperature, the banana bread will stay fresh for about 3-4 days. In the refrigerator, it can last up to a week, but keep in mind that refrigeration may alter the texture slightly.
– Signs Gone Bad: Watch for any signs of mold or an off smell. If you notice any discoloration or a sour scent, it’s best to discard it.
– How to Refresh: If your banana bread starts to dry out, you can refresh it by warming slices in the microwave for about 10-15 seconds. This will restore some of its original moisture.
Freezing Tips
Yes, your vegan banana bread freezes beautifully! Here are some tips for freezing and enjoying it later:
– Portioning: For easy thawing, it’s best to slice the banana bread into individual portions before freezing. This way, you can take out just what you need.
– How Long: Properly wrapped banana bread can be frozen for up to 3 months. Make sure to use freezer-safe wrap or bags to prevent freezer burn.
– Thawing Method: When you’re ready to enjoy your banana bread, simply transfer the slices to the refrigerator to thaw overnight. For a quicker option, you can microwave a slice for about 30 seconds or let it sit at room temperature for an hour.
Reheating Guide
If you love the taste of freshly baked banana bread, reheating it properly will bring back that warmth and comfort. Here’s how:
– Microwave: Place a slice of banana bread on a microwave-safe plate and heat for about 10-15 seconds. This method is quick and convenient.
– Oven: Preheat your oven to 350°F (175°C). Wrap the banana bread in aluminum foil and place it in the oven for about 10-15 minutes. This will help retain moisture and give you a freshly baked taste.
– Stovetop: If you prefer a more rustic method, heat a slice in a skillet over low heat for about 2-3 minutes on each side. This will create a lovely crisp outside while keeping the inside warm and soft.
Nutrition Overview
Each slice of your vegan banana bread is not just delicious; it also packs a nutritional punch. Here’s the breakdown:
– Calories: Approximately 220 calories per slice, making it a satisfying snack or breakfast option without the guilt.
– Macros Per Serving: Roughly 1g of protein, 0g of cholesterol, 42g of carbohydrates, and 8g of sugar.
– Health Benefits:
– Bananas: Rich in potassium, which is vital for heart health and maintaining blood pressure.
– Applesauce: A great substitute for oil or eggs that adds moisture while being lower in calories and fat.
– Whole Grains: Using a whole grain flour can increase fiber content, aiding digestion and promoting fullness.
Frequently Asked Questions
Q: Can I use frozen bananas for this recipe?
A: Absolutely! Frozen bananas are perfect for banana bread. Just thaw them before mashing and proceed with the recipe as normal.
Q: How can I make this recipe gluten-free?
A: You can substitute the all-purpose flour with a 1:1 gluten-free flour blend. Just make sure it contains xanthan gum for proper texture.
Q: Can I add nuts or chocolate chips?
A: Yes! Adding chopped walnuts, pecans, or vegan chocolate chips is a wonderful way to enhance the flavor and texture of your banana bread. Just fold them in gently before baking.
Q: How ripe should my bananas be?
A: The riper, the better! Look for bananas with lots of brown spots or even blackened peels. This indicates they are sweet and perfect for baking.
Q: What can I use instead of granulated sugar?
A: You can substitute granulated sugar with coconut sugar, agave syrup, or maple syrup. Adjust the quantity accordingly as some alternatives are sweeter than granulated sugar.
Q: Can I make mini loaves instead of one large loaf?
A: Yes, mini loaves are a great idea! Just reduce the baking time to about 30-35 minutes, checking frequently with a toothpick.
Q: Is there an alternative to applesauce?
A: You can use mashed silken tofu or a flax egg as a substitute for applesauce. This will help maintain moisture in the bread.
Q: How can I tell when the banana bread is done baking?
A: Insert a toothpick or skewer into the center; if it comes out clean or with just a few moist crumbs, your bread is done. If it has wet batter on it, give it a little more time.
Final Thoughts
Baking vegan banana bread is not just a treat; it’s an experience filled with warmth and delightful aromas wafting through your kitchen. A key tip for perfect banana bread is to use overripe bananas for maximum sweetness and moisture. Don’t hesitate to get creative by adding your favorite mix-ins like nuts or chocolate chips.
I genuinely hope you enjoy this wonderful recipe as much as I do! Whether it’s a cozy breakfast or a sweet afternoon snack, you and your loved ones will delight in every bite. Happy baking!