Follow Me On Pinterest!



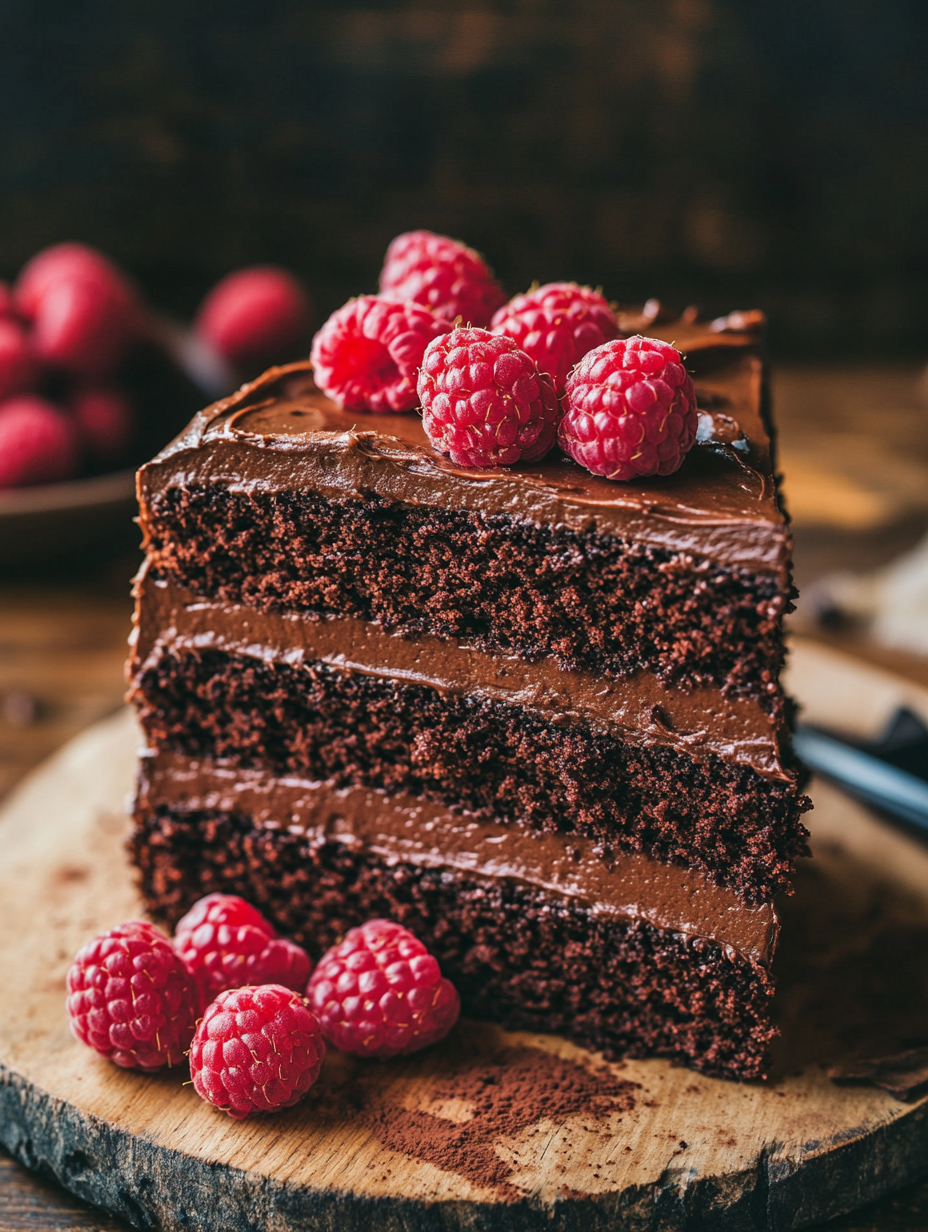
Vegan Chocolate Cake: Indulge Without Compromise
Introduction
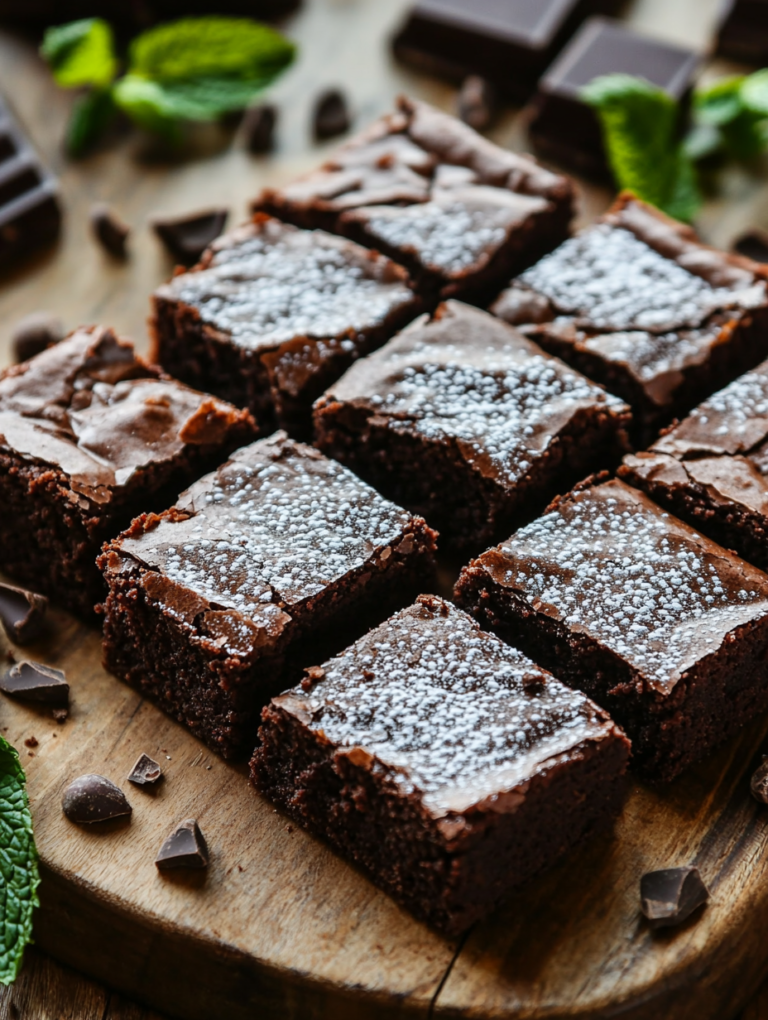
There’s something magical about the aroma of chocolate cake baking in the oven. It transports you back to simpler times—maybe to a birthday party where laughter filled the air, or to a cozy kitchen where the sweet scent mingled with warm hugs from loved ones. For me, it takes me back to my grandmother’s kitchen, where she would pull a chocolate cake out of the oven, its rich, dark color gleaming under the soft light. I can still picture her smiling face as she dusted the cake with powdered sugar, announcing, “This is a special treat, just for you.”
As I transitioned to a vegan lifestyle, it was important for me to recreate that nostalgic experience without using any animal products. This Vegan Chocolate Cake is my answer—a rich and moist delight that captures the essence of those childhood memories while being entirely plant-based. Each bite is a joy that offers not just sweetness but also the comfort of familiarity.
The beauty of this cake is in its simplicity. Using primarily pantry staples, it holds up beautifully whether you are celebrating a birthday, hosting a tea party, or simply indulging in a quiet moment with a cup of tea. I often find myself sneaking a slice straight from the pan, the moist texture and deep chocolate flavor making it impossible to resist. And the best part? You can enjoy it guilt-free, knowing that it aligns with your plant-based values.
So, put on your apron, and let’s embark on this delicious journey together!
Why This Recipe Works
This Vegan Chocolate Cake is not just any cake; it’s a celebration of flavor and texture crafted through thoughtful substitutions and techniques. At the heart of this recipe is the combination of plant-based milk and apple cider vinegar. When mixed, they create a dairy-free buttermilk that enhances the cake’s moisture and tenderness—a trick often overlooked in vegan baking.
The star of the show, of course, is the unsweetened cocoa powder. This ingredient not only brings the rich chocolate flavor that we all crave, but it also contributes to the cake’s deep color and velvety texture. Coupled with baking soda, which acts as a leavening agent, the cake rises beautifully, creating a light crumb that’s far from dense.
In addition, the use of vegetable oil instead of butter ensures that the cake remains moist and luscious. This fat content is crucial; it keeps the cake from drying out during baking, resulting in a slice that melts in your mouth.
What makes this recipe truly reliable is its simplicity and the way it embraces the science of baking. Each ingredient plays a pivotal role, ensuring that you achieve the perfect balance of flavor, texture, and moisture. With this cake, you won’t just enjoy a treat; you’ll also gain confidence in your ability to bake delicious vegan desserts that can stand up to any traditional recipe.
What Makes It Special
This Vegan Chocolate Cake stands out for several reasons, making it a stellar choice for your next gathering or a cozy night in:
– Allergen-Friendly: Unlike many traditional cakes, this recipe is free from animal products and can easily be adapted to be nut-free or gluten-free. Simply swap out the all-purpose flour for a gluten-free blend, and you’re good to go!
– Simple Ingredients: You won’t need to scour specialty stores for obscure ingredients. Everything you need is likely already in your pantry, making it a practical choice for any time of the year.
– Intense Chocolate Flavor: The combination of cocoa powder and sugar creates a deep, rich chocolate flavor that rivals any dairy-laden version. You won’t miss the eggs or butter; trust me!
– Versatility: This cake is a blank canvas. Dress it up with a vegan frosting, serve it plain, or pair it with fresh fruit and a dollop of whipped coconut cream. The options are endless, making it suitable for birthdays, holidays, or just an ordinary Tuesday when you need a little indulgence.
These qualities not only make this cake a delightful treat but also a testament to how delicious and satisfying vegan baking can be.
Ingredient Breakdown
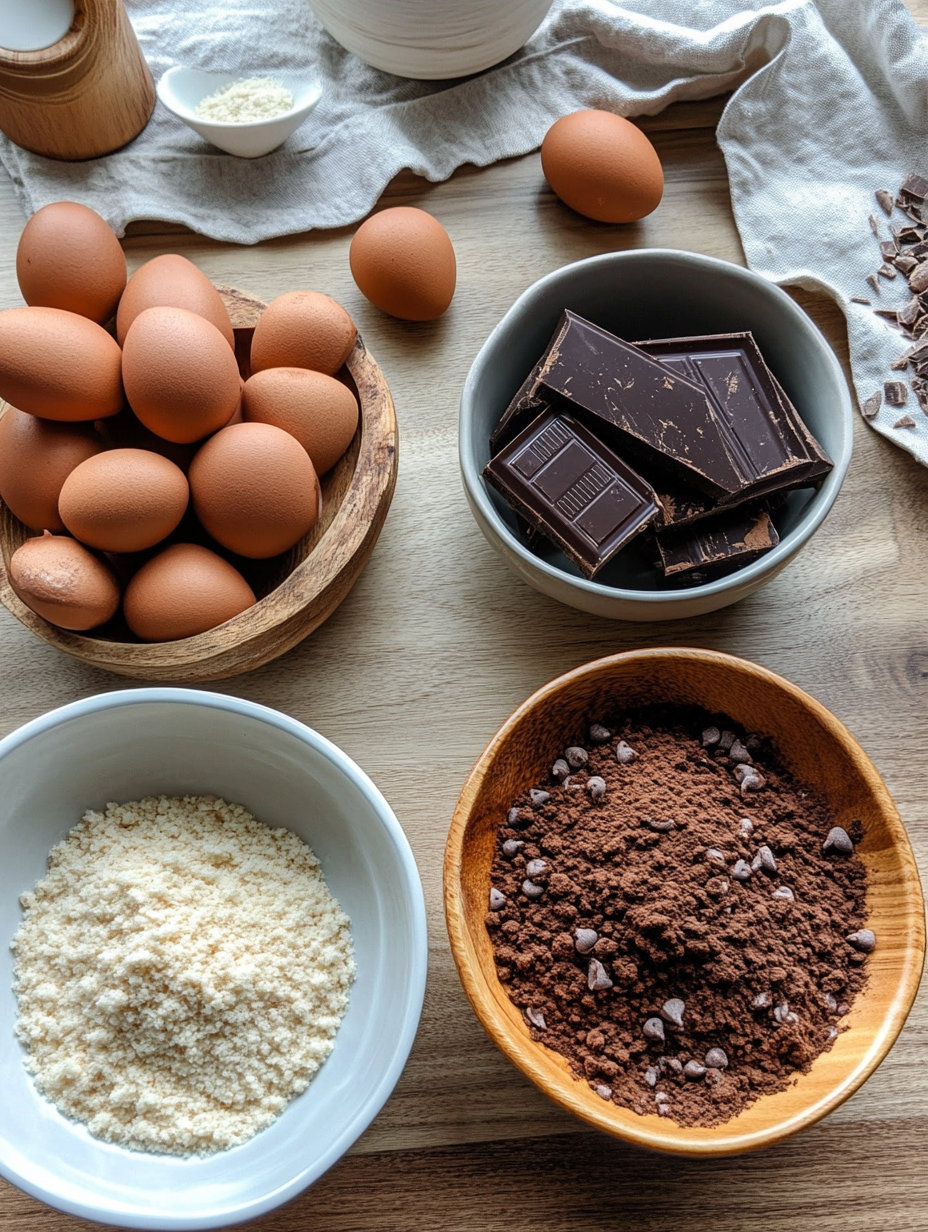
– All-Purpose Flour (1.5 cups): This is the backbone of your cake, providing structure and texture. You can substitute it with a gluten-free blend if needed, but be sure to check for one that contains xanthan gum to help mimic the elasticity of gluten.
– Granulated Sugar (1 cup): Sugar adds sweetness and helps with the cake’s moisture. For a healthier alternative, consider using coconut sugar or a sugar substitute like agave nectar, though it may require adjustments in liquid ratios.
– Unsweetened Cocoa Powder (0.5 cup): This ingredient is what gives the cake its rich chocolate flavor. Opt for high-quality cocoa for the best taste. If you want a deeper flavor, try using dark cocoa powder.
– Baking Soda (1 teaspoon): A leavening agent that helps the cake rise. Make sure it’s fresh; old baking soda can lead to a dense cake.
– Salt (0.5 teaspoon): A small but mighty ingredient that enhances the sweetness and balances the flavors. Always include it, even in sweet recipes!
– Plant-Based Milk (1 cup): This replaces dairy milk and adds moisture. You can use almond, soy, oat, or coconut milk, depending on your preference and dietary needs.
– Vegetable Oil (0.5 cup): This provides the fat content necessary for a moist cake. You can substitute it with melted coconut oil or applesauce for a lower-fat version.
– Apple Cider Vinegar (1 tablespoon): This ingredient is critical for achieving a fluffy texture. It reacts with the baking soda to create bubbles, which helps the cake rise. If you’re out of vinegar, white vinegar will work as a substitute.
– Vanilla Extract (1 teaspoon): Adds warmth and depth to the flavor profile. For an interesting twist, you can experiment with almond extract or even a hint of espresso powder to amplify the chocolate flavor.
Understanding the role of each ingredient not only empowers you to make the cake but also gives you the flexibility to experiment and customize it to your liking. Happy baking!
Equipment Needed
Creating the perfect Vegan Chocolate Cake doesn’t require fancy equipment, but having the right tools will make your baking experience smoother and more enjoyable. Here’s what you’ll need:
– 8-Inch Round Cake Pan: This pan will give your cake the perfect shape. If you don’t have one, an 8×8 square baking dish will work just as well.
– Mixing Bowls: A set of mixing bowls in various sizes is essential for combining your dry and wet ingredients. Opt for glass or stainless steel for easy cleaning and durability.
– Whisk: A whisk is great for mixing your wet ingredients and ensuring everything is combined well. If you don’t have a whisk, a fork or a spoon will suffice.
– Spatula: This handy tool is perfect for scraping the batter into the pan and smoothing the top. A silicone spatula works best as it’s flexible and won’t scratch your non-stick surfaces.
– Measuring Cups and Spoons: Accurate measuring is key in baking. Invest in a good set to ensure your ingredients are precise; this is especially important when it comes to flour and sugar.
– Oven Thermometer: Your oven might not be as accurate as you think. An oven thermometer ensures that it’s at the right temperature, which is crucial for baking success.
– Cooling Rack: Once your cake is out of the oven, a cooling rack allows it to cool evenly and prevents it from becoming soggy. If you don’t have one, you can improvise with a plate or cutting board.
Having these tools on hand will not only make your baking process easier but will also help you achieve the best results. Enjoy the experience, and let your kitchen fill with the delightful aroma of baking chocolate!
Step-by-Step Instructions
1. Preheat the Oven
WHAT: Start by preheating your oven to 350°F (175°C).
HOW: This ensures that your cake bakes evenly and rises properly.
WHAT TO LOOK/SMELL/HEAR: The oven should sound a soft hum as it heats up. Once preheated, you’ll know it’s ready when you can feel the warmth radiating from the oven door.
2. Prepare the Cake Pan
WHAT: Grease an 8-inch round cake pan to prevent sticking.
HOW: Use a paper towel or a pastry brush to apply a thin layer of vegetable oil or vegan butter to the bottom and sides of the pan.
WHAT TO LOOK/SMELL/HEAR: The pan should feel slick to the touch; if you hear a slight squelching sound as you spread the oil, you’ve applied enough.
3. Combine Dry Ingredients
WHAT: In a large mixing bowl, combine the dry ingredients.
HOW: Sift together 1.5 cups of all-purpose flour, 1 cup of granulated sugar, 0.5 cup of unsweetened cocoa powder, 1 teaspoon of baking soda, and 0.5 teaspoon of salt. Sifting helps aerate the flour and cocoa, giving your cake a lighter texture.
WHAT TO LOOK/SMELL/HEAR: You’ll notice a rich, chocolatey aroma as you mix the dry ingredients, indicating that the cocoa is well incorporated.
4. Mix Wet Ingredients
WHAT: In a separate bowl, whisk the wet ingredients together.
HOW: Combine 1 cup of plant-based milk, 0.5 cup of vegetable oil, 1 tablespoon of apple cider vinegar, and 1 teaspoon of vanilla extract until well-blended.
WHAT TO LOOK/SMELL/HEAR: Look for a creamy consistency; you might hear a gentle whisking sound as you blend, and the sweet scent of vanilla will start to fill the air.
5. Combine Wet and Dry Ingredients
WHAT: Pour the wet mixture into the dry ingredients.
HOW: Use a spatula to fold the mixtures together gently until just combined; don’t overmix to keep the cake fluffy.
WHAT TO LOOK/SMELL/HEAR: The batter should be thick and glossy with a deep chocolate scent wafting up. As you mix, you may hear a soft squishing sound when the batter comes together.
6. Bake the Cake
WHAT: Transfer the batter into the prepared cake pan.
HOW: Pour the batter in, then smooth the top with a spatula to ensure even cooking.
WHAT TO LOOK/SMELL/HEAR: Place the pan in the oven, and listen for the oven door closing. Set a timer for about 20 minutes. You’ll know it’s done when a toothpick inserted into the center comes out clean, and your kitchen is filled with the intoxicating aroma of baking chocolate.
7. Cool Before Serving
WHAT: Once baked, remove the cake from the oven and let it cool in the pan for a few minutes before inverting it onto a wire rack.
HOW: Gently run a knife around the edges of the pan to loosen the cake, then turn it upside down on the wire rack.
WHAT TO LOOK/SMELL/HEAR: The cake should come out smoothly, and you’ll hear a gentle thud as it lands on the rack. Allow it to cool completely before frosting or serving.
Chef’s Note: Make sure to monitor your cake closely in the last few minutes of baking. Every oven is different, and you want to avoid overbaking, which can lead to a dry cake.
Pro Tips for the Best Results
1. Sift Your Cocoa Powder: Cocoa powder tends to clump. Sifting it ensures a smooth batter and prevents any bitter bits from forming in your cake.
2. Room Temperature Ingredients: Using room temperature ingredients, especially your plant-based milk, helps the batter mix more uniformly and results in an even bake.
3. Don’t Overmix: Overmixing can lead to a dense cake. Mix just until the dry ingredients are incorporated, and you’ll have a light and fluffy texture.
4. Add a Pinch of Espresso Powder: For a richer chocolate flavor, consider adding a tiny pinch of espresso powder to the dry ingredients. It enhances the chocolate without leaving a coffee taste.
5. Check for Doneness: Besides the toothpick test, gently press the surface of the cake with your finger; if it springs back, it’s done.
6. Cool Completely: Allow the cake to cool completely before frosting; this prevents the frosting from melting and sliding off, plus it makes for a prettier presentation.
7. Experiment with Different Plant-Based Milks: While almond milk works beautifully, don’t hesitate to try oat or soy milk for varied flavors and textures.
8. Use Quality Ingredients: Opt for high-quality cocoa powder and vanilla extract. They significantly elevate the overall flavor of your cake.
Common Mistakes to Avoid
1. Using Cold Ingredients: Starting with cold ingredients can lead to poor mixing and a dense cake. Always bring your plant-based milk and other ingredients to room temperature.
2. Skipping the Sifting: Not sifting the flour and cocoa powder can result in clumps, which may cause uneven baking and texture issues.
3. Overbaking: Leaving the cake in too long will dry it out. Always start checking for doneness a minute or two before the suggested time.
4. Not Greasing the Pan Properly: Skipping this step can lead to a cake that sticks to the pan, making it almost impossible to remove without breaking.
5. Ignoring the Cooling Time: Cutting into the cake while it’s still warm can result in a crumbly texture. Let it cool completely on a wire rack to set properly.
6. Using Old Ingredients: Check expiration dates on your baking soda and cocoa powder. Old ingredients can lead to poor rising and flavor.
7. Not Tasting the Batter: Sampling the batter before baking is a good way to adjust flavors. If it’s too sweet or lacks depth, you can tweak it before it’s too late.
Creative Variations
1. Seasonal: For a fall twist, add 1 teaspoon of pumpkin spice to the dry ingredients. Top with a maple glaze for a seasonal flair.
2. Dietary-Friendly: Make this cake gluten-free by substituting the all-purpose flour with a gluten-free flour blend. Ensure the blend has xanthan gum for structure.
3. Gourmet Elevated: Incorporate 1/2 cup of dairy-free dark chocolate chips into the batter for a rich, melty surprise. Top with a ganache made from coconut cream and dark chocolate.
4. Quick 15-Minute: For a fast treat, make mug cakes in the microwave. Combine ingredients in a large mug and microwave for 1-2 minutes, adjusting time based on your microwave wattage.
5. Kid-Friendly: Add 1/2 cup of mashed bananas or applesauce for added moisture and natural sweetness. Decorate with colorful vegan sprinkles for extra fun!
6. International Twist: Infuse the cake with 1/2 teaspoon of cardamom and top it with a coconut whipped cream for an Indian-inspired dessert that surprises the palate.
7. Coffee Lovers: Add 1 tablespoon of brewed coffee to the wet ingredients for a mocha flavor that enhances the chocolate and offers a delightful caffeine kick.
By experimenting with these variations, you can create a unique version of this vegan chocolate cake that suits any occasion or dietary need!
Serving Ideas
When it comes to serving your vegan chocolate cake, presentation is key! Here are some delightful ideas to elevate your dessert experience:
1. Dust with Powdered Sugar: A light dusting of powdered sugar on top of the cake adds a lovely touch of sweetness and visual appeal. You can also use a stencil for fun patterns!
2. Fresh Berries: Serve slices of cake with a side of fresh berries, such as raspberries or strawberries. Their natural tartness complements the richness of the chocolate perfectly.
3. Coconut Whipped Cream: For a luxurious finish, top your cake with coconut whipped cream. This vegan alternative is light and airy, providing a creamy contrast to the dense cake.
4. Chocolate Ganache: Drizzle warm, vegan chocolate ganache over each slice. The glossy finish adds a professional touch and an extra dose of chocolatey goodness.
5. Portion Sizes: Keep the servings moderate; a 2-inch by 2-inch piece is typically satisfying. This allows your guests to enjoy their dessert without feeling overwhelmed.
These simple yet elegant serving ideas will impress your guests and make your vegan chocolate cake the star of any occasion!
What to Serve With
Pairing your delicious vegan chocolate cake with the right accompaniments can elevate the overall experience. Here are a few suggestions:
1. Coffee: The bitterness of a well-brewed coffee balances the sweetness of the cake, creating a perfect harmony of flavors.
2. Vegan Ice Cream: Whether it’s chocolate, vanilla, or even a fruity sorbet, vegan ice cream adds a cool contrast to the warm cake, making it an irresistible combo.
3. Nut Milk: A glass of almond or oat milk is not only a great non-dairy beverage choice, but it also complements the chocolate notes beautifully.
4. Fruit Compote: A warm or chilled fruit compote made from berries or stone fruits adds a burst of freshness, cutting through the richness of the cake.
5. Tea: Herbal or chai tea can provide a soothing accompaniment. The spices in chai can enhance the chocolate flavor while offering a relaxing vibe.
6. Nuts: A handful of roasted nuts (like walnuts or hazelnuts) on the side adds a crunchy texture that contrasts nicely with the moist cake.
These pairings will not only enhance the taste but also create a delightful experience for your palate.
Storage Guide
To ensure your vegan chocolate cake stays fresh and delicious, proper storage is essential. Here’s how to do it:
– Container Type: Store the cake in an airtight container to prevent it from drying out. If you don’t have a container, you can wrap it tightly in aluminum foil or plastic wrap.
– Temperature: Keep your cake at room temperature for short-term storage, but if you plan to keep it for more than a couple of days, refrigerate it.
– Days it Keeps: Your cake can last up to 3-5 days in the fridge. If left at room temperature, it should be consumed within 2-3 days for optimal freshness.
– Signs Gone Bad: Check for any unusual odor or mold. If the texture becomes excessively dry or hard, it’s time to toss it.
– How to Refresh: If your cake feels a little stale, you can warm it in the microwave for about 10-15 seconds to bring back its moistness, or serve it with a dollop of coconut whipped cream to add moisture.
By following these storage guidelines, you can ensure your cake remains delectable for days to come!
Freezing Tips
If you want to save your vegan chocolate cake for later, freezing is a fantastic option! Here’s how to do it:
– Freezing Well: This cake freezes beautifully, maintaining its taste and texture when done correctly.
– Portioning: Slice the cake into individual portions before freezing. This way, you can easily thaw just what you need later without defrosting the entire cake.
– How Long: Properly wrapped, your cake can be frozen for up to 3 months. Just make sure to use freezer-safe wrap or containers.
– Thawing Method: To thaw, simply remove the desired portion from the freezer and place it in the refrigerator overnight. If you’re in a hurry, you can leave it at room temperature for a couple of hours until soft.
With these freezing tips, you’ll always have a slice of vegan chocolate cake ready to enjoy!
Reheating Guide
If you’ve stored your vegan chocolate cake and want to enjoy it warm, here’s how to reheat it using different methods:
– Microwave: Place a slice on a microwave-safe plate and heat for about 10-15 seconds. Check to avoid overheating, which could dry it out.
– Oven: Preheat your oven to 350°F (175°C). Wrap the cake in aluminum foil to retain moisture, and heat for about 10-15 minutes. This method warms the cake without losing its texture.
– Stovetop: For a unique approach, you can use a skillet. Place the slice in a non-stick skillet over low heat, cover it with a lid, and warm for about 5 minutes. This method helps maintain a soft texture.
These reheating methods will ensure your cake is just as delightful as the day you made it!
Nutrition Overview
Enjoying a slice of vegan chocolate cake doesn’t mean you have to compromise on nutrition! Here’s a brief overview:
– Calories: Each serving contains approximately 250-300 calories, depending on your specific ingredients.
– Macros: You can expect around 8-10g of fat, 45-50g of carbohydrates, and 3-4g of protein per serving.
– Health Benefits: Ingredients like cocoa powder are rich in antioxidants, which can help reduce inflammation and improve heart health. Using plant-based milk also provides calcium and vitamin D, supporting bone health, while the apple cider vinegar may aid digestion.
These details remind you that your indulgence can still be part of a balanced diet!
Frequently Asked Questions
Q: Can I substitute the all-purpose flour with gluten-free flour?
A: Yes, you can use a 1:1 gluten-free flour blend in place of all-purpose flour. Just ensure it’s a blend that includes xanthan gum for binding.
Q: How can I make this cake even more chocolatey?
A: You can increase the cocoa powder to 3/4 cup instead of 1/2 cup, or add vegan chocolate chips to the batter for an extra chocolate kick.
Q: What can I use instead of apple cider vinegar?
A: White vinegar or lemon juice can be excellent substitutes for apple cider vinegar, as they both provide the necessary acidity for the cake to rise.
Q: Can I make this cake in advance for an event?
A: Absolutely! You can bake the cake a day or two in advance and store it in the fridge. Just make sure to keep it covered to maintain freshness.
Q: How do I know when the cake is done baking?
A: The cake is done when a toothpick inserted into the center comes out clean or with a few moist crumbs. If it comes out wet with batter, it needs more time.
Q: Can I add nuts or other mix-ins to the cake batter?
A: Yes, feel free to fold in walnuts or pecans into the batter before baking. Just keep in mind that this may alter the texture slightly.
Q: Is this cake suitable for kids?
A: Yes, this cake is kid-friendly and can be a great way to introduce them to vegan desserts without any compromise on taste.
Q: How can I make this cake less sweet?
A: You can reduce the sugar to 3/4 cup or even use a sugar alternative like maple syrup or coconut sugar. Just keep in mind that it might alter the texture slightly.
Final Thoughts
As you embark on your vegan baking journey, remember that this vegan chocolate cake is not just a delightful treat; it’s a testament to how delicious plant-based desserts can be! Here are a couple of key tips: always measure your ingredients carefully for the perfect texture, and don’t hesitate to experiment with flavors or toppings that excite you.
Your enthusiasm for baking will shine through in your creations, and sharing this cake with friends and family will surely bring smiles all around. So, gather your ingredients, preheat that oven, and enjoy every delicious moment of baking! Happy baking!